

Have you ever wondered how to create something magical with just a sheet of paper?
Origami tea pot folding transforms ordinary paper into extraordinary art.
This ancient craft brings joy while teaching patience and precision—perfect for crafty afternoons.
What is an Origami Teapot?
When I first discovered how to make a tea pot origami, I was absolutely fascinated by its elegant design and practical appearance. An origami teapot is a paper representation of a traditional teapot, complete with a body, spout, and handle—all created through strategic folding techniques without any cutting or gluing.
What makes this project so special is that it captures the essence of a functional object using only geometric folds. The finished piece makes a wonderful decoration, gift, or even a creative way to present a tea bag to a friend or loved one.
I’ve found that creating an origami teapot also offers a wonderful meditative experience. The precision required for each fold helps clear the mind and focus on the present moment—something we could all use more of in our busy lives!
Materials Needed
Before we begin our journey into creating a simple tea pot step by step, let’s gather all the necessary materials:
| Material | Specification | Purpose | Optional/Required |
|---|---|---|---|
| Paper | 15″ × 15″ square | Base material | Required |
| Colored paper | Various colors | Aesthetic appeal | Optional |
| Origami paper | Pre-cut squares | Easier folding | Optional |
| Flat surface | Clean desk or table | Workspace | Required |
| Bone folder | Plastic or actual bone | Crisp folds | Optional |
| Ruler | Straight edge | Guide for folds | Optional |
| Patience | Abundant | Success factor | Required |
I always recommend beginning with a larger piece of paper when trying an origami project for the first time. The 15″ × 15″ size specified above is perfect because it gives you plenty of room to make precise folds and see the details clearly.
Step-by-Step Origami Teapot Instructions
Now, let’s dive into the actual origami tea pot instructions. I’ll follow the exact steps provided:
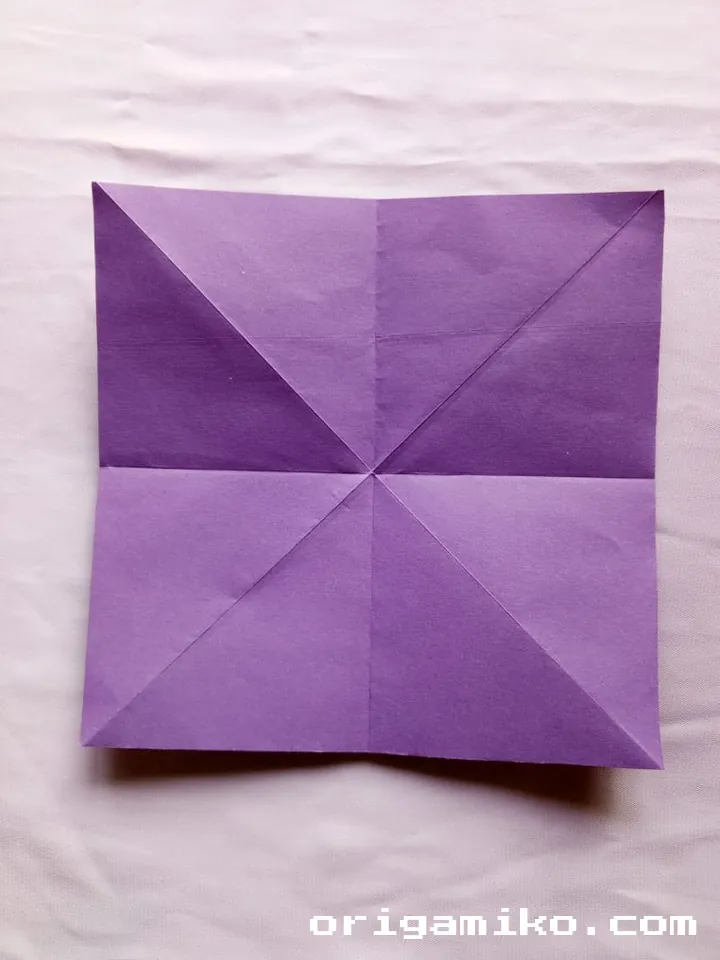
Step 1
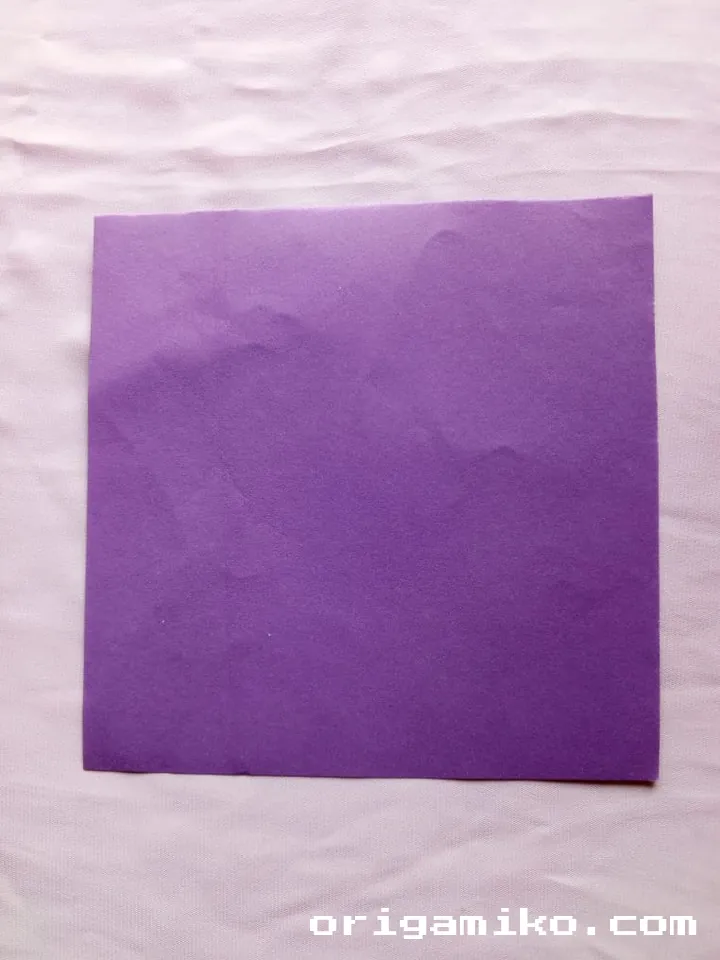
Take a square shape paper. I recommend using the specified 15″ × 15″ size for the best results. Make sure the paper is placed flat on your working surface.
Step 2
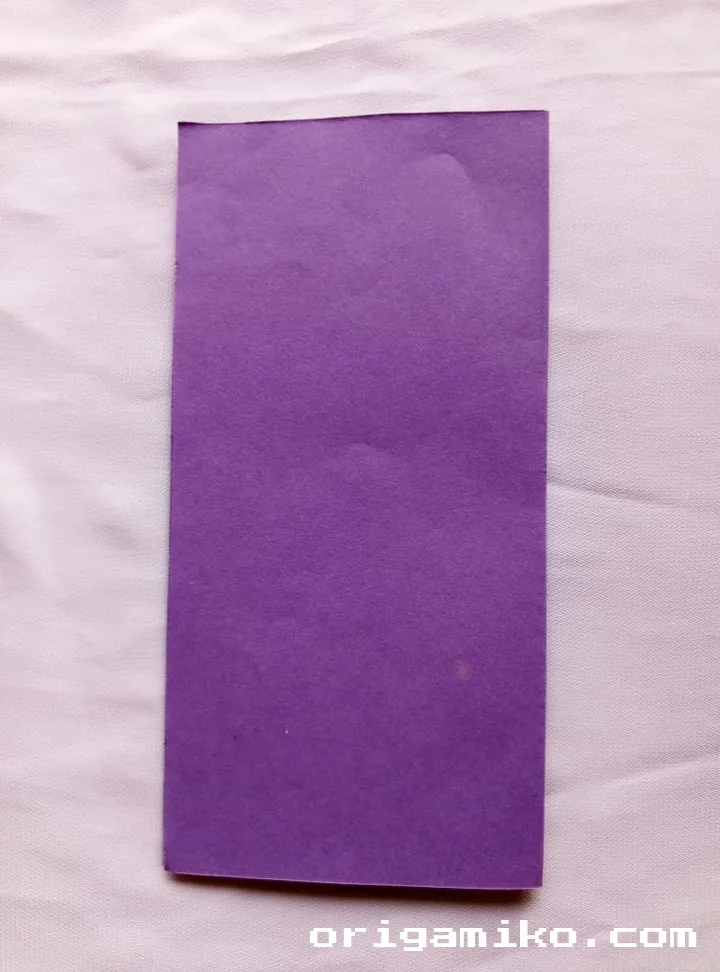
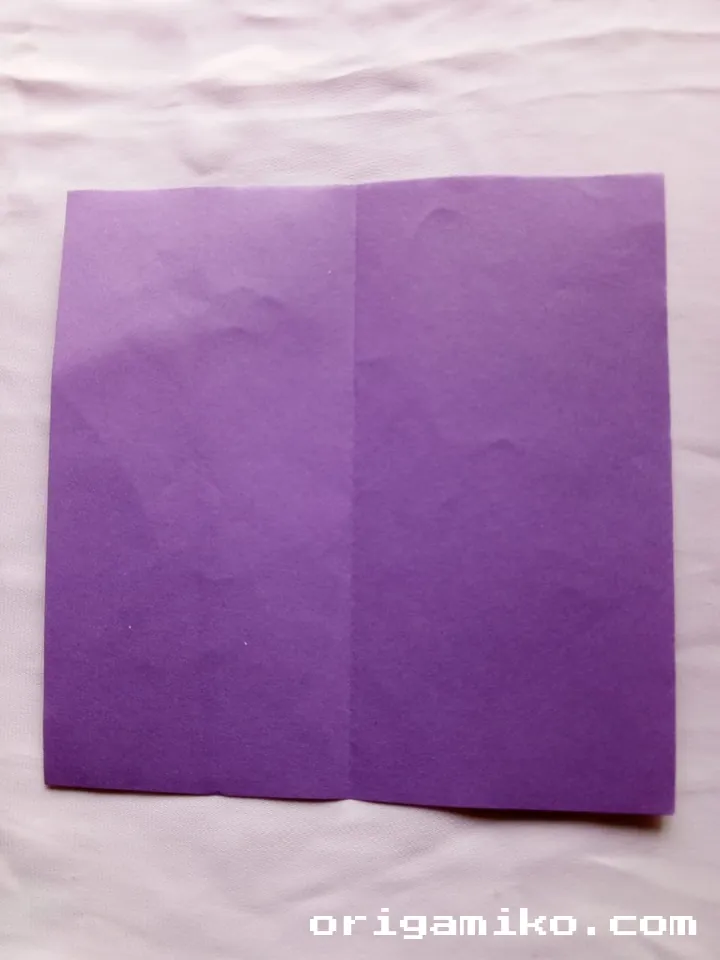
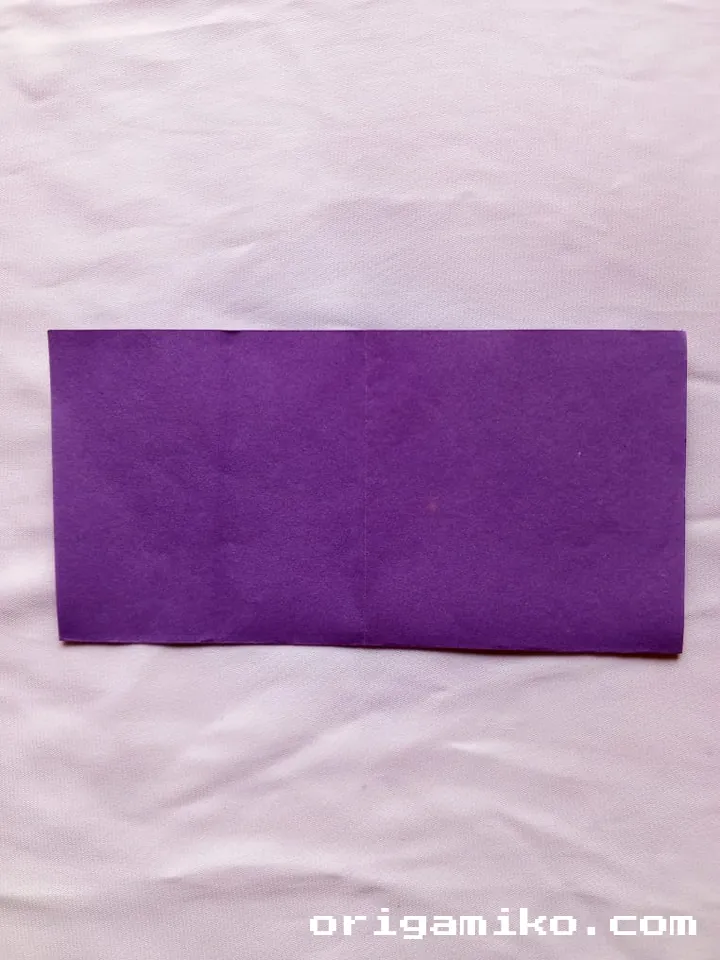
Fold it vertically and unfold, fold it horizontally and unfold. This creates important crease lines that will guide your later folds. Make sure these creases are sharp and well-defined.
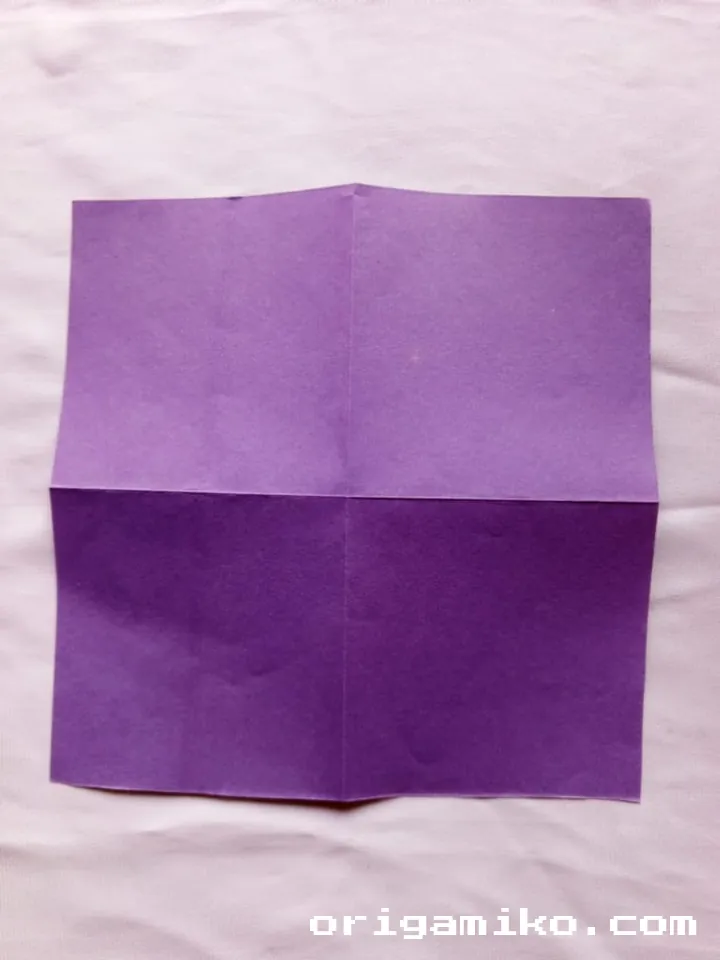
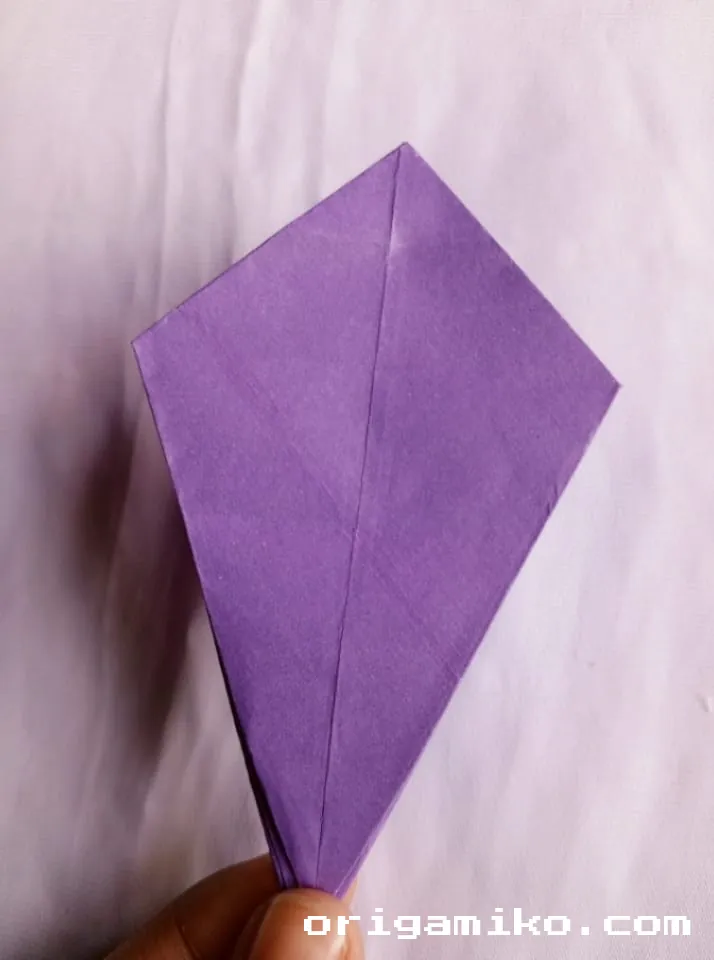
Step 3
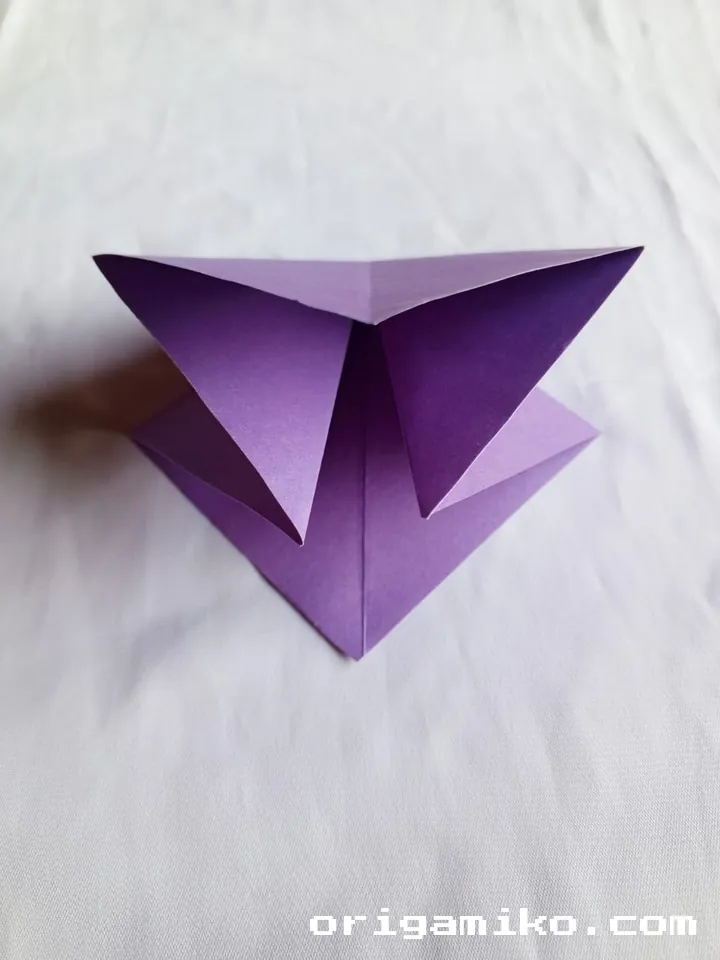
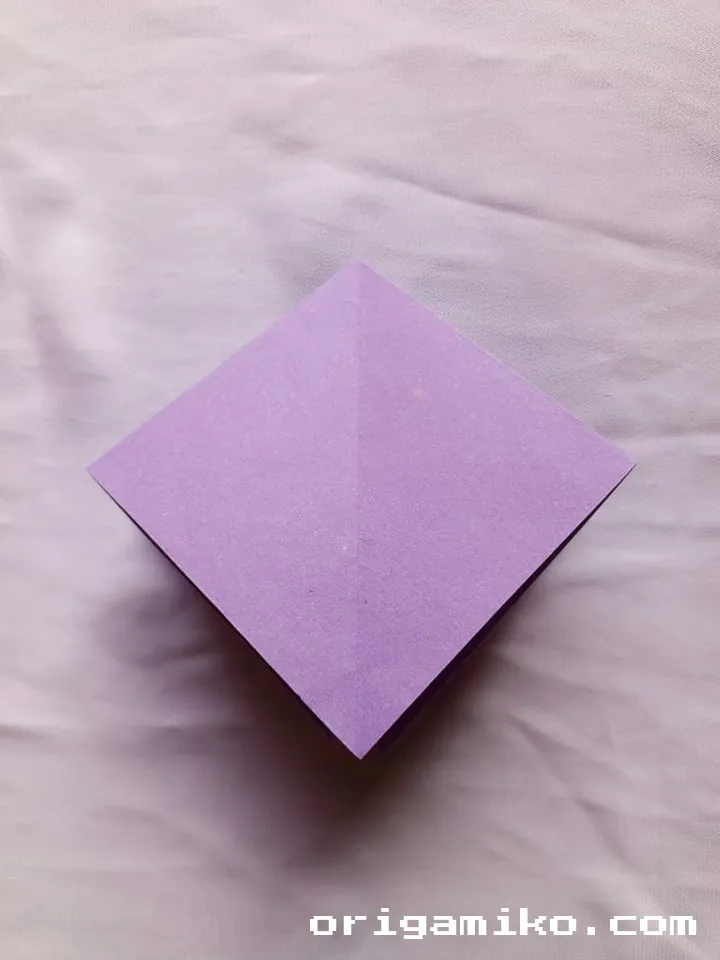
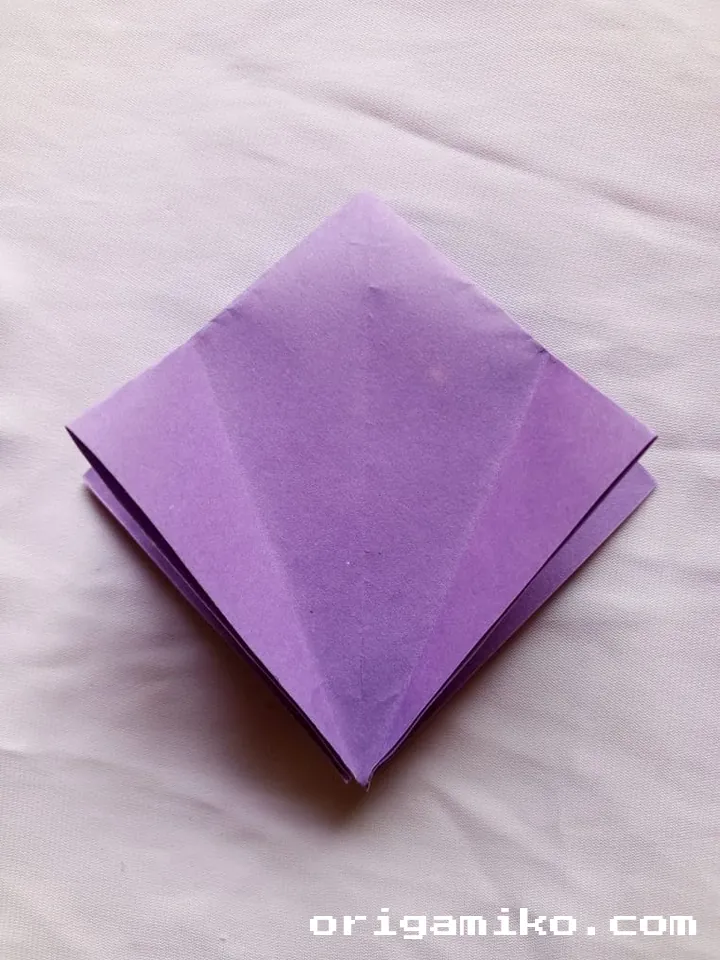
Fold and unfold the corners. Fold the two sides of the paper inside and fold the two sides and unfold the same way and fold the other side. This step begins to establish the three-dimensional structure of your teapot.
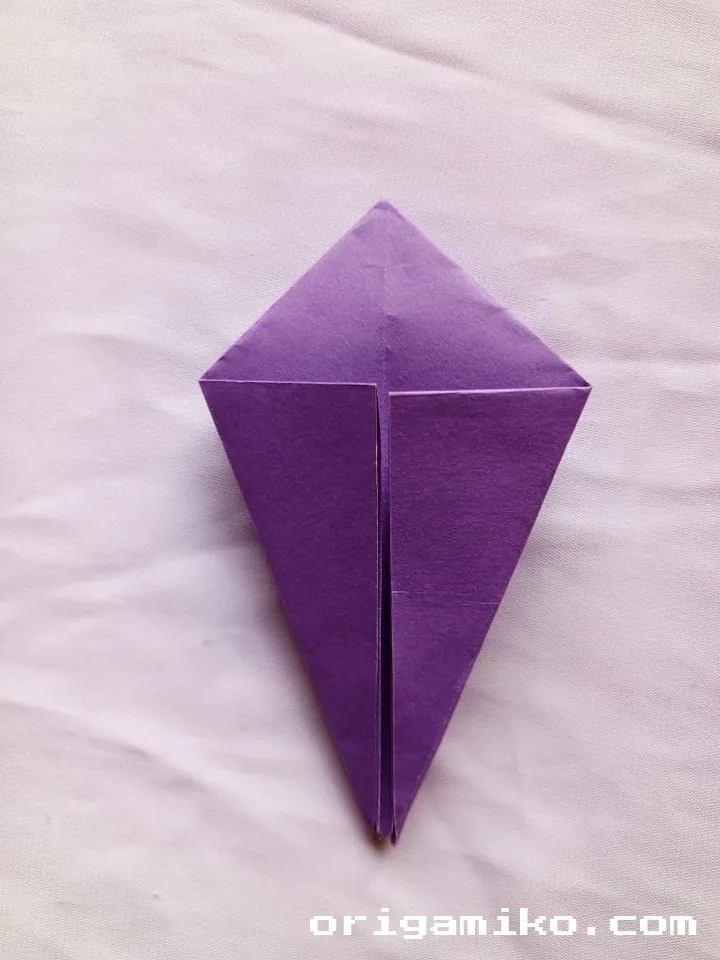
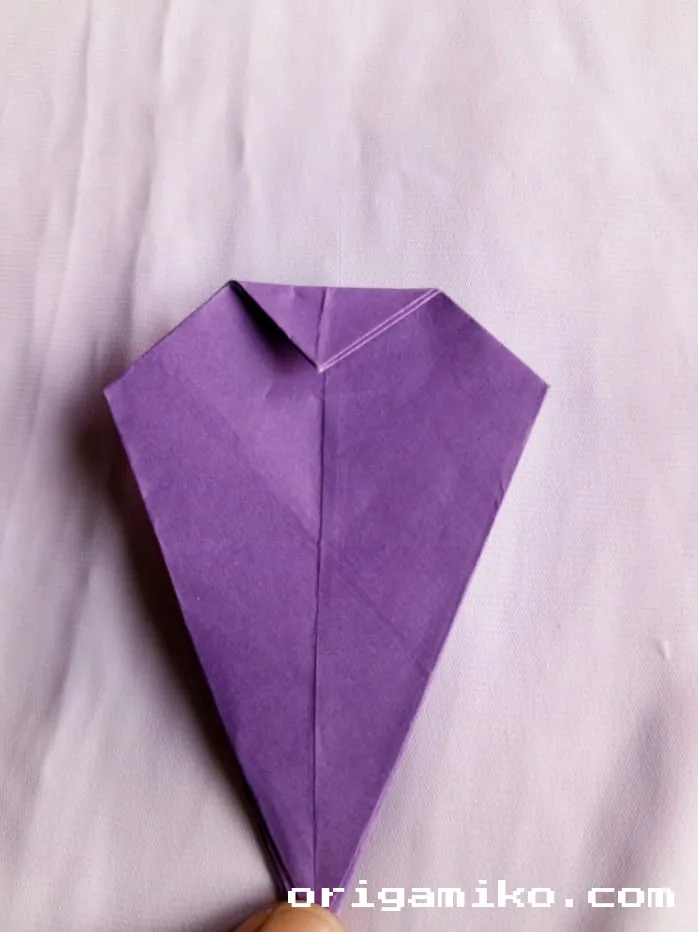
Step 4

Now unfold the fold and fold it on the inside and fold the other side in the same way. Now fold both sides of the paper along the middle and unfold. These precise folds are creating the body of the teapot.
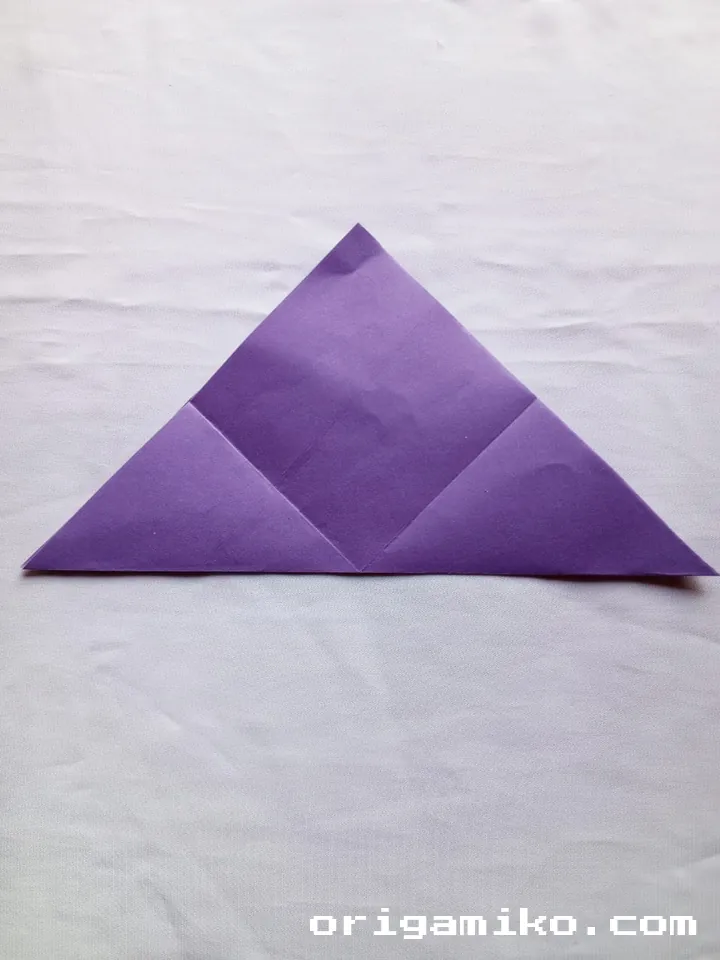
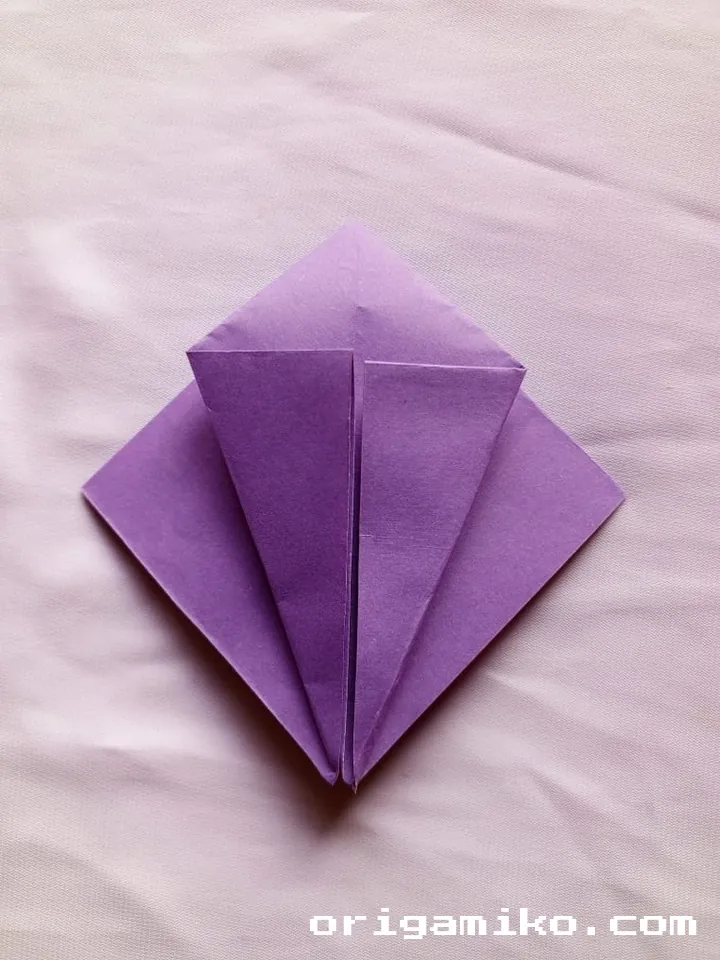
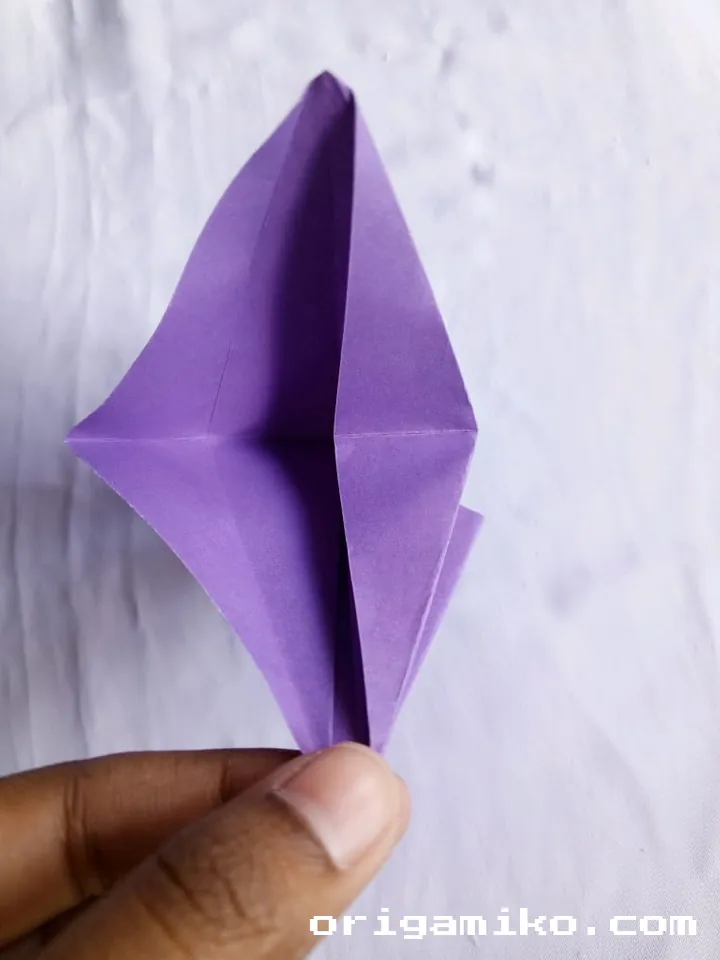
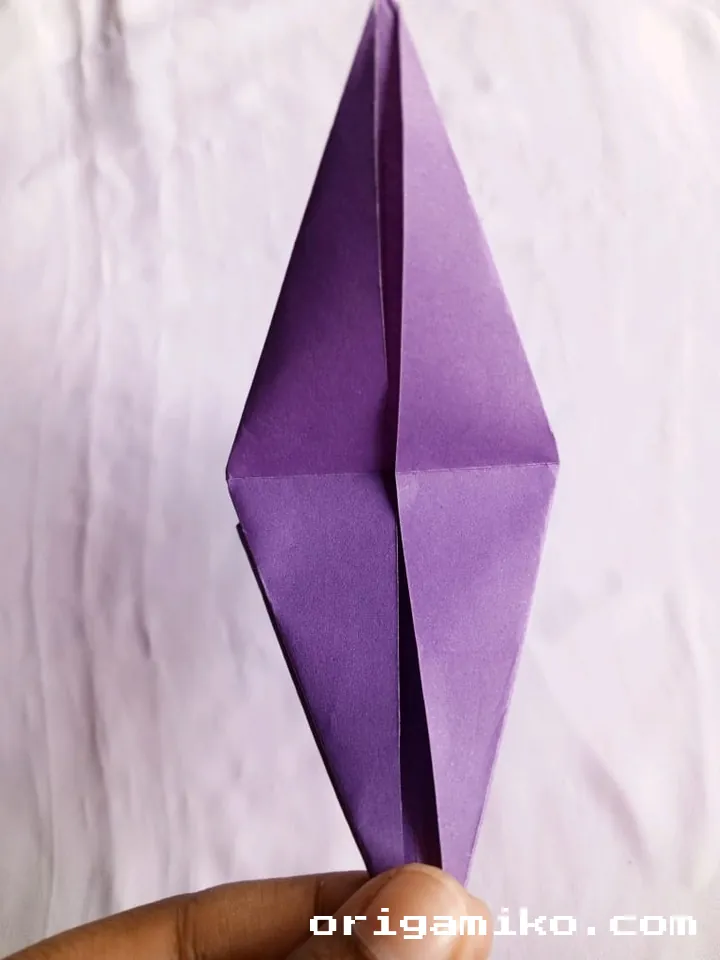
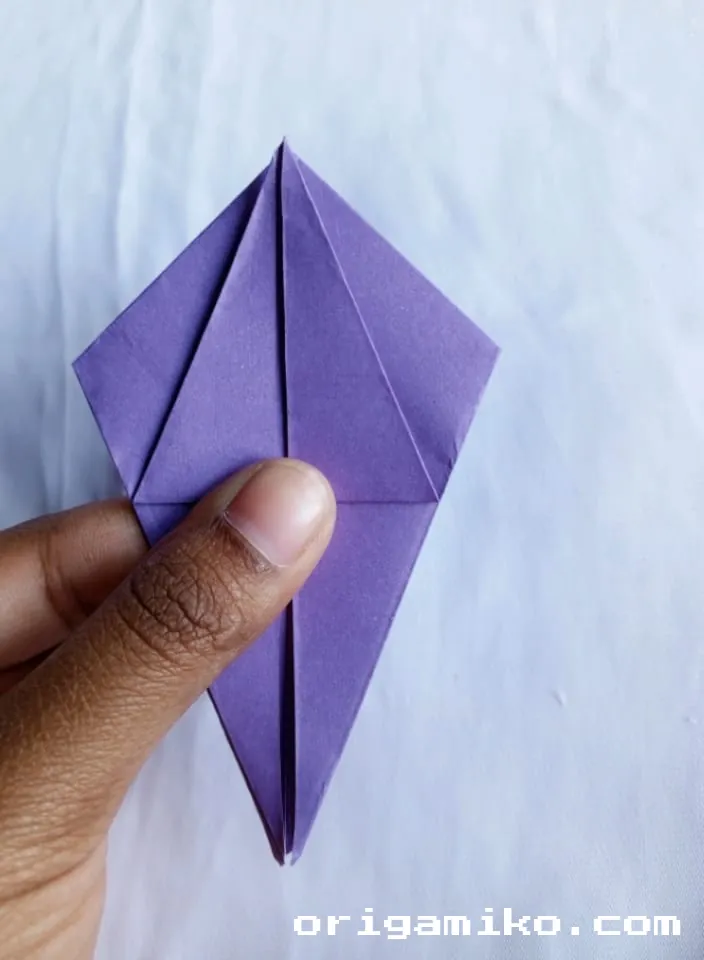
Step 5
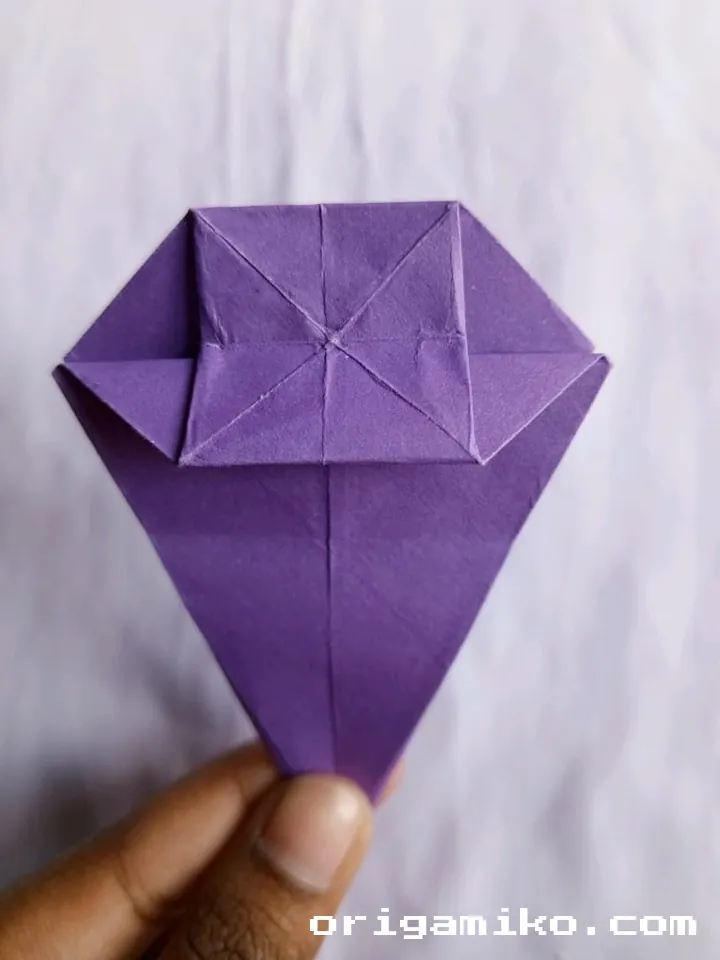

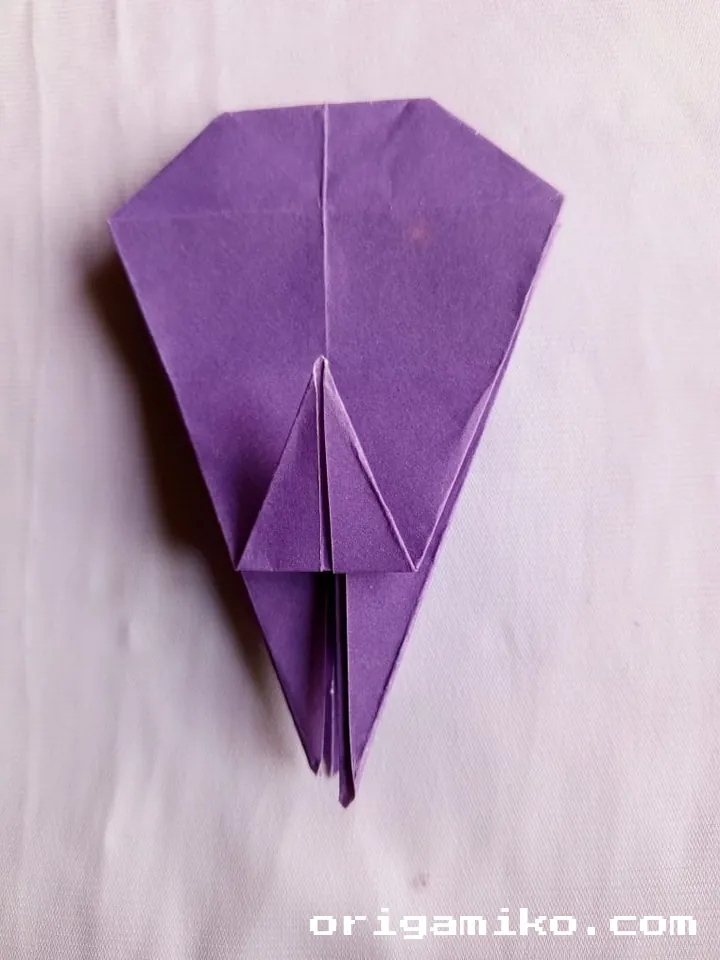
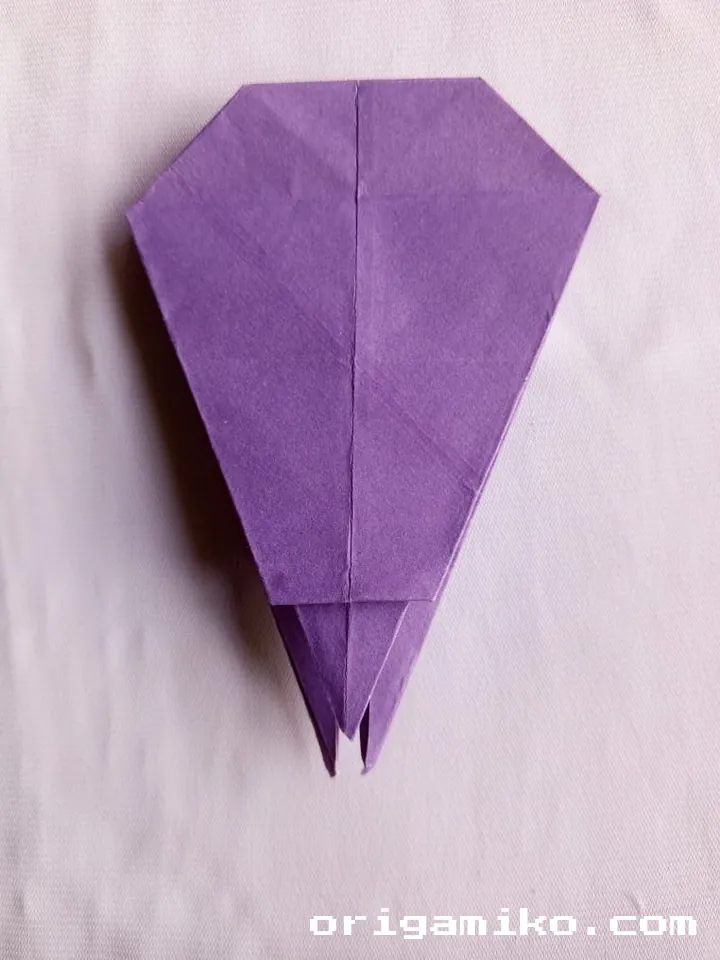
Make two folds from the top and fold it from the middle, this time fold it from both sides and fold it down again. This complex series of folds creates the spout and handle of your teapot.
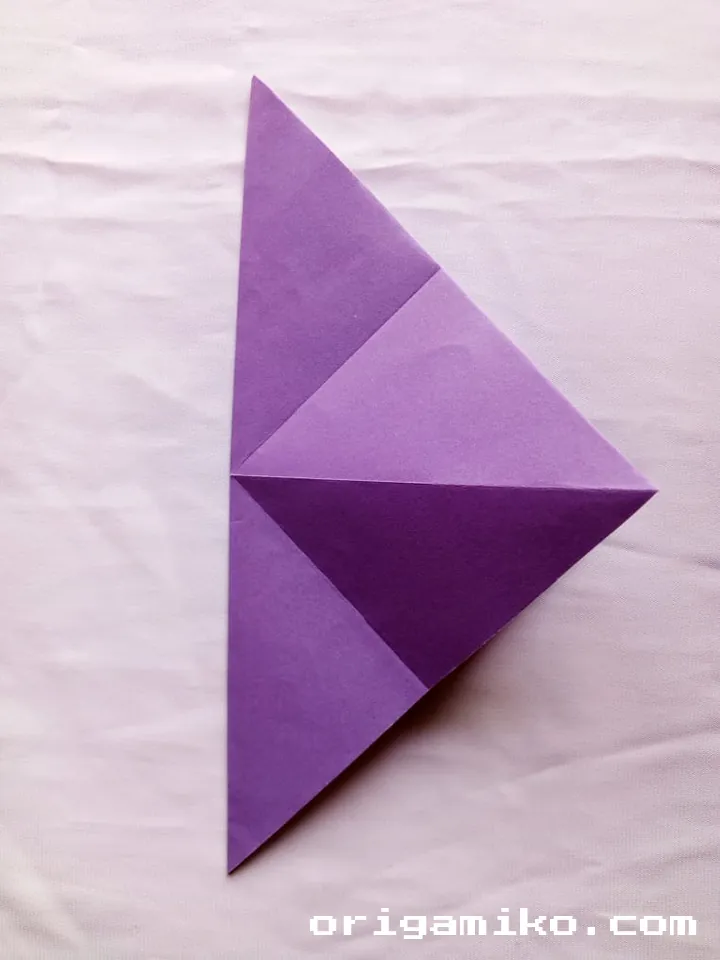
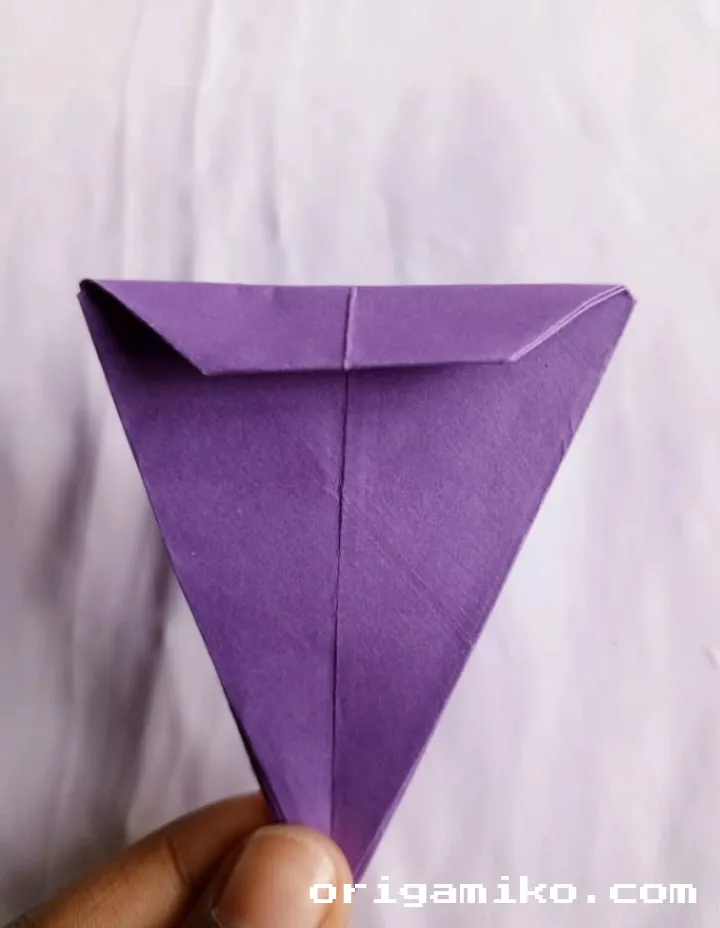
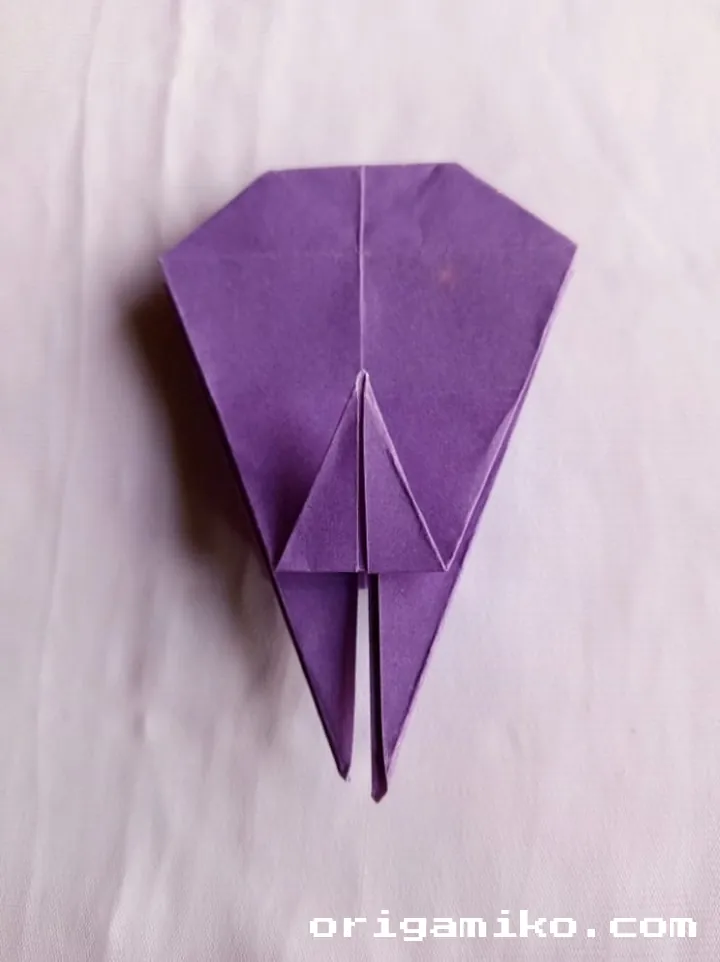
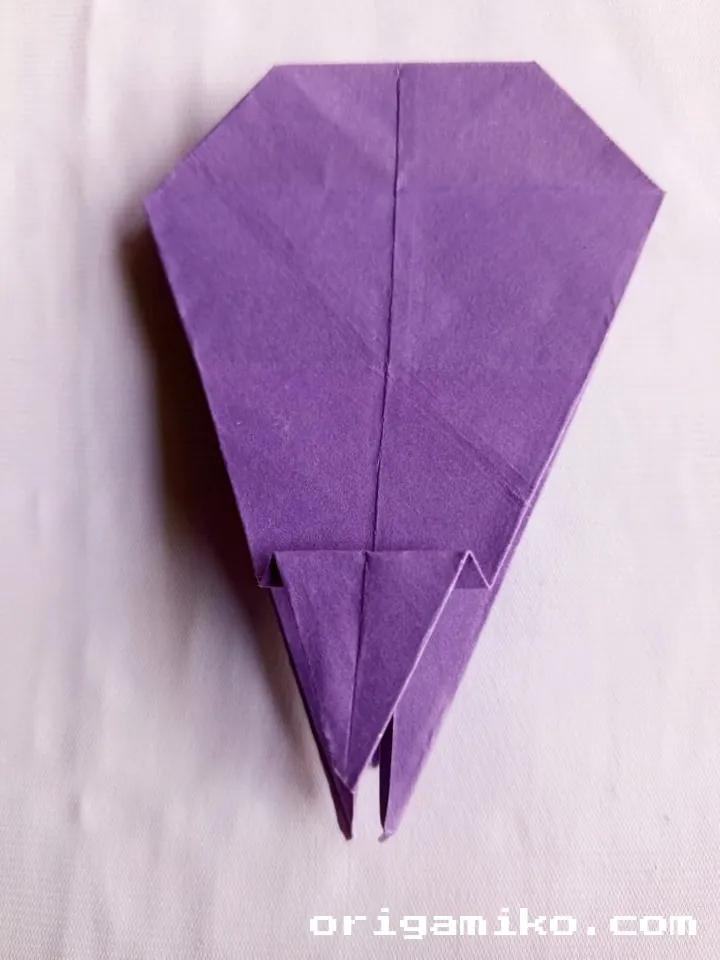
Step 6
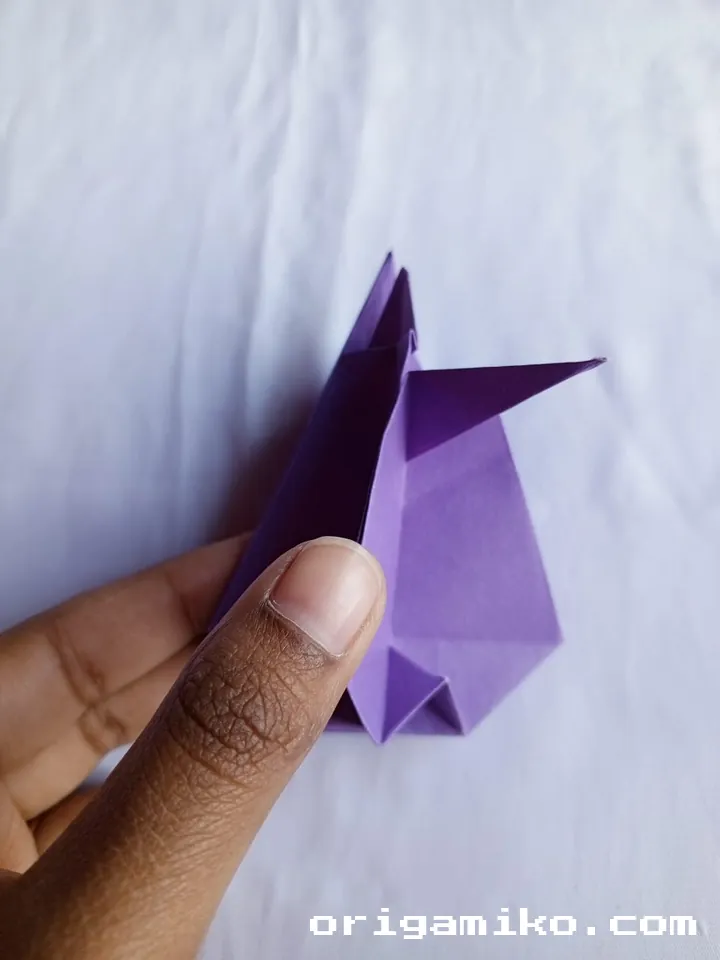
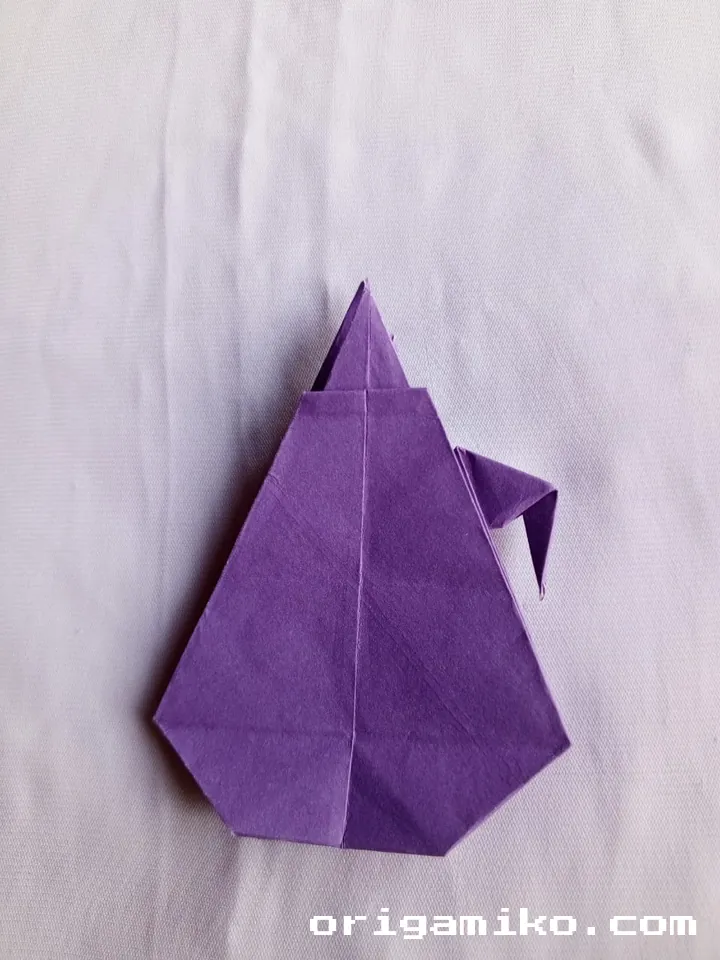
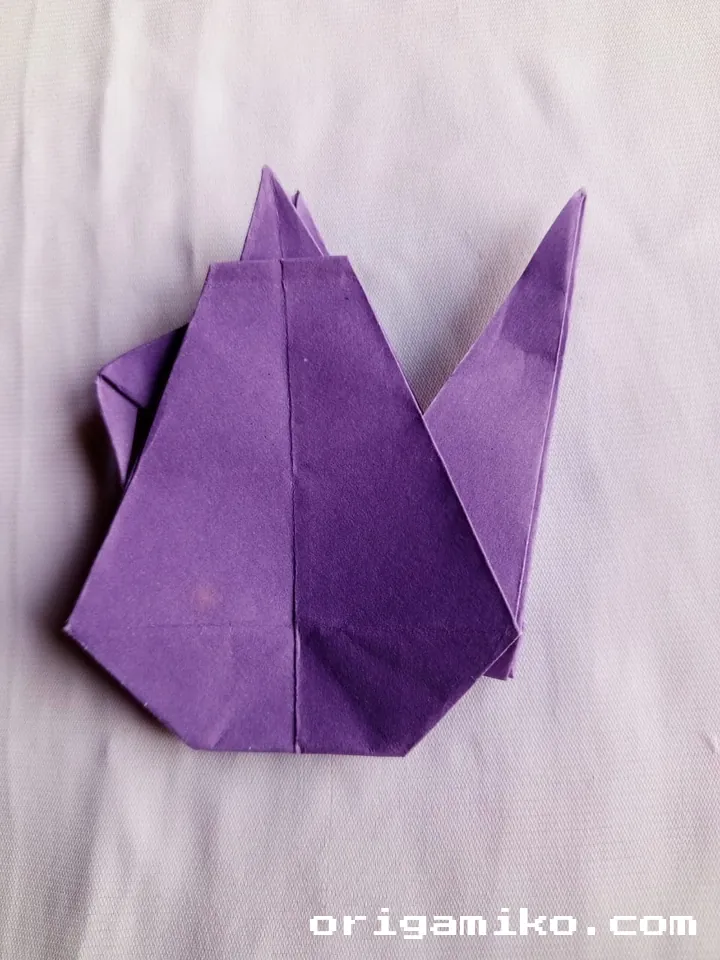
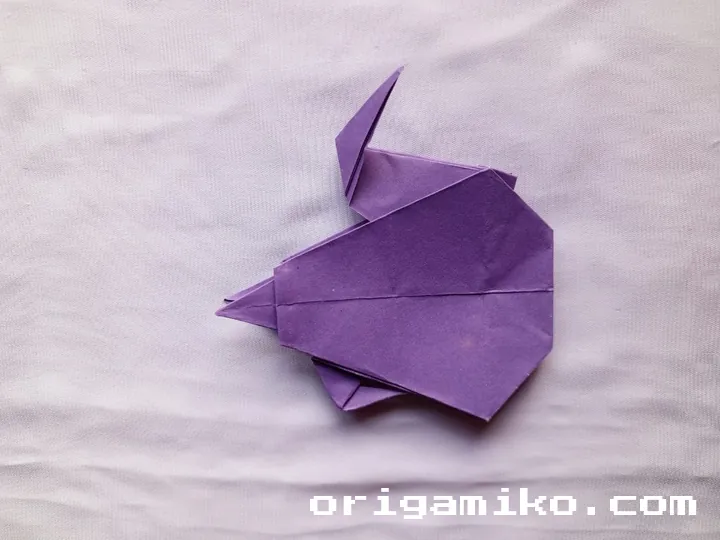
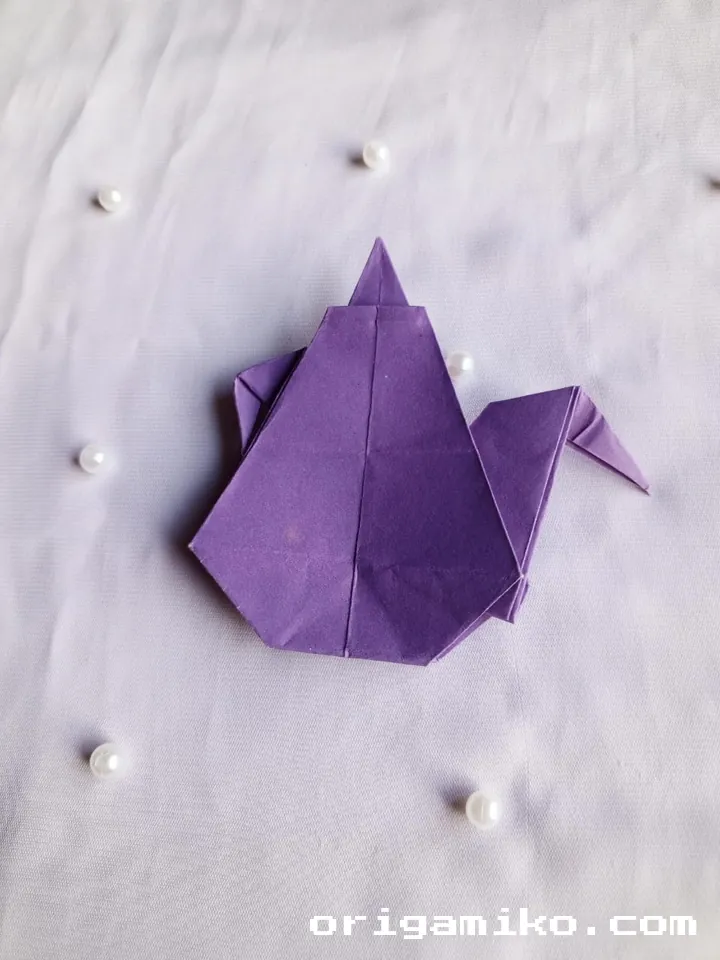
After folding it as shown in the picture, the origami tea pot is ready. Congratulations! You’ve successfully completed your easy origami note tea pot.
I found that following these steps exactly as written yielded the best results. Remember to be patient with each fold and to create precise creases for a clean final product.
Tips for Success
When I first started making origami projects, I made plenty of mistakes. Here are some tips I’ve learned along the way to help you avoid the same pitfalls:
• Start with clean hands – Oil from your fingers can stain the paper • Make precise creases – Each fold should be sharp and definitive • Follow the sequence exactly – Skipping steps will affect the final shape • Be patient – Rush folding leads to mistakes and frustration • Use the right paper – Thinner paper works better for complex folds • Practice makes perfect – Don’t get discouraged if your first attempt isn’t ideal
I’ve found that running my fingernail along each crease helps create sharper folds, which dramatically improves the final appearance of the origami note tea pot.
Common Mistakes and How to Avoid Them
| Mistake | Consequence | Solution |
|---|---|---|
| Imprecise initial folds | Uneven final product | Take extra time on foundation folds |
| Rushing through steps | Messy appearance | Slow down and enjoy the process |
| Using paper that’s too thick | Difficult to fold | Choose appropriate weight paper |
| Ignoring crease lines | Structure problems | Always follow established creases |
| Uneven pressure when folding | Wobbly teapot | Apply consistent pressure throughout |
| Skipping steps | Failed construction | Follow instructions sequentially |
One thing I’ve learned through creating countless origami pieces is that patience truly is the key. When I first tried making an origami teapot, I wanted to rush through the process. The result? A lopsided creation that barely resembled a teapot! Taking my time transformed my experience and results completely.
Similar Variations That Can Be Made
Once you’ve mastered how to make tea pot origami, you might want to explore these related projects:
• Origami Tea Cup – A perfect companion piece to your teapot • Origami Kettle – Slightly different proportions for a different look • Origami Coffee Pot – Similar technique with modified spout design • Miniature Tea Set – Create tiny versions using smaller paper • Decorative Tea Tray – Display your teapot creation in style
I personally love creating a complete tea set that includes the teapot, cups, and even little origami sugar cubes. These make wonderful gifts or decorative pieces for any room.
FAQs About Origami Teapots
How long does it take to make an origami teapot?
For beginners, the first attempt might take about 30-45 minutes. With practice, you can create one in about 15 minutes.
Can I use regular printer paper?
Yes, but I recommend cutting it into a perfect square first. Origami paper works better because it’s thinner and holds creases well.
My teapot doesn’t stand up properly. What went wrong?
This usually happens when the base folds aren’t precise. Make sure your initial creases are sharp and accurate.
Can children make this origami teapot?
I suggest this project for children aged 10+ with some origami experience. Younger children might need significant assistance.
How do I preserve my origami teapot?
Keep it away from moisture and direct sunlight. A light coat of clear craft spray can help maintain its shape longer.
Can I make a functional teapot from origami?
No, paper origami cannot hold liquid. This is purely decorative, though there are waterproof origami techniques using different materials.
The Joy of Origami
I’ve found that origami brings a special kind of satisfaction that few other crafts can match. There’s something magical about transforming a flat piece of paper into a three-dimensional teapot using nothing but your hands and patience.
Each time I create an origami piece, I’m connecting with a tradition that spans centuries and crosses cultural boundaries. The simple act of folding paper becomes a meditative practice—a brief escape from our screen-dominated world.
Whether you’re creating this origami tea pot for decoration, as a gift, or simply to challenge yourself, the process itself offers tremendous value. The concentration required, the satisfaction of completing each step, and the pride in the finished creation are all part of what makes origami so enduringly popular.
Conclusion
Creating an easy origami note tea pot is a rewarding journey that combines artistry, precision, and patience. I hope this guide has inspired you to try this beautiful paper craft for yourself. Remember, every master was once a beginner, so don’t be discouraged if your first attempt isn’t perfect.
The joy of origami lies not just in the finished teapot, but in the peaceful moments spent creating it. So gather your paper, follow these simple tea pot step by step instructions, and enjoy the process of bringing this origami teapot to life!