

Ever wondered how to add a touch of elegance to your paper crafting skills?
Let me introduce you to the origami top hat.
This simple yet sophisticated paper creation will transform your crafting repertoire.
What is an Origami Top Hat?
Hey friends, I’m excited to share one of my favorite paper folding projects with you today – the origami top hat! I remember the first time I made one of these little beauties. I was looking for a quick craft project to do with my niece, and we ended up making tiny top hats for all her stuffed animals.
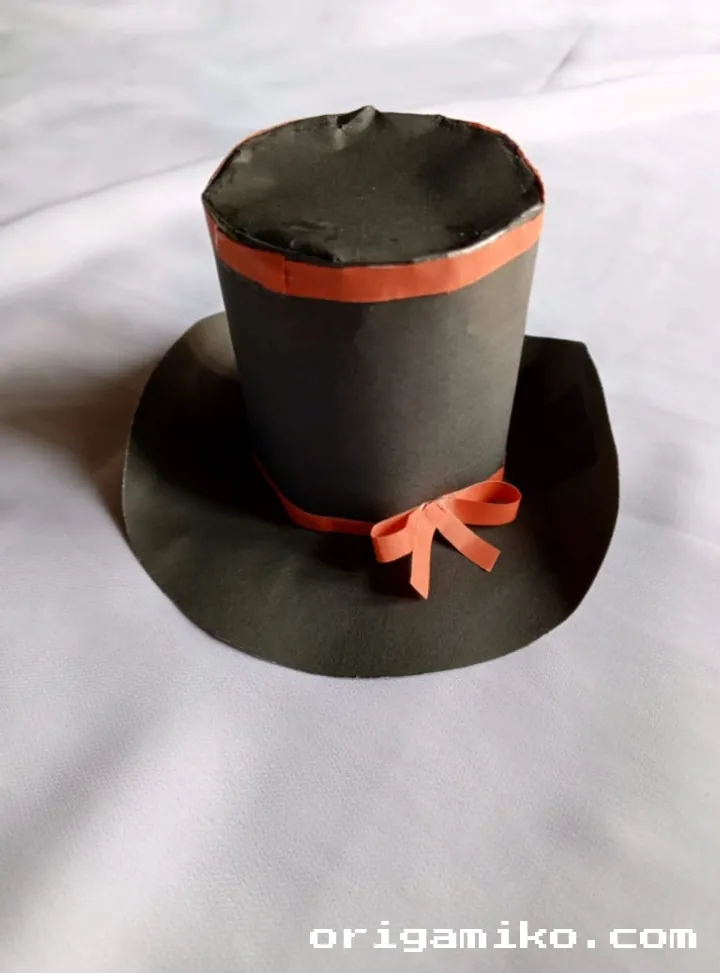
The origami top hat is a classic paper folding project that creates a miniature version of the formal headwear. The good news? This project is perfect for both beginners and experienced paper folders. You can create these little hats in different sizes – from tiny decorative versions to larger ones that can actually be worn by dolls or as costume accessories.
What I love most about the easy origami top hat is that it teaches fundamental folding techniques while producing something truly charming. Let’s get started with this step-by-step guide!
Materials Needed
Before we jump into making our origami top hat, let’s gather everything we’ll need. Nothing’s worse than getting halfway through a project and realizing you’re missing something essential!
| Materials | Description | Recommended |
|---|---|---|
| Paper | Circle paper (for main structure) | 8-10 inch diameter |
| Additional Paper | Rectangular paper (for finishing touches) | 2×4 inch rectangle |
| Scissors | Sharp scissors for clean cuts | Small craft scissors |
| Ruler | For measuring cuts precisely | 6-inch ruler |
| Pencil | For marking measurements | #2 pencil |
| Glue | Optional for securing parts | Craft glue or glue stick |
| Decorative Elements | Optional embellishments | Ribbon, stickers, etc. |
I personally prefer using colored paper for a more vibrant top hat, but plain paper works just as well if you want to decorate it later.
Step-by-Step Instructions on How to Make a Top Hat Origami
Now that we have our materials ready, let’s dive into the process. I’ll break this down into clear, manageable steps so you can follow along easily.
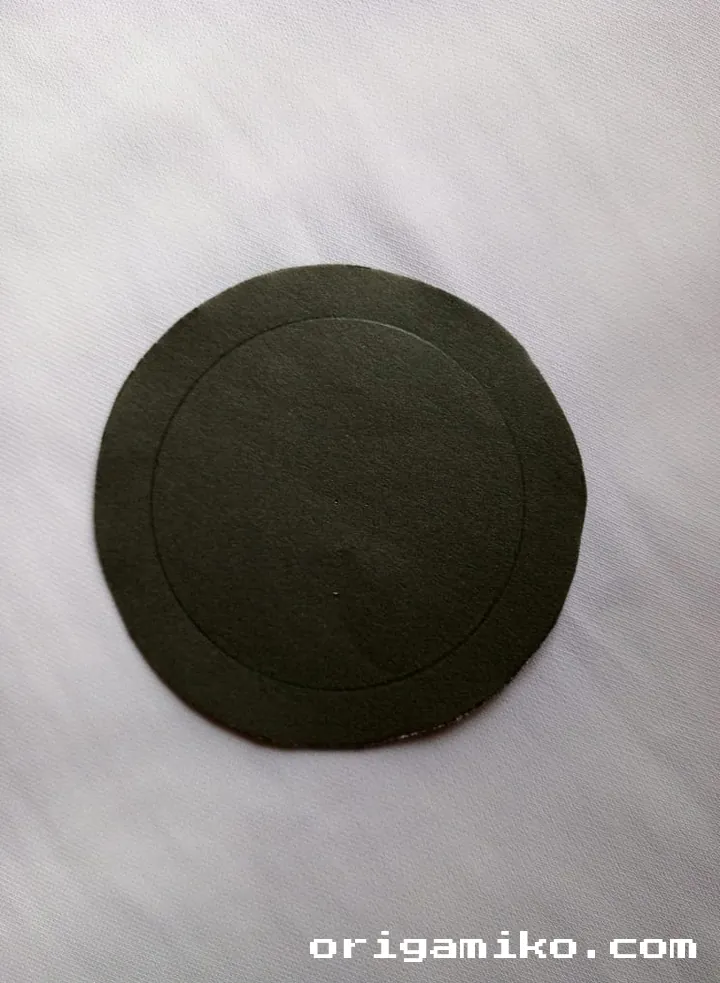
1. Prepare Your Circle Paper
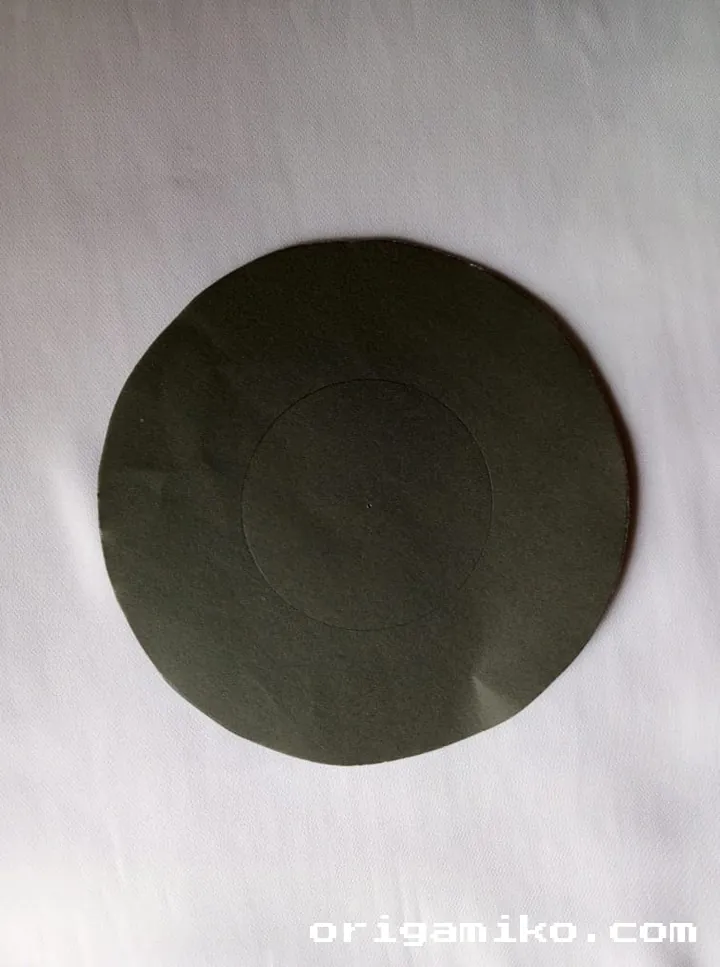
First things first – we need to start with our circle paper. This will form the main structure of our origami top hat.
- Take your circle paper and place it flat on your work surface
- Make sure the colored side (if using two-toned paper) is facing down
- Smooth out any wrinkles or creases
2. Create the Center Cut
This is where we begin shaping our top hat:
- Locate the exact center of your circle paper
- Carefully cut a round shape from the middle of the circle
- This center hole will eventually form the opening of your hat
I find it helpful to draw a small circle in the center before cutting to ensure I get a nice, even shape.
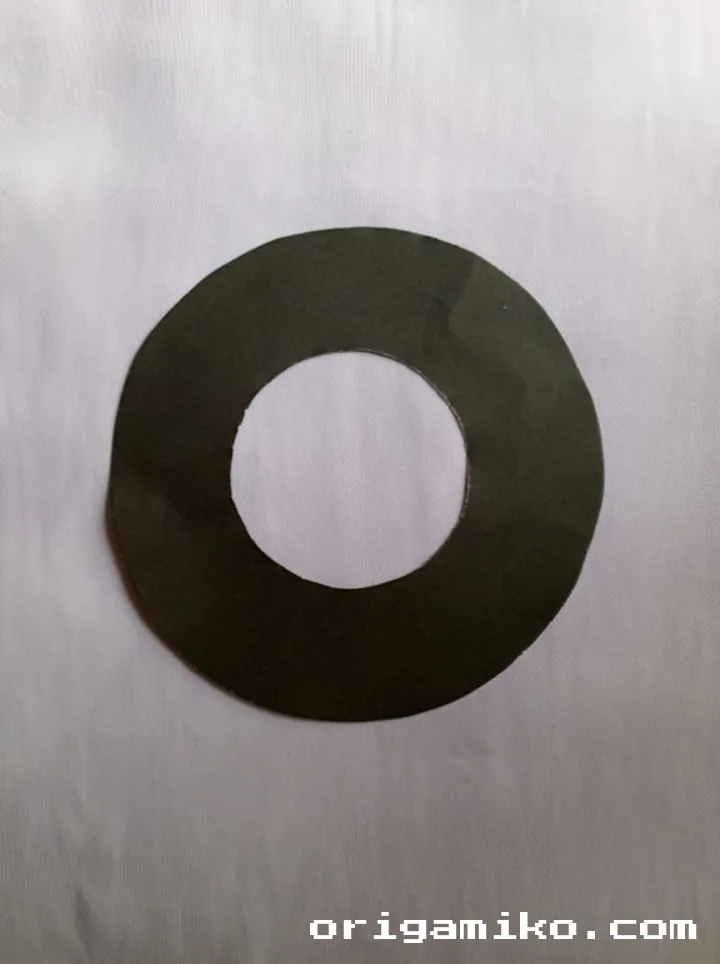
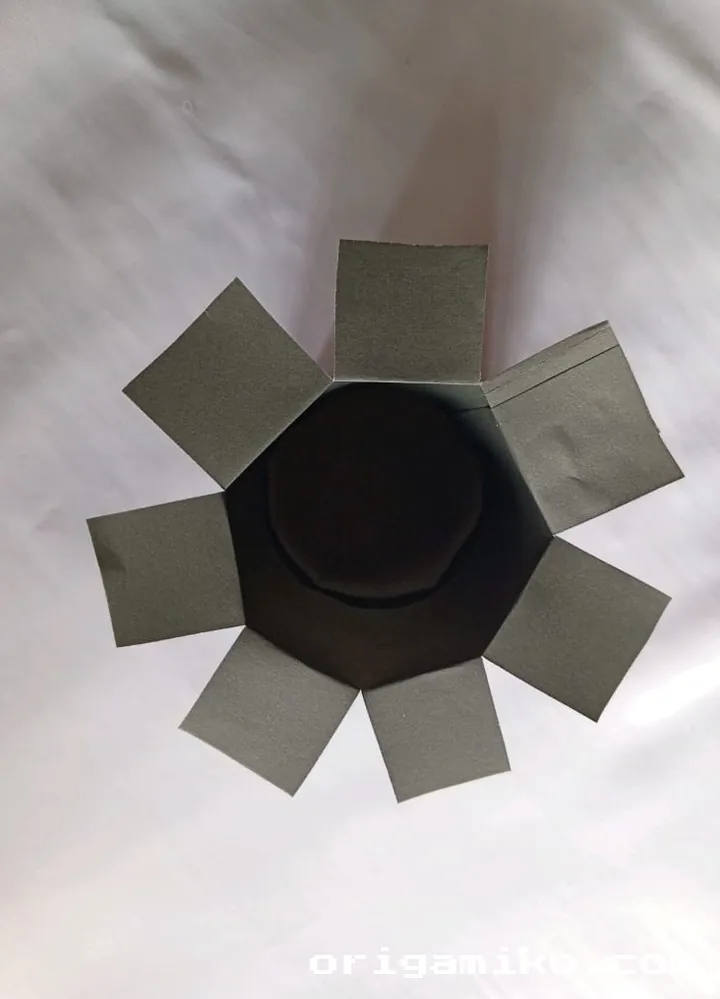
3. Form the Side Cuts
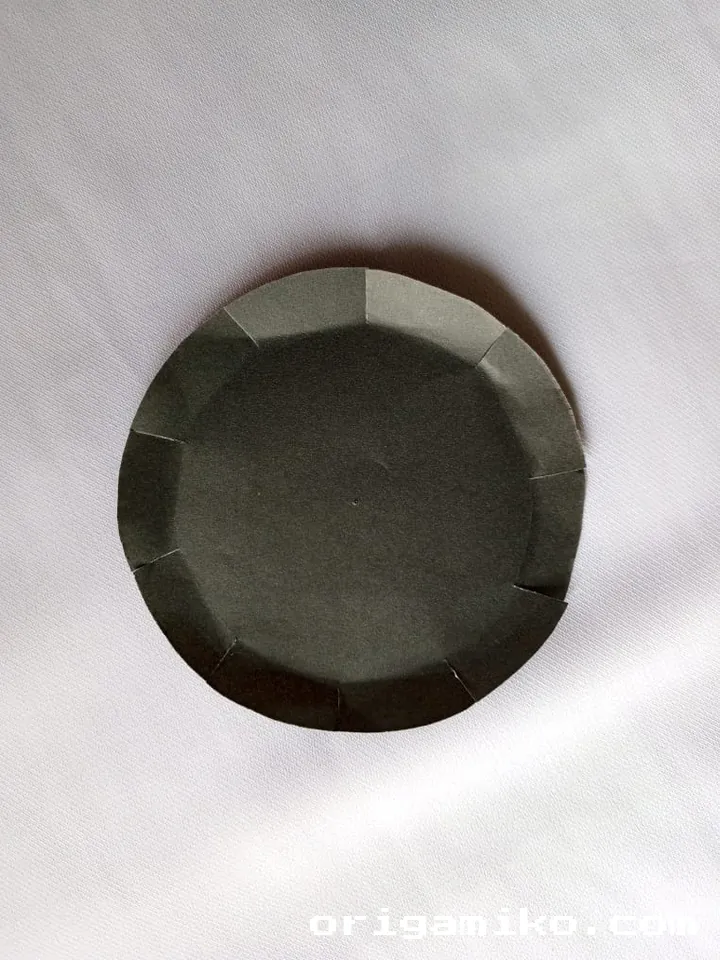
Now we’ll work on creating the sides of our top hat:
- Take the remaining ring of paper after your center cut
- Cut four equally spaced slits around the ring
- These cuts should be perpendicular to the edge of the ring
- Make sure not to cut all the way through to the center hole
The four cuts will help our paper fold into the three-dimensional hat shape we’re aiming for.
4. Add the Rectangular Element
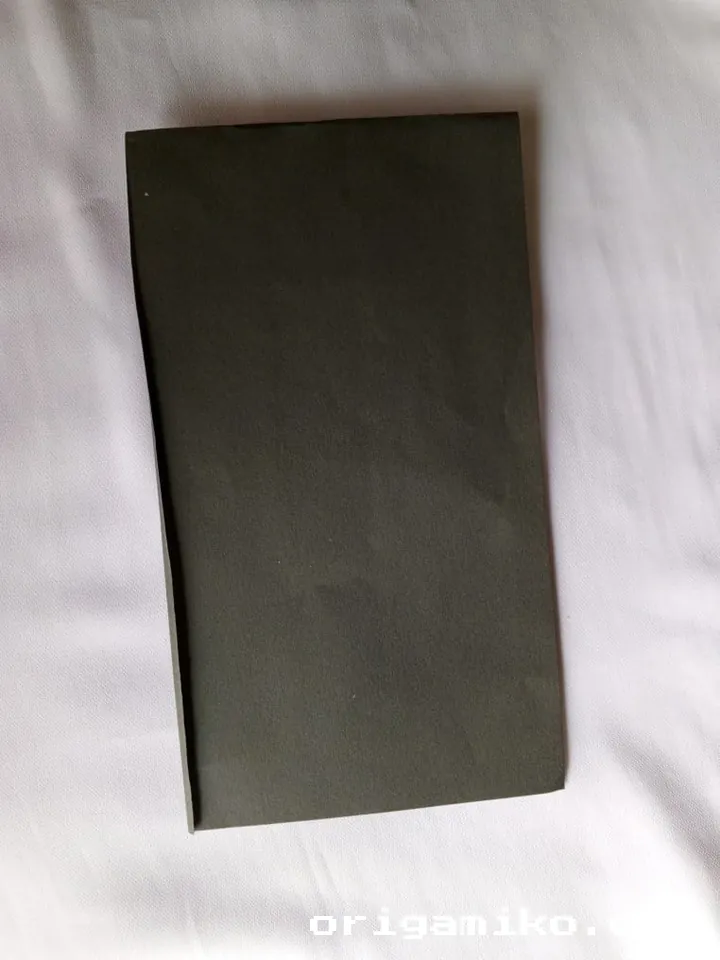
Let’s incorporate our rectangular paper to create the distinctive top hat shape:
- Take your rectangular paper piece
- Position it underneath the round paper as shown in step 4
- Align it so it will form the cylindrical part of the top hat
- The rectangle should stand vertically when the hat is complete
This rectangular piece is what gives our origami top hat its height and classic silhouette.
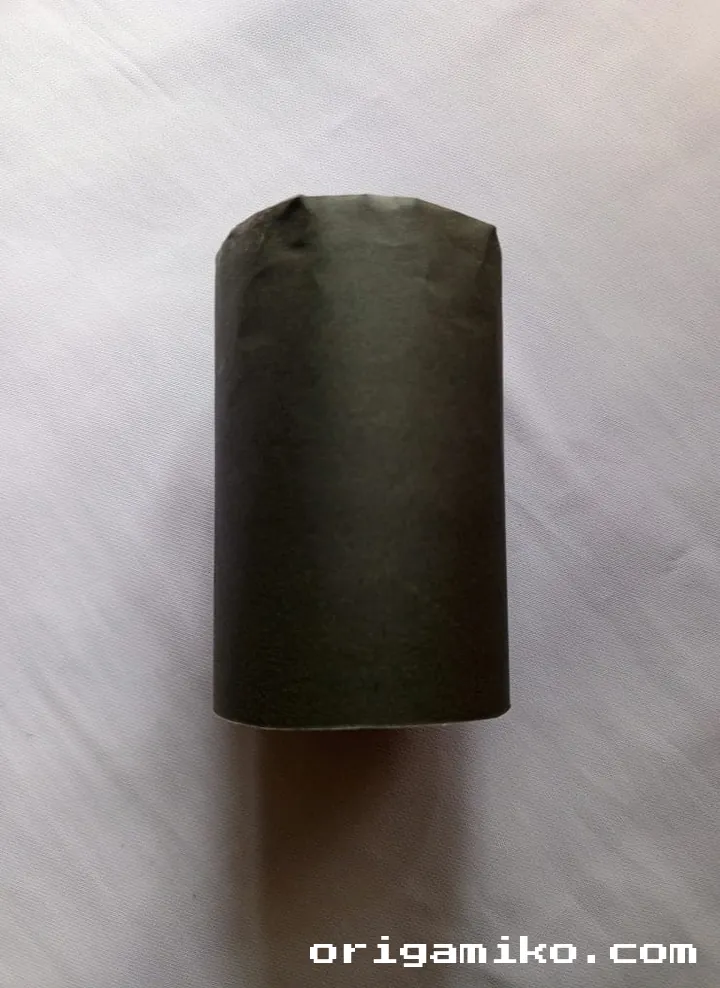
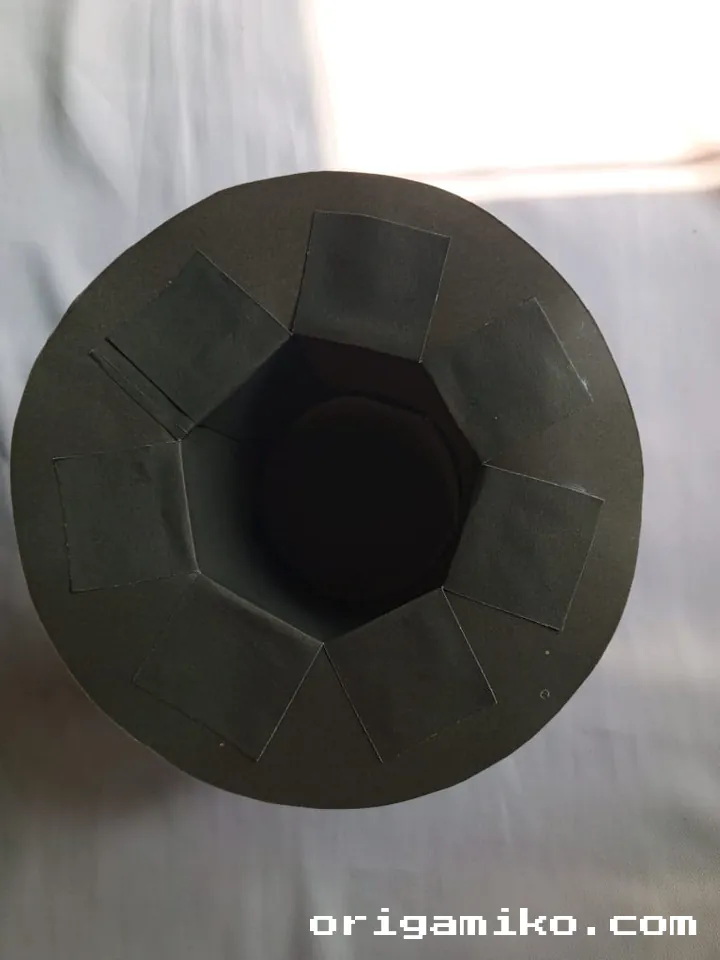
5. Create the Final Cuts and Assembly
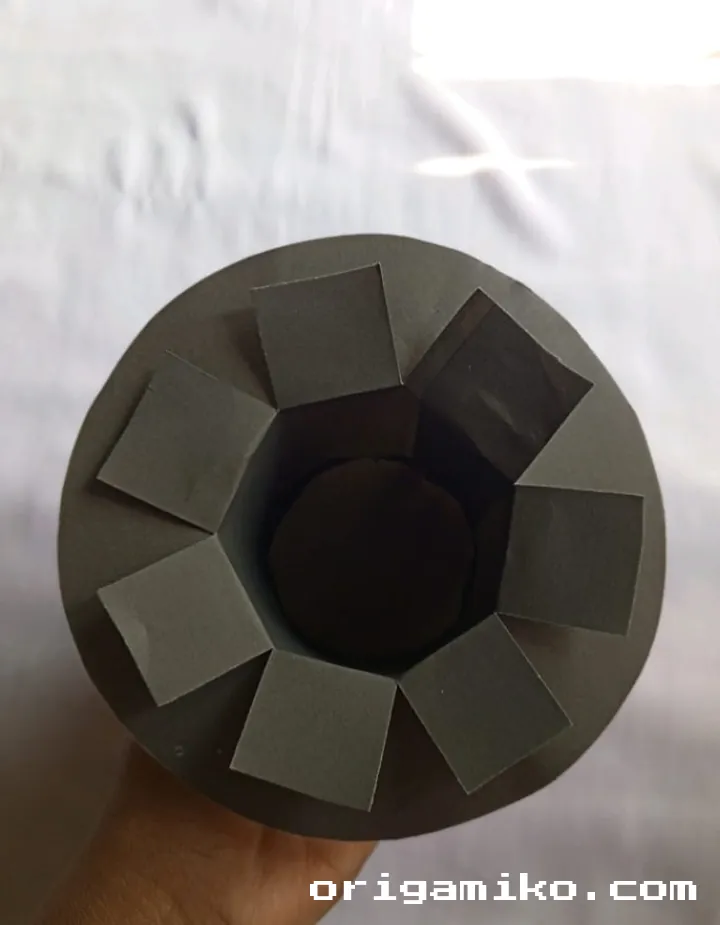
We’re almost there! This step brings everything together:
- Cut approximately one inch around the paper as indicated
- These cuts create tabs that will fold inside
- Carefully insert these tabs into the round paper structure
- Ensure everything is securely positioned
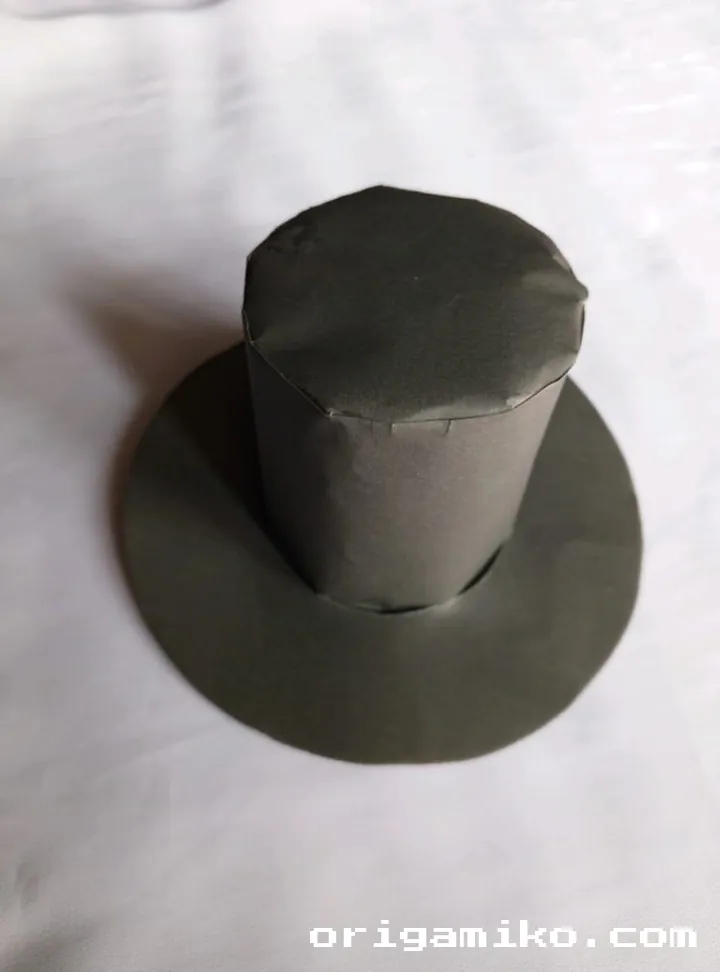
The round paper essentially forms the brim of our hat, while the rectangular piece creates the tall portion.
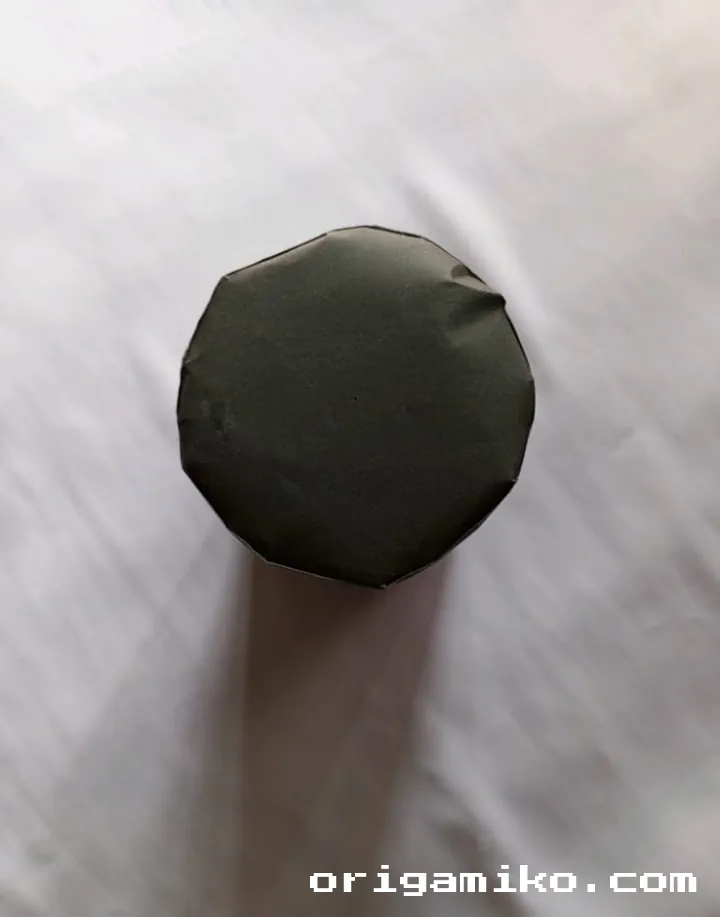
6. Complete Your Top Hat
The final step is putting all the pieces together:
- Once all tabs are properly inserted and positioned
- Add the goal (the top piece) to complete the structure
- Make sure everything is aligned properly
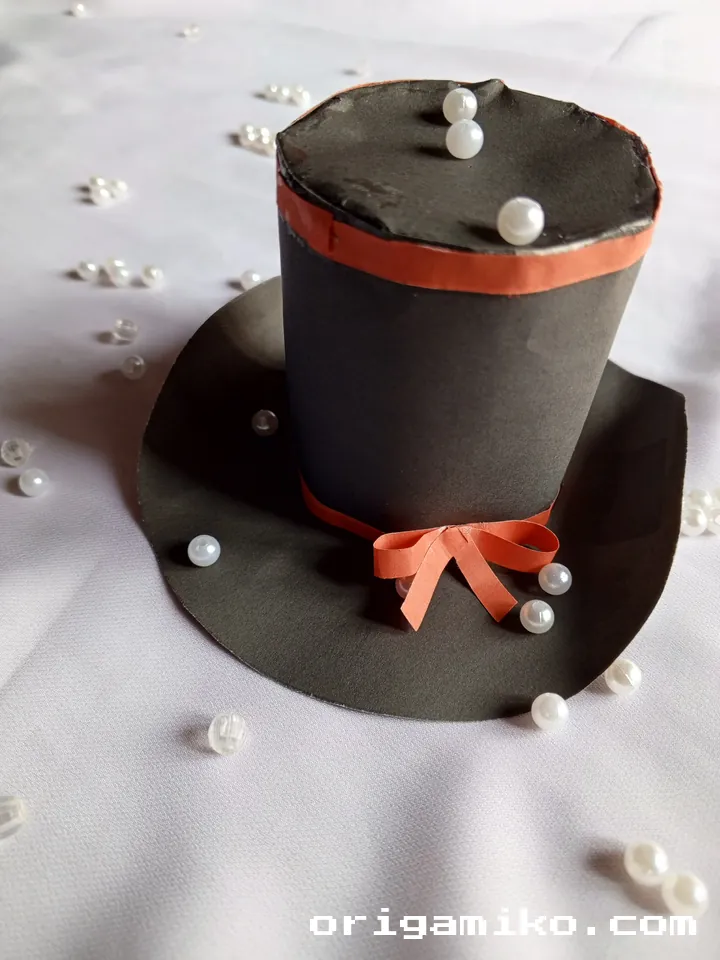
- Your origami top hat is now complete!
If you want extra stability, you can add small dots of glue to secure the pieces, though this is optional for a true origami approach.
Tips for Success
Through my many attempts at making origami top hats (some more successful than others!), I’ve collected some handy tips to share with you:
- Paper Quality Matters: Thicker paper is more stable but harder to fold precisely. I recommend medium-weight paper for beginners.
- Precise Cuts: Take your time with the cutting steps – clean, straight cuts make assembly much easier.
- Practice Makes Perfect: Don’t get discouraged if your first attempt isn’t perfect. My first origami top hat looked more like a squashed cupcake!
- Size Considerations: Larger hats are often easier for beginners to work with. As you gain skill, you can try making smaller, more intricate versions.
- Pre-fold Guide Lines: For better precision, you can lightly score fold lines with a paper scorer or the back of a knife before making your folds.
Common Mistakes and How to Avoid Them
Even experienced origami artists make mistakes! Here are some common issues when creating an origami top hat and how to overcome them:
Uneven Center Cut
Problem: The center hole is off-center or unevenly cut. Solution: Use a compass or trace a small round object to mark the circle before cutting.
Tearing at Fold Points
Problem: Paper tears when folding along the cut lines. Solution: Make sure your cuts don’t extend too far, and fold gently along the cut lines.
Unstable Structure
Problem: The hat collapses or won’t stand upright. Solution: Check that your rectangular piece is properly sized and securely attached to the round base.
Difficulty with Assembly
Problem: The pieces don’t seem to fit together as expected. Solution: Double-check your measurements and cuts. Sometimes slightly adjusting the size of your cuts can make assembly easier.
Similar Variations That Can Be Made
Once you’ve mastered the basic origami top hat, you might want to try these creative variations:
Mini Decorative Top Hats
These tiny versions make perfect decorations for holiday trees, gift packages, or miniature scenes. I made a set of mini top hats last Christmas, and they were a hit as tree ornaments!
Paper Top Hat with Brim
By adjusting the size of your initial circle and the width of your cuts, you can create a hat with a wider brim – perfect for a steampunk-inspired paper creation.
Stovepipe Hat
Make the rectangular piece taller for an Abraham Lincoln-style stovepipe hat. This variation has a more dramatic, historical look.
Embellished Fancy Hat
Add ribbons, paper flowers, or small feathers to create a fancy hat suitable for a paper doll’s day at the races!
FAQs About Origami Top Hats
Q: How long does it take to make an origami top hat? A: Once you’re familiar with the process, a simple top hat can be completed in about 10-15 minutes. Your first attempt might take closer to 30 minutes as you learn the steps.
Q: What size paper should I start with for a beginner-friendly project? A: I recommend starting with an 8-10 inch diameter circle and a 2×4 inch rectangle. These sizes are easy to handle but still produce a nice-sized hat.
Q: Can I make a wearable origami top hat? A: The traditional origami top hat is miniature, but you can scale up the project using poster board or similar materials to create a wearable version. However, this moves somewhat away from pure origami into paper crafting.
Q: How do I get the top hat to stand up properly? A: Make sure your rectangular piece is folded with crisp edges and properly inserted into the round base. If needed, a tiny bit of glue can help stabilize the structure.
Q: Can children make this origami top hat? A: With supervision for the cutting steps, this project is suitable for children aged 8 and up. Younger children may need help with the precise cutting and assembly.
Wrapping Up Your Origami Top Hat Journey
I hope you’ve enjoyed learning how to make this simple top hat origami project! There’s something truly satisfying about transforming a flat piece of paper into a three-dimensional miniature hat through the art of paper folding.
Remember, the beauty of origami is in the process as much as the result. Each time you create an origami top hat, you’ll discover new techniques and improve your paper folding skills. So grab your paper and scissors, and start creating your own collection of charming origami top hats today!