


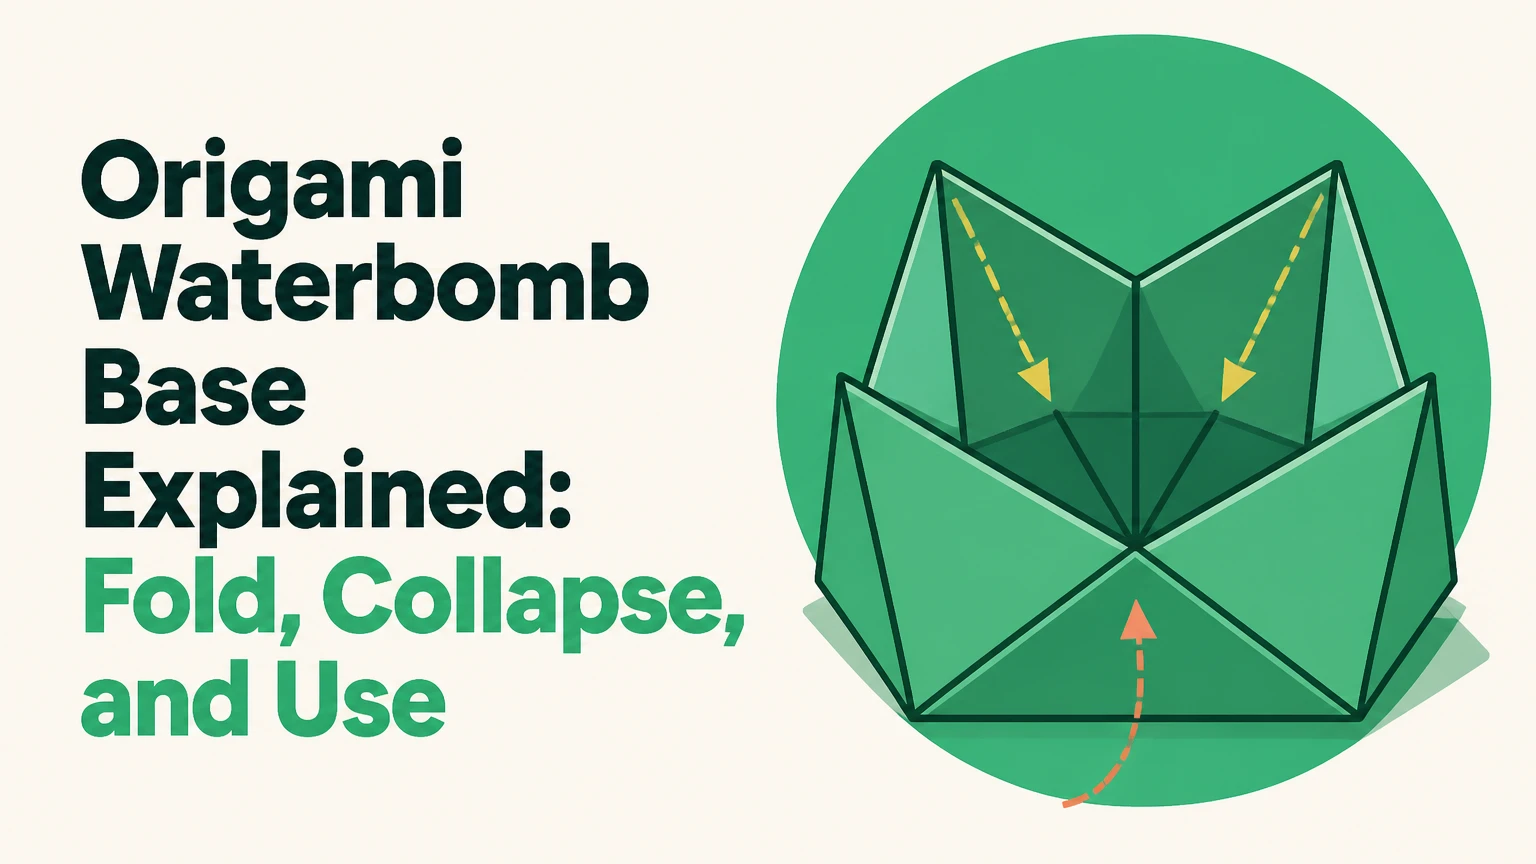
The origami waterbomb base, also called the balloon base, is a four-flapped triangular foundation made from a square sheet through two diagonal and two perpendicular crease lines. Its opposing mountain and valley creases allow the paper to collapse flat, creating a reusable structure for the waterbomb, traditional frog, insects, flowers, and geometric models.
Key Facts at a Glance
- The waterbomb base begins with a square sheet and collapses into a triangular form.
- The standard crease pattern contains both diagonals and both center lines.
- The diagonal creases and center creases must have opposite fold directions for a clean collapse.
- The waterbomb base is different from the square-shaped preliminary base.
- A 15 cm square usually produces a practical beginner-sized base for small models.
- The base uses the complete sheet, so traditional folding requires no cutting or paper waste.
What Is the Origami Waterbomb Base?
The origami waterbomb base is a foundational fold in which a square becomes a compact triangular arrangement of layered flaps. Traditional origami diagrams often call it the balloon base because opening the finished model produces a blown-up paper waterbomb or balloon.
The base is not a finished figure. It is a starting geometry that places paper edges, corners, and layers where later folds can turn them into limbs, wings, petals, or body sections. The same base can therefore produce models that look unrelated on the surface.
The name “waterbomb” refers to the traditional model that inflates into a small hollow form. In origami terminology, a base describes a repeatable intermediate structure rather than a single design. The preliminary base, bird base, frog base, and fish base follow the same general principle.
Why does the base collapse into a triangle?
The waterbomb base collapses because its crease pattern gives the square a coordinated set of mountain and valley folds. When the opposite edges move inward, the diagonal folds rise while the center folds sink, allowing four sectors of paper to rotate around the central vertex.
A useful mental model is a flexible four-panel pyramid flattened onto a table. The paper does not simply fold along one line; several creases move together. If the crease directions are reversed or the center is misplaced, the panels compete instead of nesting.
The finished outline is commonly described as a triangle, although the visible shape depends on orientation and how firmly the layers are flattened. The apex is not necessarily a perfect geometric 90-degree corner in every practical fold because paper thickness, crease width, and alignment affect the outline.
How Does the Crease Pattern Work?
The waterbomb base uses four center-crossing creases: two diagonals from corner to corner and two lines connecting opposite midpoints. The diagonals normally become mountain folds in the collapsed base, while the horizontal and vertical center lines normally become valley folds when viewed from the appropriate side.
| Crease | Connects | Typical role | Practical checkpoint |
|---|---|---|---|
| First diagonal | Top-left to bottom-right | Mountain crease | Ends meet exactly |
| Second diagonal | Top-right to bottom-left | Mountain crease | X crosses at center |
| Horizontal center | Left edge to right edge | Valley crease | Edge midpoint alignment |
| Vertical center | Top edge to bottom edge | Valley crease | Four equal sectors |
| Central vertex | All four crease lines | Collapse origin | No offset or tear |
The exact mountain-versus-valley appearance changes when the paper is turned over. A crease that looks like a mountain from the colored side looks like a valley from the reverse side, so diagrams should be read from their stated viewpoint.
What geometry does each crease create?
The two diagonals divide the square into four isosceles right triangles. The horizontal and vertical center lines divide the sheet into four smaller squares before collapse, creating a grid that intersects the diagonal pattern.
This pattern gives the base four principal flap directions. In a simple waterbomb model, those flaps later become broad surfaces or body sections. In a complex insect design, a designer may allocate them to legs, wings, antennae, or a thorax.
The crease pattern is flat-foldable in the ideal thin-paper model. Real paper adds thickness, friction, and stiffness, so the base may require light precreasing and controlled finger pressure rather than a single automatic motion.
How Do You Fold an Origami Waterbomb Base?
Fold an origami waterbomb base in six main actions, using a square sheet and accurate corner alignment. A beginner generally needs 1-3 minutes, while an experienced folder can prepare the base in roughly 15-45 seconds; precision matters more than speed.
Before You Start
| Requirement | Beginner specification | Advanced alternative | Why it matters |
|---|---|---|---|
| Paper shape | 15 x 15 cm square | 20 x 20 cm design paper | A true square keeps flaps equal |
| Paper weight | 60-80 gsm kami | 35-60 gsm tissue foil | Thin paper collapses more easily |
| Tools | No tools required | Bone folder for precreasing | Fingers are sufficient for most sheets |
| Working surface | Flat table, 30 cm wide | Smooth cutting mat | Prevents sliding and distorted corners |
| Preparation time | 1-3 minutes | 15-45 seconds | Timing depends on familiarity |
| Cost | One sheet, usually under $0.25 | Specialty sheet, about $0.50-$3 | Prices vary by pack and region |
Use a square sheet with the colored side facing upward if you want the final flaps to show color. A two-sided sheet makes fold orientation easier to inspect, while very glossy paper can resist precise crease formation.
Step 1: Fold and Unfold the First Diagonal
Place the square like a diamond or a regular square, then bring one corner directly to the opposite corner. Align the edges before pressing from the center toward both ends, and unfold the sheet completely.
You will know it worked when one straight diagonal runs from corner to corner without a visible bend. A common mistake is creasing after the corners are only approximately aligned, which shifts every later intersection.
Step 2: Fold and Unfold the Opposite Diagonal
Bring the remaining two corners together, crease the second diagonal, and unfold. The sheet now shows a centered X formed by the two diagonal creases.
Check the center. Both diagonals should cross at one point, and each should divide the sheet into two equal halves. If the lines miss by more than the crease width, refold the sheet before continuing.
Step 3: Reverse the Sheet
Turn the paper over so the reverse side faces upward. This change of working surface helps produce the intended opposition between diagonal and center creases.
Do not skip the turn merely because the paper is thin. If every crease is made from the same side, the fold memory may not guide the collapse correctly, especially with stiff cardstock or heavily coated paper.
Step 4: Fold and Unfold the Horizontal Center
Bring the top edge to the bottom edge, align the corners, crease the midpoint line, and unfold. The horizontal crease should pass through the intersection of the two diagonals.
Crease outward from the center instead of grinding repeatedly across the center point. This reduces paper fatigue where four major folds already meet.
Step 5: Fold and Unfold the Vertical Center
Bring the left edge to the right edge, align all four corners, crease, and unfold. The paper now carries an X and a plus sign, with all five visible lines meeting at the center.
The success checkpoint is four equal outer corners and a central intersection that remains flat. A skewed plus sign usually indicates that one edge-to-edge fold was not aligned.
Step 6: Collapse and Flatten the Base
Place the sheet so the diagonal creases can rise and the center creases can sink. Push the left and right sides toward each other while guiding the top and bottom sections inward, then flatten the layers into a triangular packet.
Do not force one corner downward first. Let the existing creases fold as a group. You will know the collapse worked when the paper forms a stable triangle with paired flaps along its sides and no large open pocket trapped inside.
| Stage | Visible shape | Fold memory | Correct result |
|---|---|---|---|
| Diagonal precreases | Flat square | X pattern | Four equal triangles |
| Center precreases | Flat square | X plus plus sign | One central vertex |
| Initial collapse | Raised pyramid-like form | Opposing slopes | Four sectors rotate inward |
| Partial flattening | Uneven triangle | Layer nesting begins | Flaps align in pairs |
| Finished base | Compact triangle | Mountain and valley set | No major bulges |
| Ready for model | Four flap groups | Stable packet | Corners remain accessible |
Which Paper Works Best?
Kami is the most forgiving paper for learning the waterbomb base because its 60-80 gsm thickness accepts repeated creases without becoming excessively rigid. A 15 cm sheet gives enough surface for beginner hands, while a 7.5 cm sheet is more difficult because small alignment errors become proportionally significant.
Tant, washi, tissue foil, and other specialty papers suit display models when the design requires stronger shaping or thinner accumulated layers. Their behavior differs substantially: washi often has long fibers and good tear resistance, while tissue foil can hold a sharp crease but may crush at the central intersection.
| Paper type | Typical weight | Approximate price per sheet | Best use |
|---|---|---|---|
| Kami | 60-80 gsm | $0.05-$0.25 | Beginner practice |
| Tant | 70-90 gsm | $0.20-$0.60 | Colored display models |
| Washi | 40-80 gsm | $0.50-$3.00 | Durable complex models |
| Tissue foil | 20-50 gsm equivalent | $0.30-$2.00 | Many-layer insects |
| Copy paper | 75-90 gsm | $0.02-$0.10 | Large practice sheets |
| Cardstock | 120-200 gsm | $0.05-$0.40 | Usually poor for small bases |
Paper grain can influence the collapse in larger or fibrous sheets. If one diagonal resists, rotate the paper 90 degrees and test again; the direction of greatest stiffness may be interfering with the center folds.
What Models Use the Waterbomb Base?
The waterbomb base is especially useful when a model needs broad, equal flaps arranged around a central region. The traditional waterbomb uses the flaps to create an inflatable hollow form, while the traditional frog uses later squash and reverse folds to build legs and a body.
| Model or category | Base use | Typical next operation | Suitable paper size |
|---|---|---|---|
| Waterbomb balloon | Hollow body panels | Inflation and shaping | 15-20 cm |
| Traditional frog | Body and leg allocation | Squash folds | 15-20 cm |
| Simple crab | Broad side flaps | Reverse folds | 20 cm |
| Butterfly variation | Wing placement | Petal or reverse folds | 15 cm |
| Insect design | Limb and body planning | Multiple sinks | 25-40 cm |
| Modular geometry | Repeated triangular units | Assembly | 7.5-15 cm |
The base is less suitable when a model needs one long narrow neck, a tall central axis, or four clean corners radiating from a square. Those requirements often point toward a preliminary base or another starting structure.
A base does not determine the entire model. Designers may hide, reverse, split, or reshape its flaps, so the same foundation can support radically different silhouettes.
What Are the Main Waterbomb Base Variations?
The standard waterbomb base has a centered intersection and four principal flap regions. Advanced folders modify the crease pattern or add preliminary folds to change flap length, count, symmetry, or thickness.
Blintzed Waterbomb Base
A blintzed waterbomb base begins with a blintz fold, in which all four corners move toward the center, before the waterbomb structure is formed. The result adds internal divisions and can provide more usable flap regions for insects, flowers, and multi-limbed designs.
The cost is thickness. Multiple layers gather at the center, so thin, strong paper is usually preferable. A beginner should learn the standard base first because the blintzed version makes alignment and collapse substantially less forgiving.
Offset or Asymmetric Waterbomb Base
An offset waterbomb base moves the central intersection away from the geometric center. Unequal sectors then create flaps with different lengths, which can model a long tail, narrow head, or asymmetrical wing.
This is a design strategy rather than a beginner variation. The shifted origin must be calculated or marked carefully, because a one-millimeter error on a small sheet can produce a visibly crooked model.
Reverse-Orientation Waterbomb
Opening the base and reversing the mountain and valley relationships produces a different collapse behavior. Folders sometimes use the term “reverse waterbomb” for related arrangements, but terminology varies between diagram authors.
Do not assume that every square foundation is a preliminary base simply because it is an inside-out version. The preliminary base has its own conventional crease arrangement and square or diamond appearance.
| Variation | Center position | Finished tendency | Main benefit | Main limitation |
|---|---|---|---|---|
| Standard waterbomb | Geometric center | Triangular packet | Fast, symmetrical foundation | Limited flap length control |
| Blintzed waterbomb | Center after blintz | Layer-rich packet | More appendage planning | High central thickness |
| Offset waterbomb | Deliberately shifted | Unequal flaps | Asymmetric anatomy | Difficult measurement |
| Reverse orientation | Same or modified center | Opposite layer arrangement | Alternate shaping paths | Terminology varies |
| Preliminary base | Geometric center | Square or diamond packet | Tall, four-corner layouts | Different collapse logic |
Waterbomb Base Versus Preliminary Base
The waterbomb base is the better choice for triangular, wide, or inflatable models, while the preliminary base is the better choice when four corners need to extend from a square or diamond foundation. The two bases can look related because both use center and diagonal geometry, but their collapsed forms and later fold sequences differ.
| Decision factor | Waterbomb base | Preliminary base | Practical consequence |
|---|---|---|---|
| Collapsed outline | Triangle | Square or diamond | Determines initial silhouette |
| Main flap arrangement | Four triangular sectors | Four corner regions | Changes limb placement |
| Common model path | Balloon, frog, crab | Crane, flower, box forms | Base choice follows anatomy |
| Best visual width | Wide and low | Tall and balanced | Supports different proportions |
| Layer direction | Diagonals typically mountain | Reversed relationship in common diagrams | Collapse feels different |
| Beginner recognition | Clear triangular packet | Square packet | Shape provides fast diagnosis |
A preliminary base is not a universal replacement for the waterbomb base. Reversing a finished waterbomb can demonstrate related fold mechanics, but it does not automatically reproduce every preliminary-base crease assignment.
How Long Does Folding Take, and What Does It Cost?
A single practice waterbomb base usually costs less than $0.25 with kami or copy paper and takes 1-3 minutes for a beginner. Specialty paper commonly costs $0.30-$3 per sheet, while a practiced folder can precrease and collapse a standard base in 15-45 seconds.
These figures are typical working ranges, not fixed industry prices. Pack size, country, paper brand, and handmade fiber content alter the cost considerably.
| Scenario | Paper example | Typical time | Typical material cost |
|---|---|---|---|
| First practice attempt | 20 cm copy paper | 3-8 minutes | $0.02-$0.10 |
| Beginner with kami | 15 cm kami | 1-3 minutes | $0.05-$0.25 |
| Experienced folder | 15 cm kami | 15-45 seconds | $0.05-$0.25 |
| Display model | 20 cm Tant | 2-5 minutes | $0.20-$0.60 |
| Complex insect preparation | 30 cm tissue foil | 5-12 minutes | $0.50-$2.00 |
| Classroom session | 15 cm bulk kami | 2-4 minutes | $0.03-$0.15 |
The base itself preserves the square’s full area because it uses folding rather than cutting. That does not mean every later model uses every region visibly; designers may hide or compress paper during subsequent folds.
Why Does the Base Fail to Collapse?
A waterbomb base usually fails to collapse because the crease directions, center alignment, or paper stiffness prevent the diagonal and center folds from nesting. The fastest remedy is to reopen the sheet, inspect the central intersection, and reinforce each crease in the intended direction rather than applying more force to the final packet.
Paper stays flat
If the paper refuses to buckle, check whether the diagonals and center lines were made from the correct sides. Turn the sheet over and gently pinch opposite side edges together; forcing the apex first often creates a random fold instead of the intended collapse.
One flap is longer
Unequal flaps usually come from a non-square sheet or corners that missed during the first two folds. Measure the paper diagonally if necessary; two equal side lengths do not guarantee a perfect square.
The center tears
A torn center indicates excessive pressure, brittle paper, or repeated correction at the same vertex. Use a larger 20 cm sheet, switch to kami or thin washi, and crease from the center toward the edges only once.
Layers twist
Twisting often occurs when one side collapses before the other. Open the last stage, place both hands symmetrically on the left and right edges, and guide the two sides inward at the same rate.
The triangle will not flatten
A trapped pocket or reversed crease can hold the packet open. Lift each flap separately, identify the valley that should sink, and flatten one sector at a time without changing the central vertex.
What Advanced Folders Should Watch?
The most important practitioner rule is to precrease accurately but avoid polishing the center excessively. Four major crease families meet there, so repeated hard rubbing can weaken the fibers before the model even begins.
A second rule concerns scale. A 7.5 cm sheet magnifies a 1 mm alignment error far more than a 25 cm sheet, so beginners should practice large before moving to miniature formats.
A third rule is to distinguish crease memory from visible color. On two-color paper, the mountain-valley pattern may appear reversed after flipping the sheet, but the physical fold direction has not changed. Read the model’s orientation, not only the color.
The waterbomb base is not ideal for every project. It does not provide a ready-made long neck, a precise four-point square arrangement, or unlimited appendage length, and complex variants can accumulate too many layers for ordinary 80 gsm paper.
FAQ
Is the waterbomb base the same as the balloon base?
Yes. “Waterbomb base” and “balloon base” commonly refer to the same triangular origami foundation. The balloon name comes from the traditional inflatable waterbomb model, whose finished form expands into a hollow paper shape.
Can I make a waterbomb base from rectangular paper?
Not reliably without first creating a square. A rectangle changes the diagonal intersections and produces unequal sectors, so use a ruler and trim the sheet or fold and remove the excess before making the base.
Which side of two-color paper should face up?
Place the color you want visible on the finished model according to the diagram’s orientation, then turn the sheet when making the center creases if required. The flip controls fold memory, while the chosen starting side controls which color appears on particular layers.
Is the waterbomb base difficult for children?
Most children aged eight and above can learn it with a 15-20 cm kami sheet and close alignment guidance. The collapse is the hardest part, so an adult should demonstrate the inward side pressure rather than pushing down on a single corner.
How do I turn the base into a waterbomb?
Begin with the completed triangular base, open the appropriate flaps according to a waterbomb diagram, and inflate the central pocket gently. A sharp precrease and thin paper make inflation easier, while thick cardstock can split at the opening.
What should I fold after mastering this base?
Try the traditional waterbomb first, then a simple frog or crab. Those models reveal how the base’s four flap groups become body sections, legs, or side structures before you attempt a blintzed or offset design.
The Bottom Line
The origami waterbomb base explained in practical terms is a centered, triangular, four-flap foundation controlled by an X-and-plus crease pattern. Accurate diagonals, correctly opposed mountain and valley folds, and gentle symmetrical collapse matter more than speed. Start with a 15 cm kami square, then use the base for balloons, frogs, crabs, insects, and flowers before exploring blintzed or offset variations.
