
")
Ever stared at a sticky note during a boring meeting and thought, “This could be something more”?
Maybe a flower. Maybe a rose. Maybe something that lasts.
Well, this is your sign.
Today, I’m walking you through how to make a simple Sticky Note rose step by step.
It’s not just paper folding—it’s paper magic.
Stay with me.
You’re about to learn how to fold something beautiful from something ordinary.
What Are We Making?
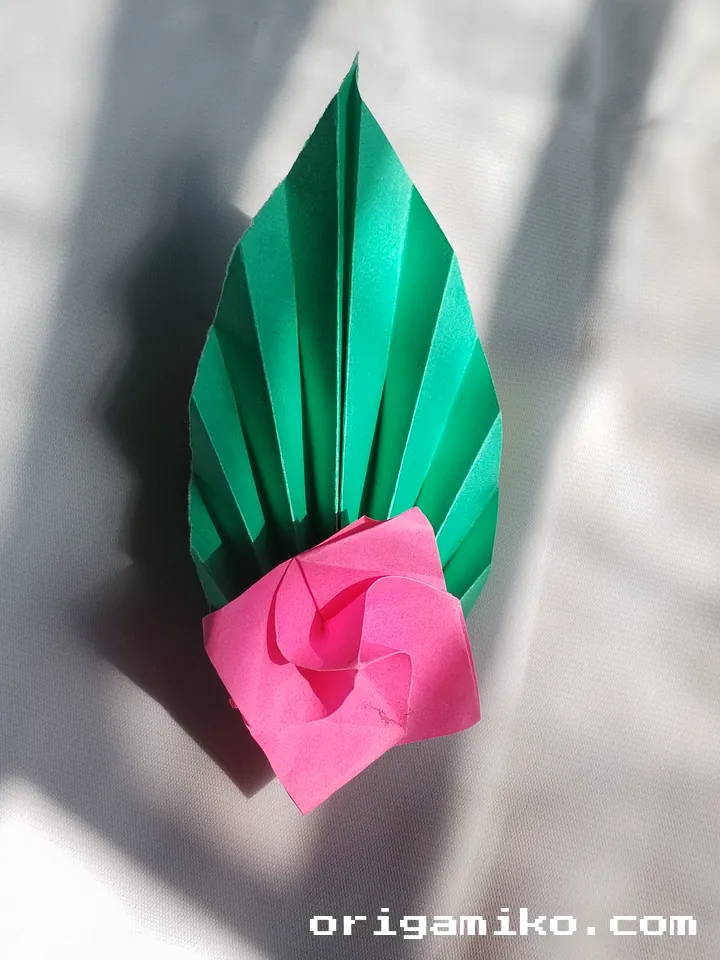
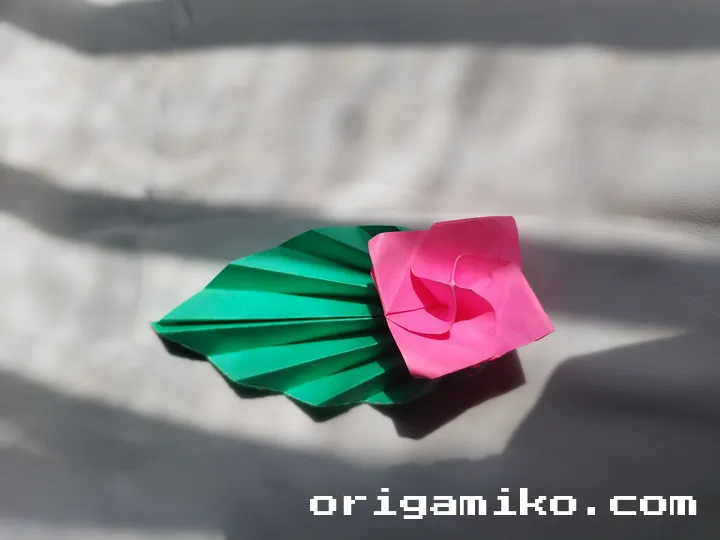
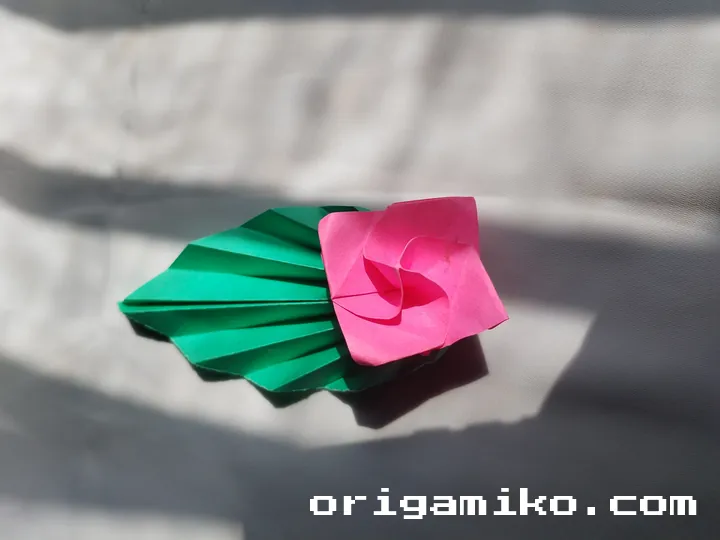
We’re making an Origami Sticky Note rose. And yes—it’s exactly what it sounds like. A delicate, spiral rose created from that everyday square piece of sticky paper. It’s surprisingly easy once you know the folds, and the final result? Kinda stunning.
Think of it like turning fast food into fine dining.
You’re taking a simple note and crafting it into a mini sculpture.
No glue. No scissors. Just folding.
Whether you’re a seasoned origami fan or someone who’s never folded more than a paper airplane, this one’s for you.
Key Terms to Know
Here’s a quick breakdown of a few terms you’ll hear me use:
- Valley Fold: The paper bends towards you, like a V.
- Mountain Fold: The paper bends away from you, like a peak.
- Crease Line: The visible fold line after bending the paper.
- Base: The starting shape you fold everything from.
- Twist Fold: A move where you rotate the paper as you collapse it.
You don’t need to memorize these. I’ll guide you step by step.
Materials Needed
You don’t need a craft closet full of supplies. Here’s what you need for this easy Origami Sticky Note rose:
| Item | Description | Why You Need It |
|---|---|---|
| Sticky Note | Standard 3×3 inches, square-shaped | It’s the star of the show |
| Flat Surface | Clean and smooth | Makes precise folding easier |
| Patience | Optional but recommended | For smoother, cleaner folds |
| Good Lighting | Natural or bright lamp | Helps spot crease lines |
That’s it. Seriously. No tape, no glue. Just the note and your hands.
Step-by-Step Instructions
I’ll break it down clearly so you can follow along without any confusion. Ready?
Step 1: Take a Sticky Note

Grab a sticky note. Make sure the sticky edge is at the top. This helps later during twisting.
Step 2: Fold the Corner
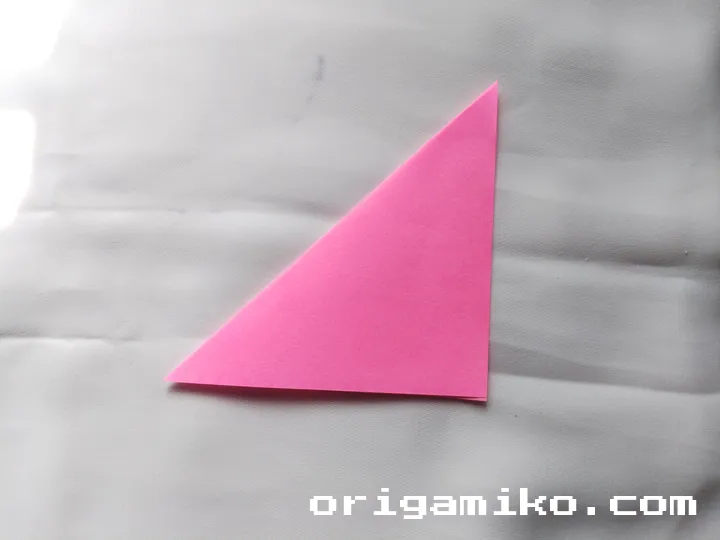
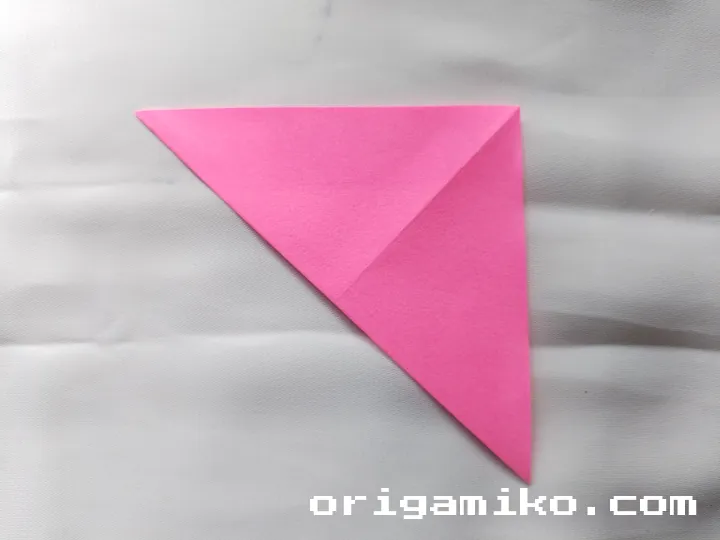
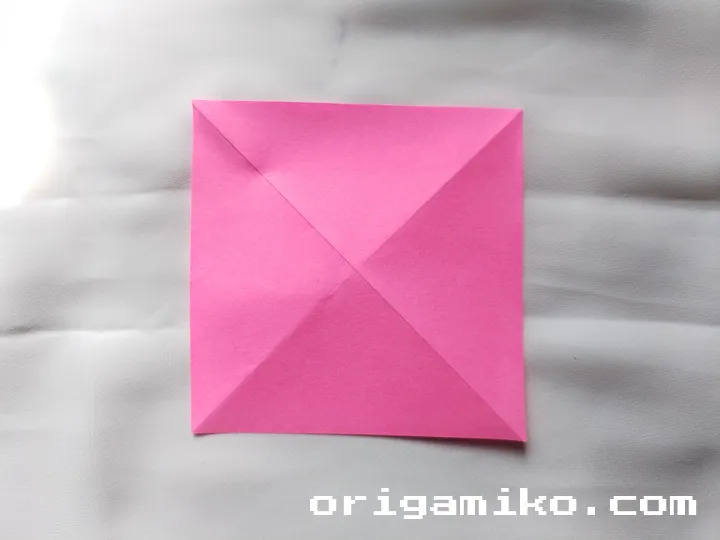
Fold one corner diagonally to the opposite side.
Crease it well, then unfold.
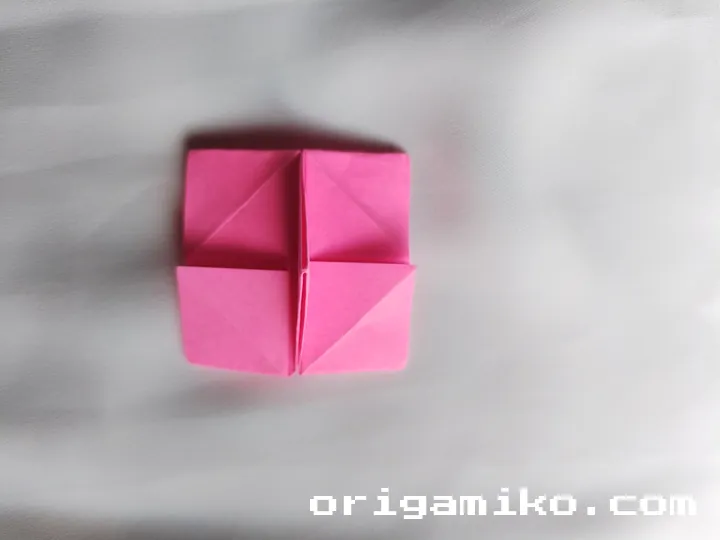
Flip the paper over and fold it in half vertically.
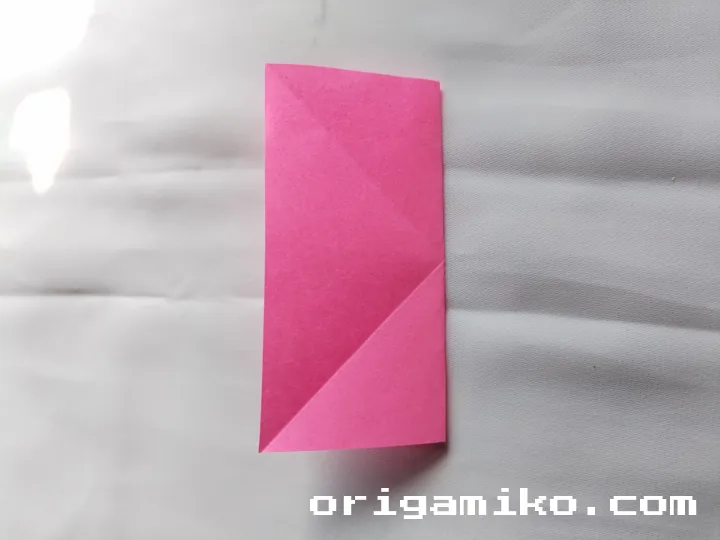
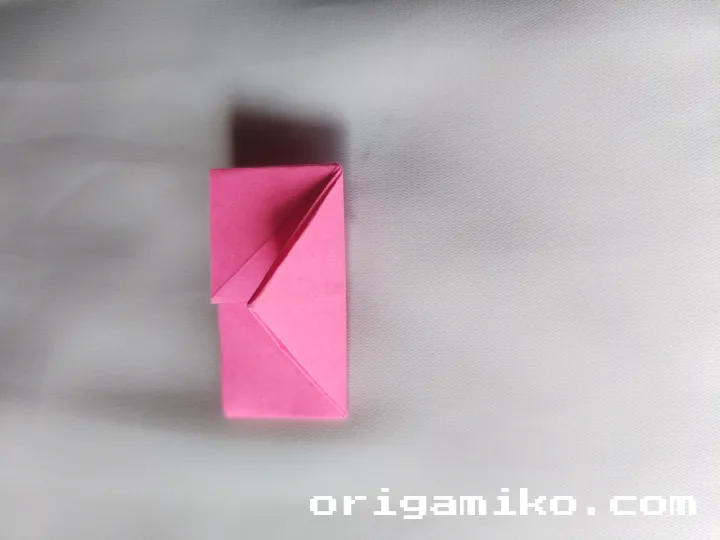
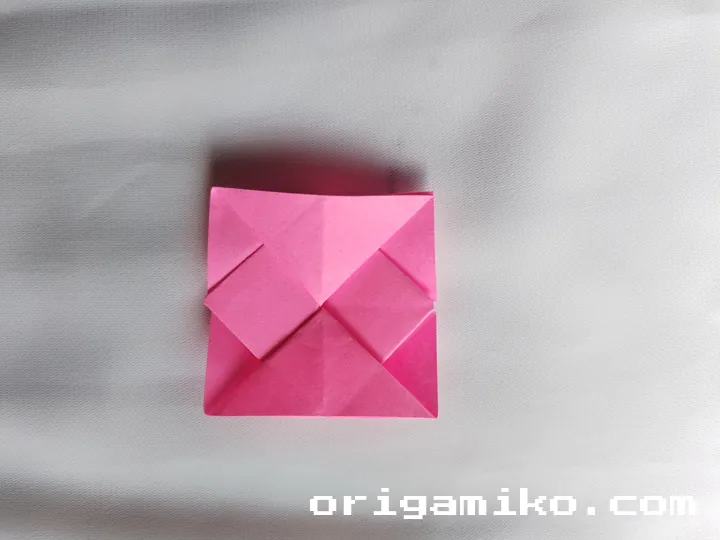
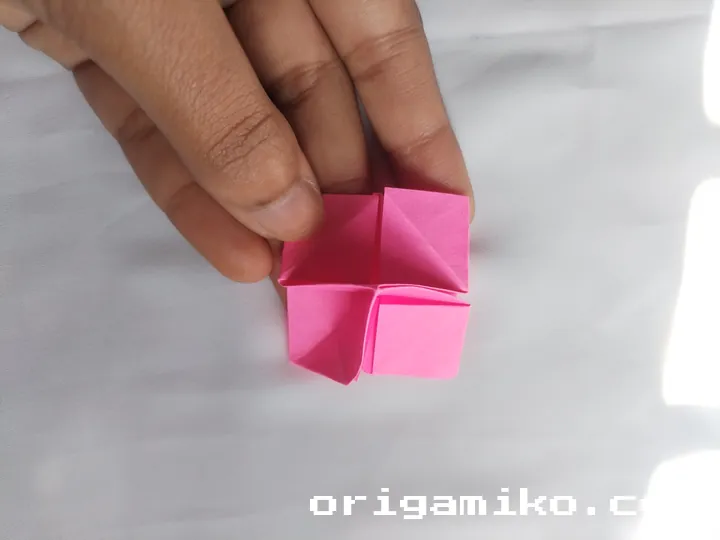
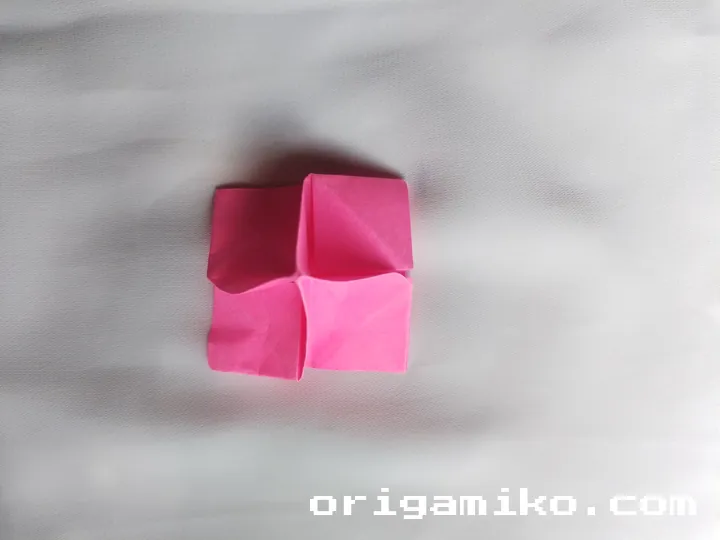
Step 3: Form the Base

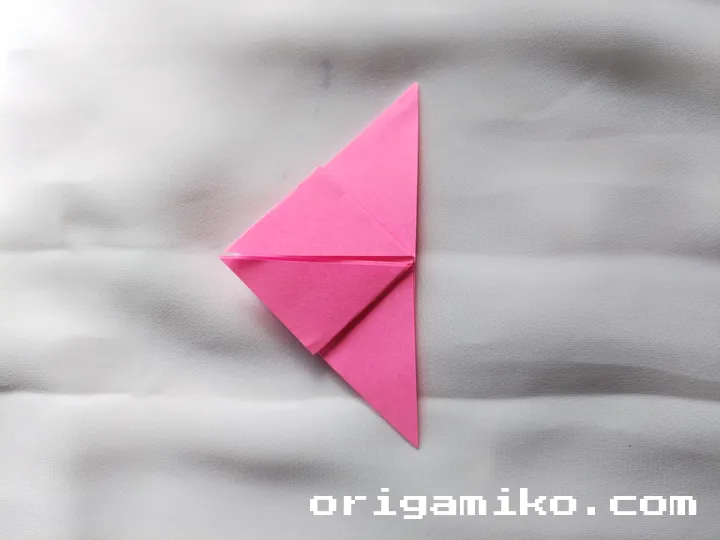
This part looks tricky but you’ve got this.
Fold it again as shown in tutorials (you can peek at photos online if needed).
You’re bringing two corners together, tucking them in between the layers, and creasing.
Basically, you’re shaping the base of the rose. It’ll look like a little triangle pouch.
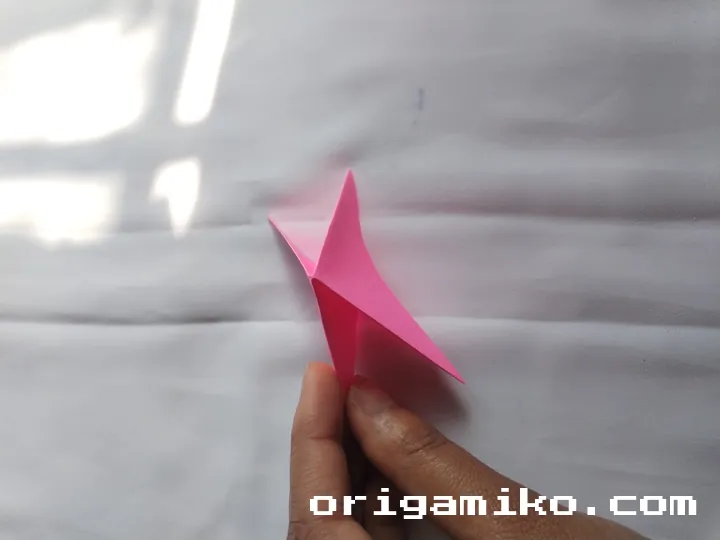
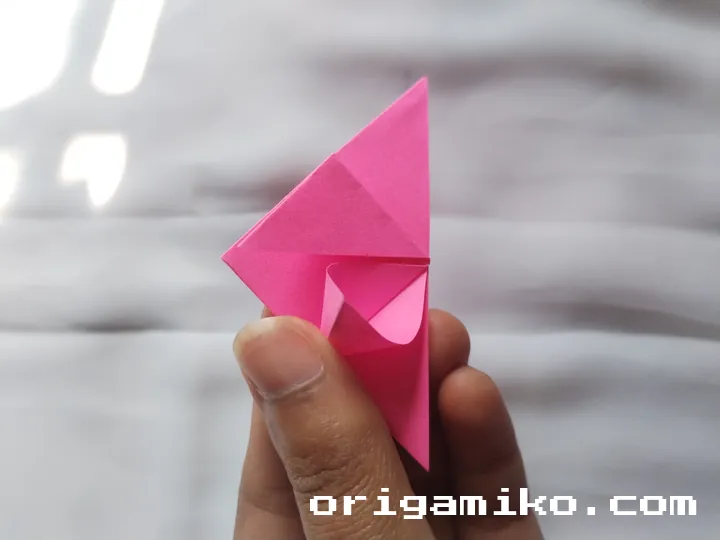
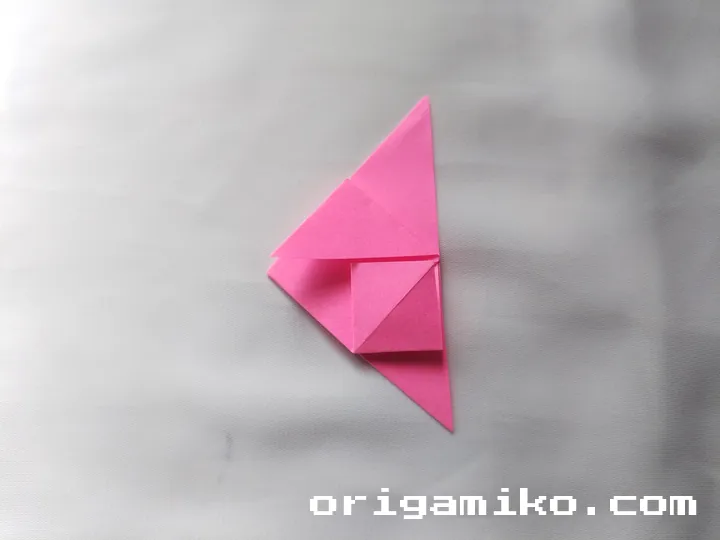
Step 4: Twist and Open
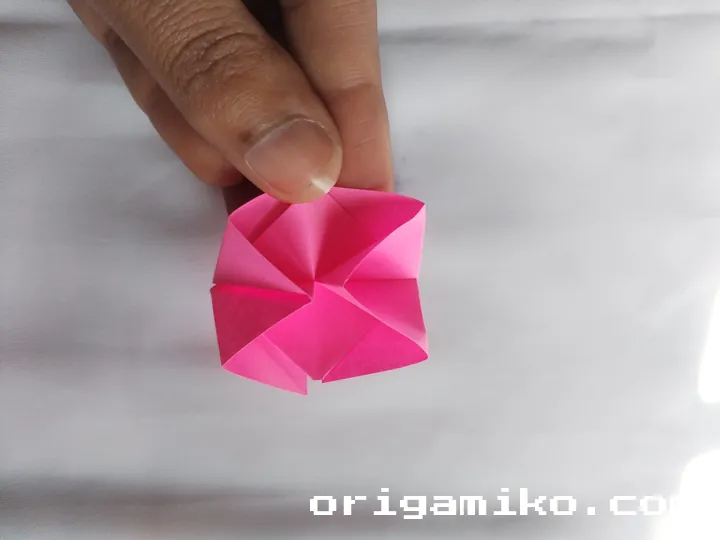
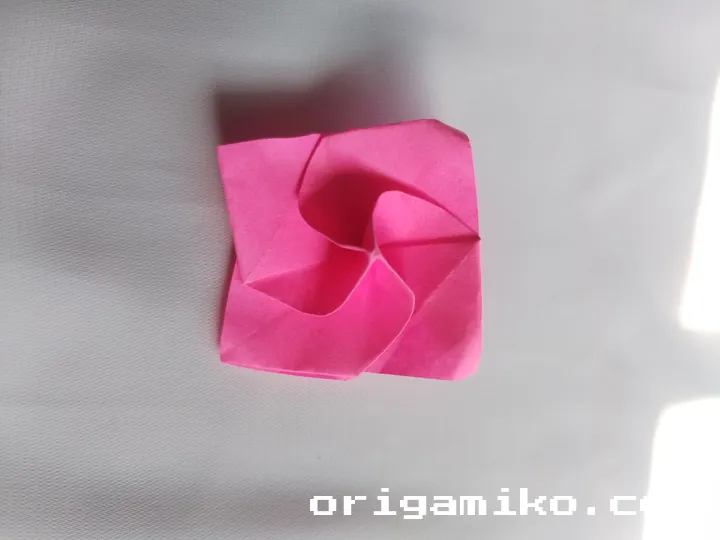
Fold the bottom point upward.
Then gently open the folded triangle from the inside.
Twist the upper part slightly—it’ll start to spiral.
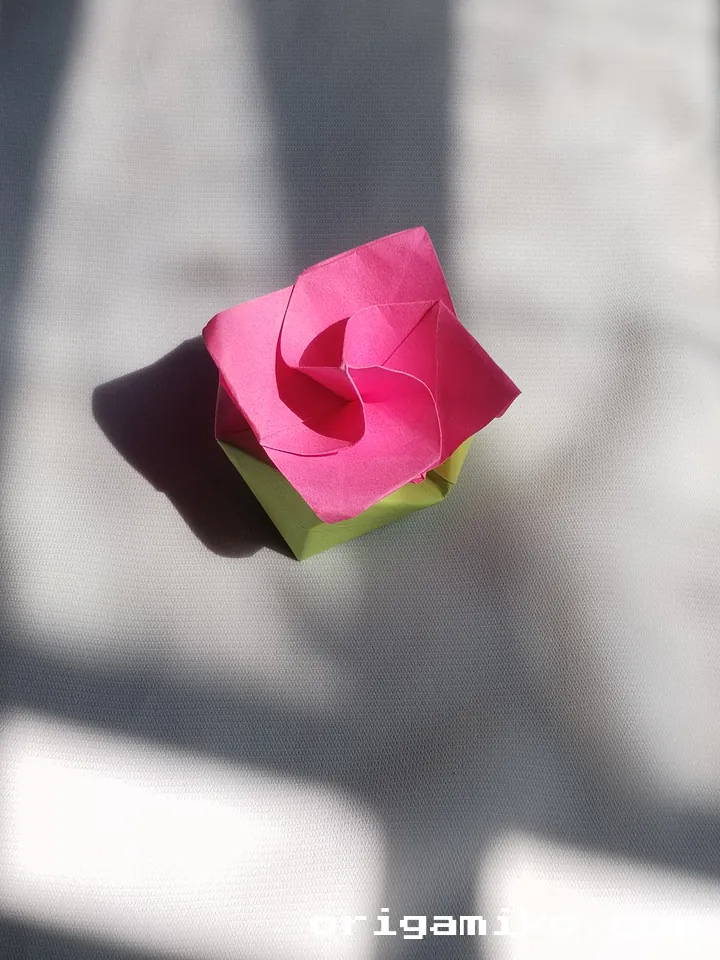
Here’s where the magic happens. Suddenly it’s not a square anymore. It’s a bud.
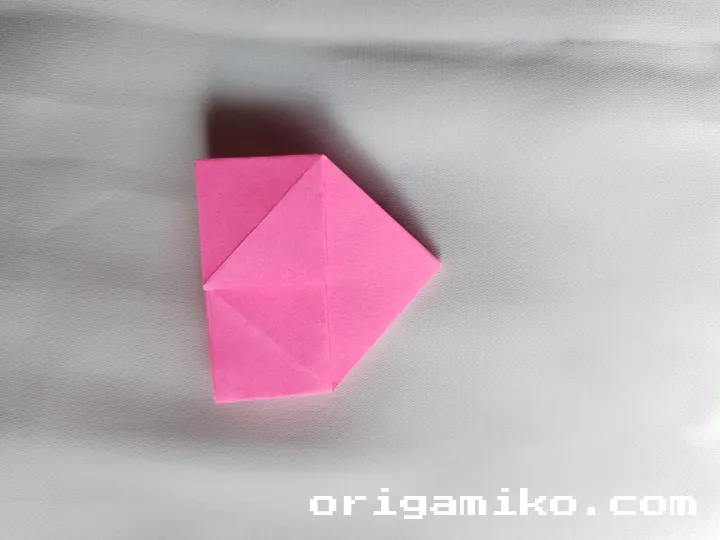
Step 5: Admire Your Rose
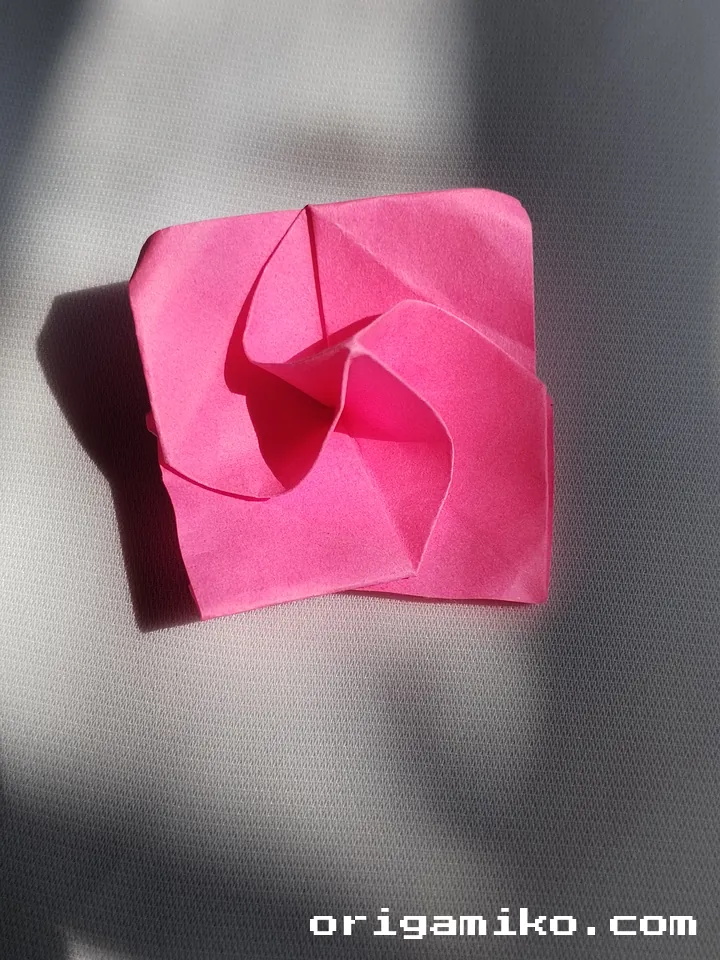
That’s it. You’ve made an Origami Sticky Note rose.
Give it a gentle twist to tighten the spiral. Adjust the petals if you want more bloom.
Isn’t it kind of amazing?
Tips for Success
I’ve made more of these than I can count, and here’s what I’ve learned:
- Use a new sticky note. Old ones curl or peel weirdly.
- Don’t rush the folds. Take it slow for crisp lines.
- Flatten folds with a fingernail. This helps them hold better.
- Practice with plain paper. Once you get the hang of it, try again with a sticky note.
Think of folding like drawing—practice sharpens the outcome.
Common Mistakes (And How to Avoid Them)
Even the best folders mess up sometimes. Here’s what usually goes wrong:
- Twisting too hard
Fix: Be gentle. It’s a rose, not a pretzel. - Sticky edge gets in the way
Fix: Start with the sticky side up and fold downward. - Petals look flat or boxy
Fix: Open the folds softly and shape with your fingertips. - Paper rips
Fix: Don’t over-crease. Smooth once, then move on.
If it doesn’t work the first time, try again. That’s part of the fun.
Similar Variations to Try
Once you master the rose, try branching out. Here are a few cool offshoots:
- Origami Tulip from Sticky Note
Slightly different folds, more pointed petals. - Mini Origami Lotus
Great as a desk decoration. - Origami Heart Note
Perfect for love notes or journal entries.
Each one builds on the same basic paper-folding skills. Keep exploring.
FAQs
Q: Can I use different sizes of sticky notes?
A: Yes! But the standard 3×3 works best for balance and foldability.
Q: How long does it take to learn?
A: Your first one might take 5–10 minutes. After that? Under 3 minutes.
Q: Is this good for kids?
A: Definitely. Ages 8 and up can do this with a little help.
Q: Why is my rose too tight?
A: Loosen the twist at the end and fluff the petals gently.
Q: Do I need origami paper?
A: Nope! That’s the fun part—it’s a simple sticky note rose.
Final Thoughts
You’ve just turned a boring office supply into something beautiful.
And now you know how to make Sticky Note rose Origami that’s fun, simple, and share-worthy.
Give it a try. Teach a friend. Leave one on someone’s desk.
It’s a small way to add something unexpected to an ordinary day.
Remember—origami isn’t about perfection.
It’s about the process. And today, you folded something wonderful.
Start with a sticky note. End with a rose. That’s the magic of an easy Origami Sticky Note rose.