

Have you ever wished for a tiny tree to sprout right from your desk?
Imagine creating something beautiful and enchanting using nothing more than a simple sticky note.
Today, I’m going to show you how to fold a whimsical Origami Sticky Note Tree — no special tools needed!
Whether you’re a beginner wondering if you have the skills, or a seasoned paper-folding artist hunting for a charming new project, you’re exactly where you need to be. In this guide, we’ll walk through each step slowly, carefully, and with a lot of encouragement. You’ll discover the joy of turning an everyday sticky note into a miniature paper tree — a true conversation starter and desk companion!
Let’s begin this rewarding journey together — one fold at a time.
What You’ll Need
- 1 sticky note (standard size like 3×3 inches works great)
- A flat surface
- Scissors (for a small cut — but don’t worry, it’s minimal!)
- A little patience and a sense of wonder
That’s it. Seriously! No fancy paper, no origami toolkit, no complicated measurements. The magic lives in the folds.
Why Use a Sticky Note?
You might be wondering, why sticky notes?
Sticky notes are thin, square, and already have a light adhesive on one side — making them perfect for folding and crafting. Plus, their pastel colors give your finished Origami Sticky Note Tree a delightful look without needing to paint or color anything afterward.
Ready? Grab your sticky note, and let’s jump in!
Step-by-Step Guide to Making an Origami Sticky Note Tree
Step 1: Take a Sticky Note

Peel one sticky note carefully from the pad.
Try to keep it as flat as possible — avoid curling the edges too much.
Place it sticky side down on your surface, so it doesn’t interfere with your folds.
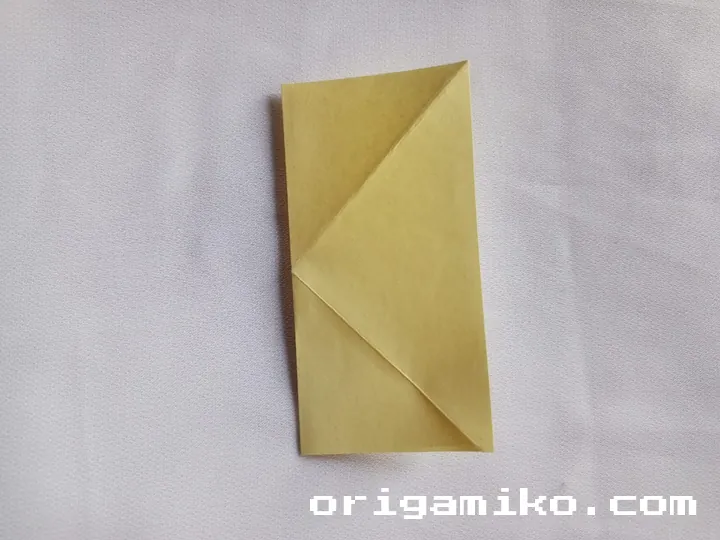
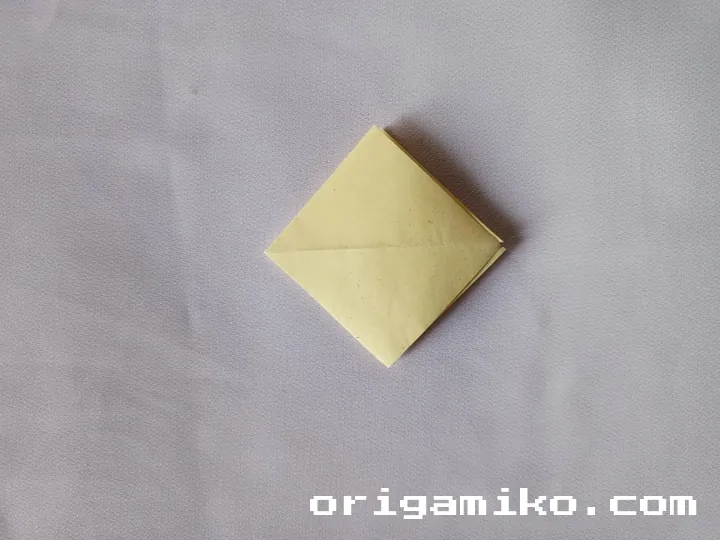
Step 2: Fold and Unfold the Corners
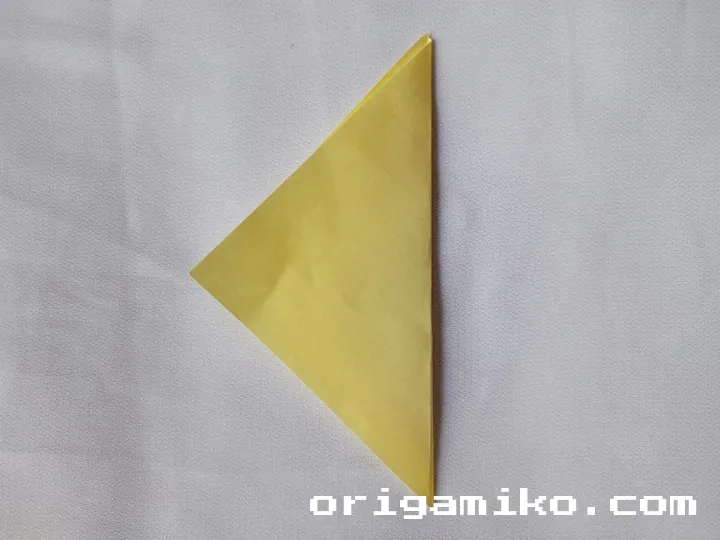
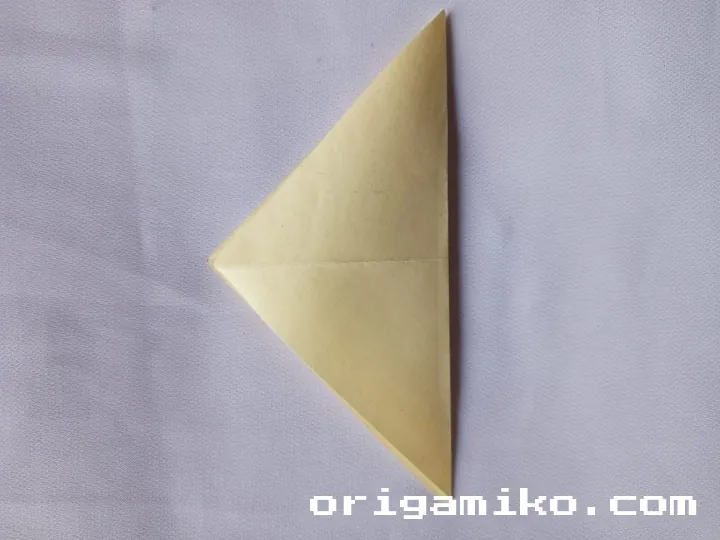

Now, take the top left corner and fold it neatly to meet the bottom right corner.
Crease it well, then unfold.
Repeat this with the other two corners — fold the top right corner down to the bottom left corner, crease, and unfold.
What you’re doing is setting up helpful crease lines. These folds guide the rest of the structure like invisible blueprints.
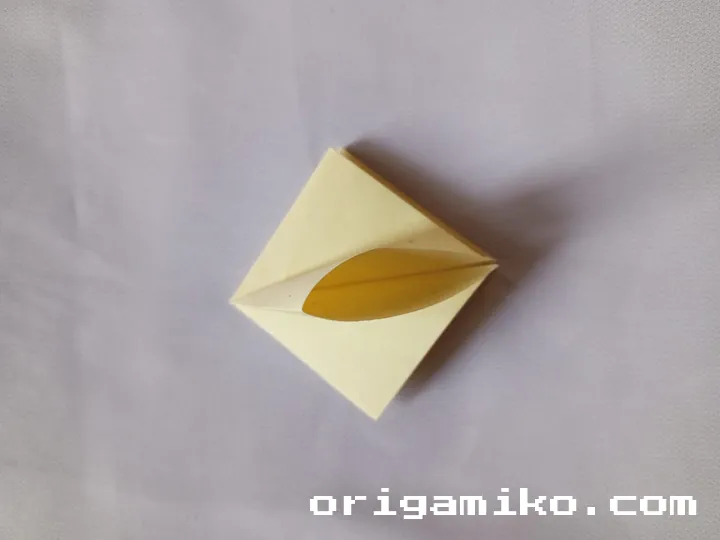
Step 3: Fold Vertically, Horizontally, and Unfold
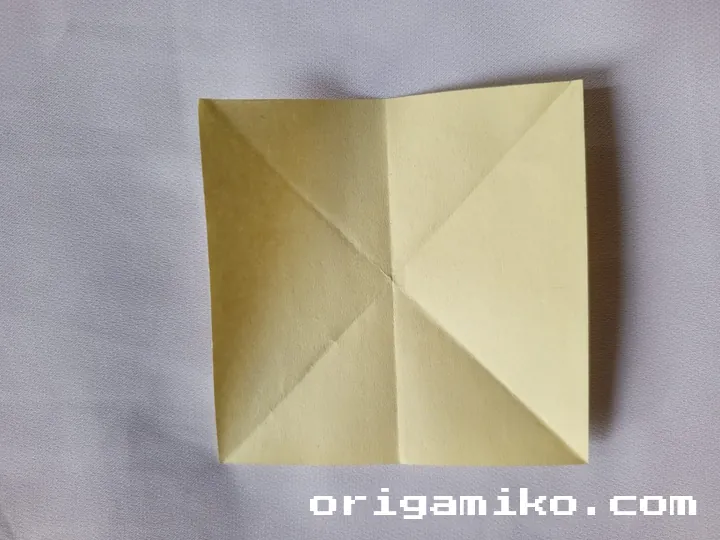

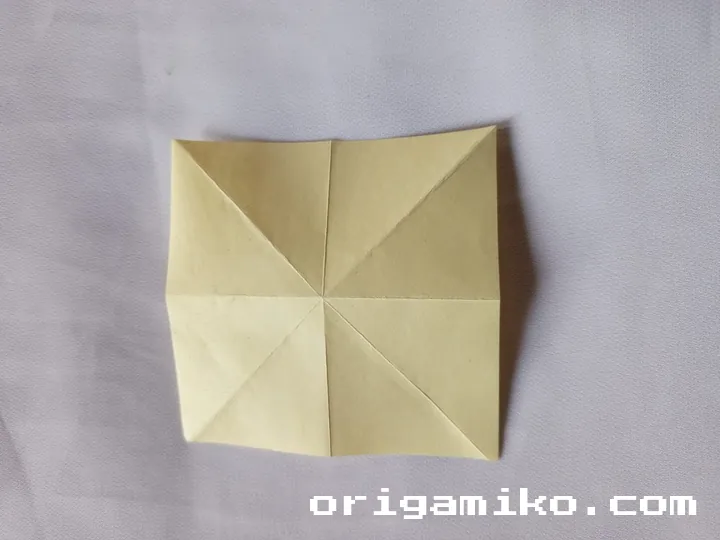
Next, fold the sticky note vertically — bring the left side over to the right side.
Make a sharp crease, then open it up again.
Now, fold it horizontally — fold the top edge down to meet the bottom edge, crease, and unfold.
At this point, your sticky note should be crisscrossed with creases, like a soft star at the center.
Step 4: Fold from Two Sides and Collapse Inward
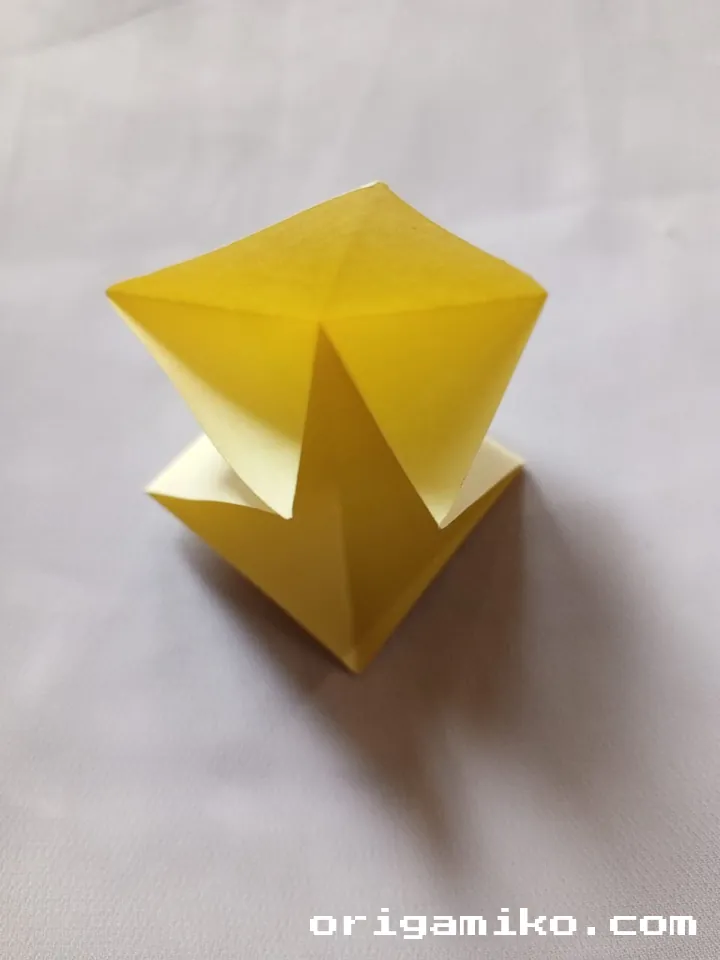
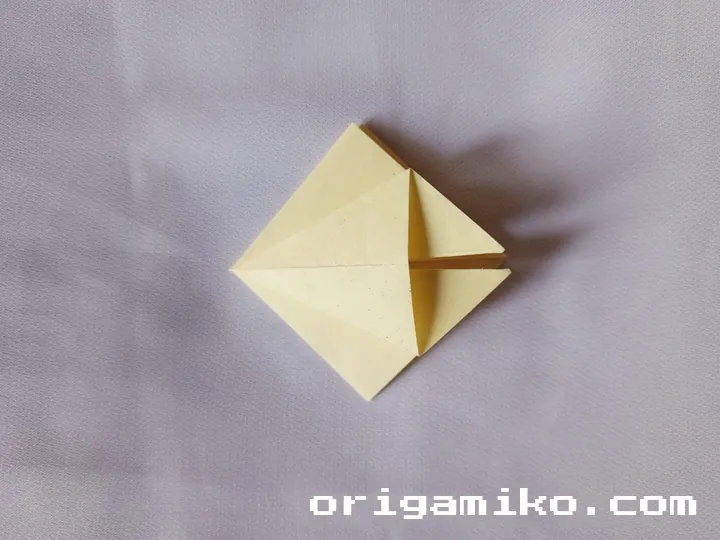

Here’s where the magic really begins.
Hold the sticky note with one hand on each side.
Gently push in from the left and right edges, using the crease lines to guide the paper inward.
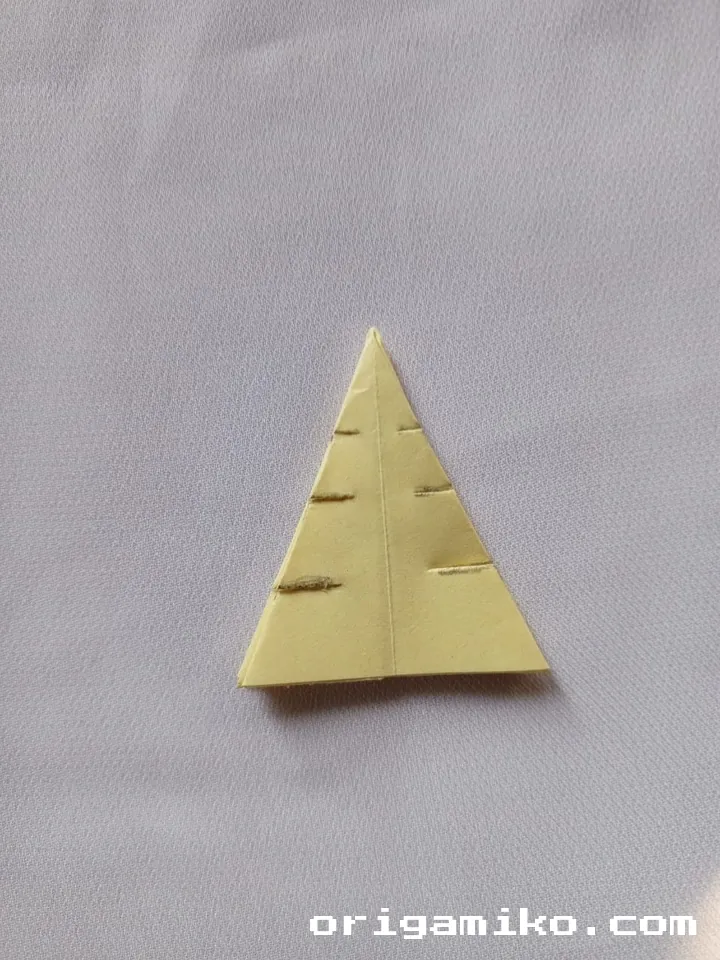
You’ll notice that the sticky note naturally wants to collapse into a smaller, layered square (sometimes called a “waterbomb base” in origami).
Smooth everything neatly.
Important: Trim off the small bottom tip if it sticks out — just a tiny snip with scissors. This ensures your tree stands properly later!
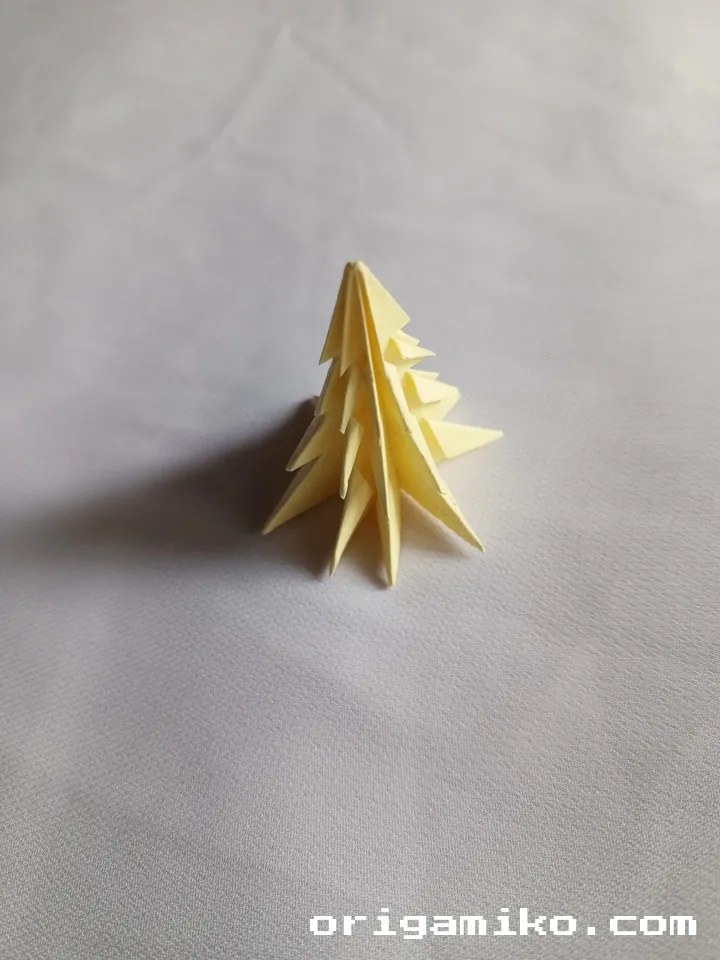
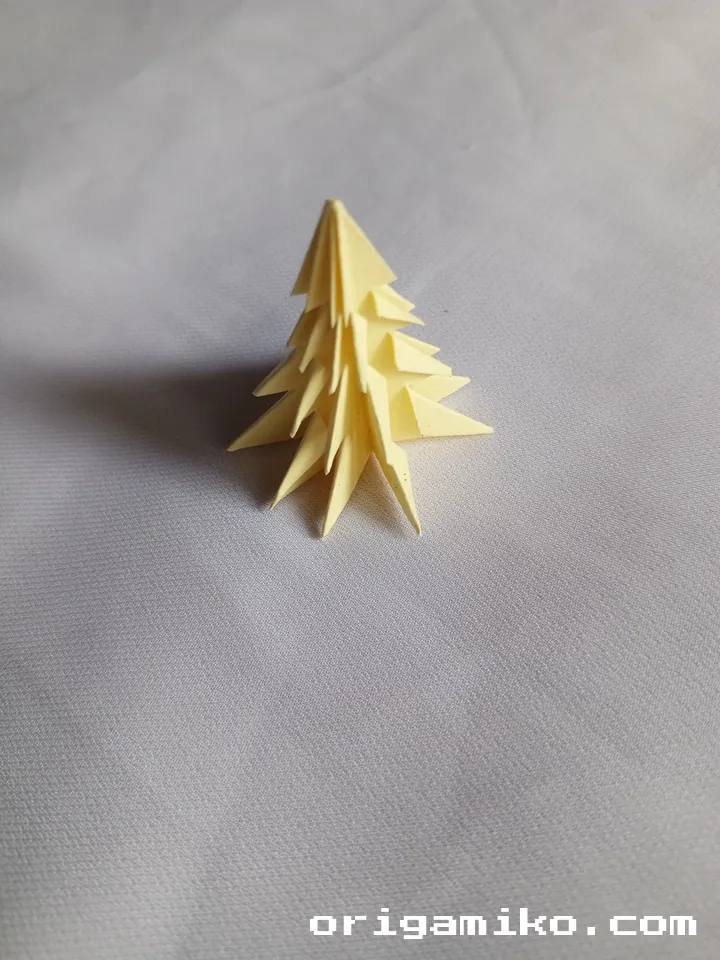
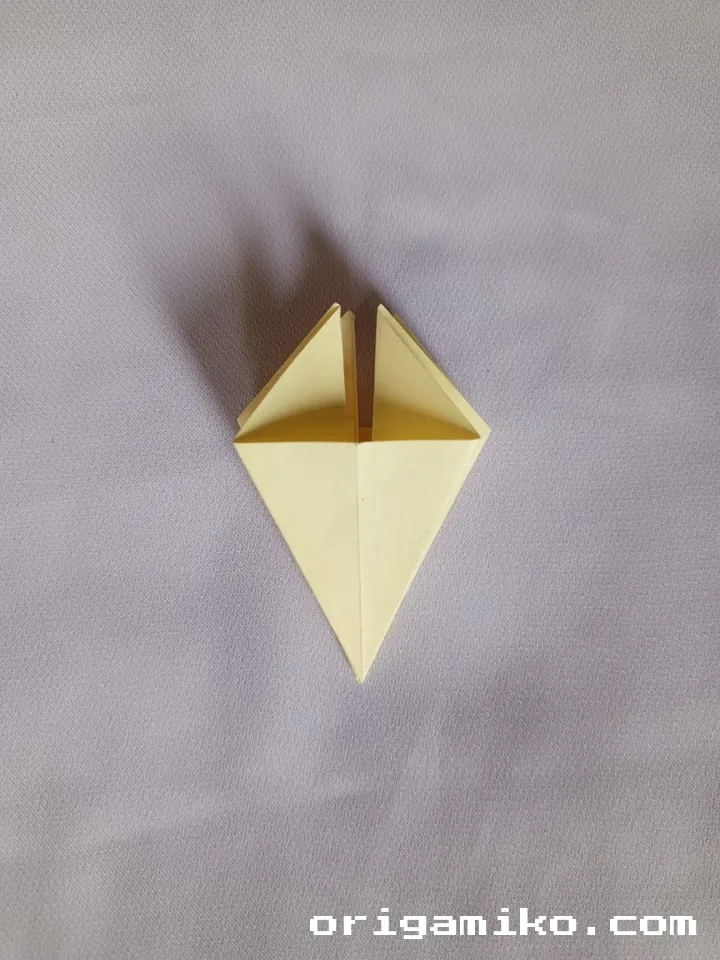
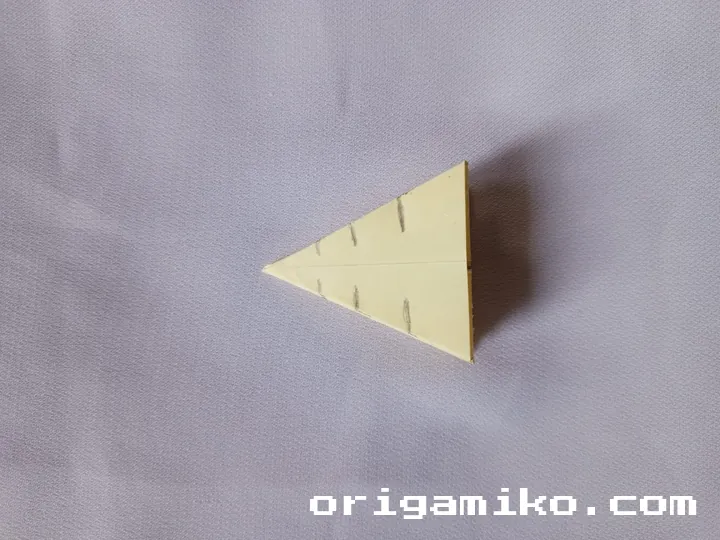
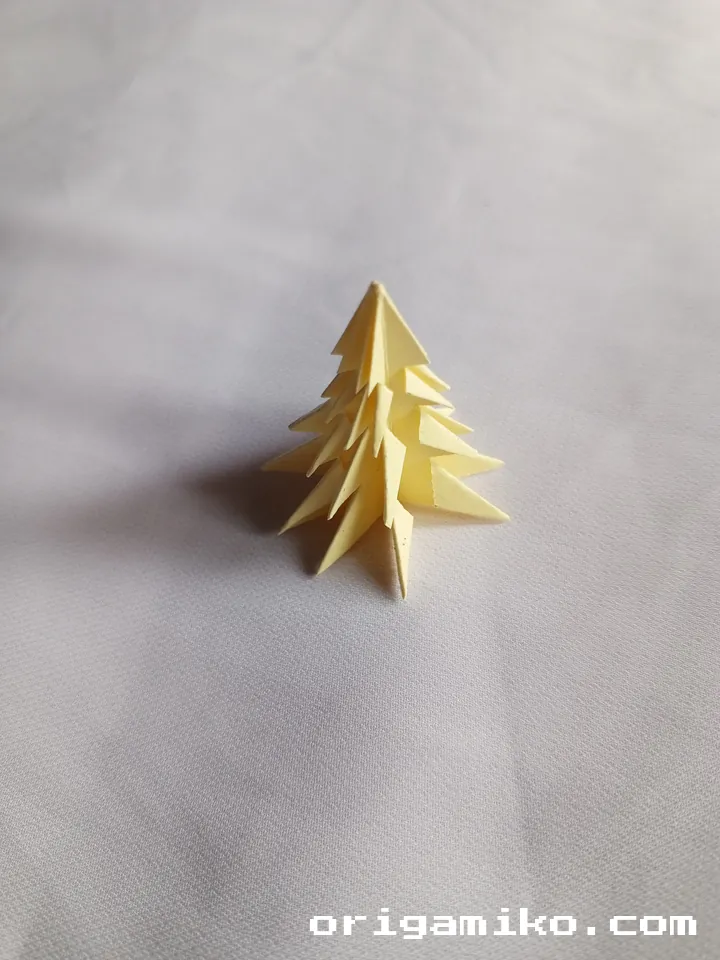
Step 5: Shape the Tree
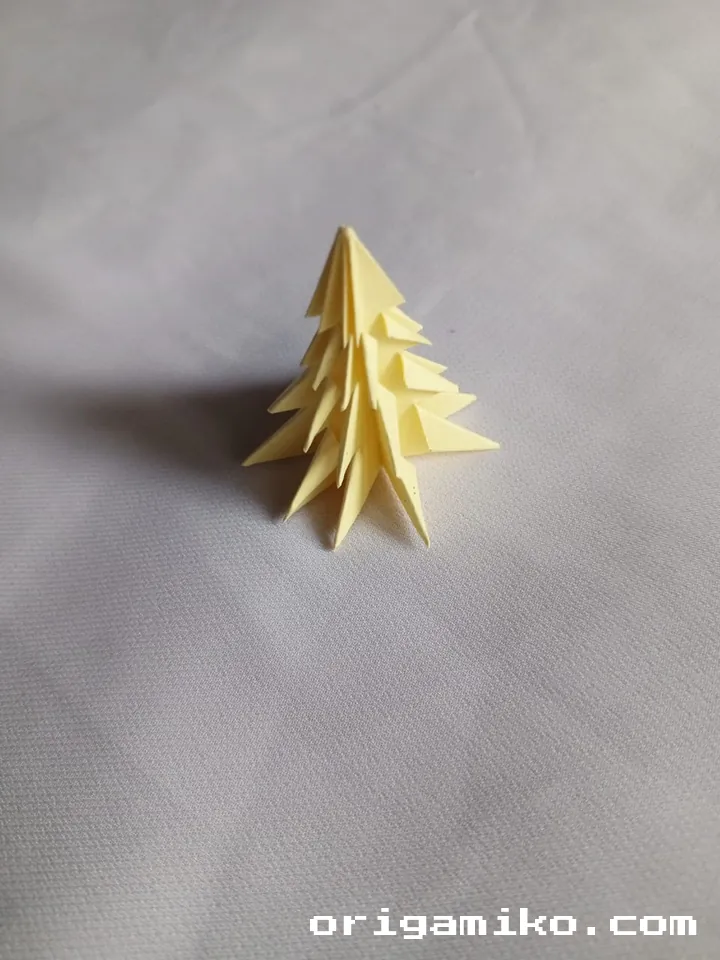
Now, look at your layered square.
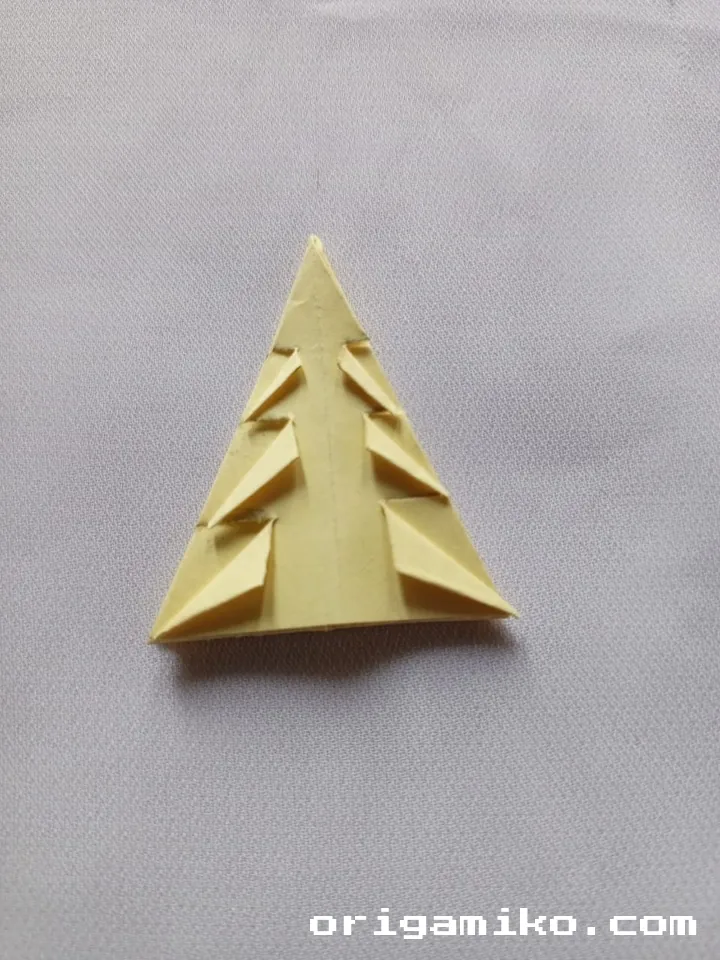
On two adjacent sides, you’re going to make small cuts along the folds — about halfway into the paper (you’ll notice natural “flaps” forming).
After cutting, gently fold these small flaps outward to create a “branchy” effect.
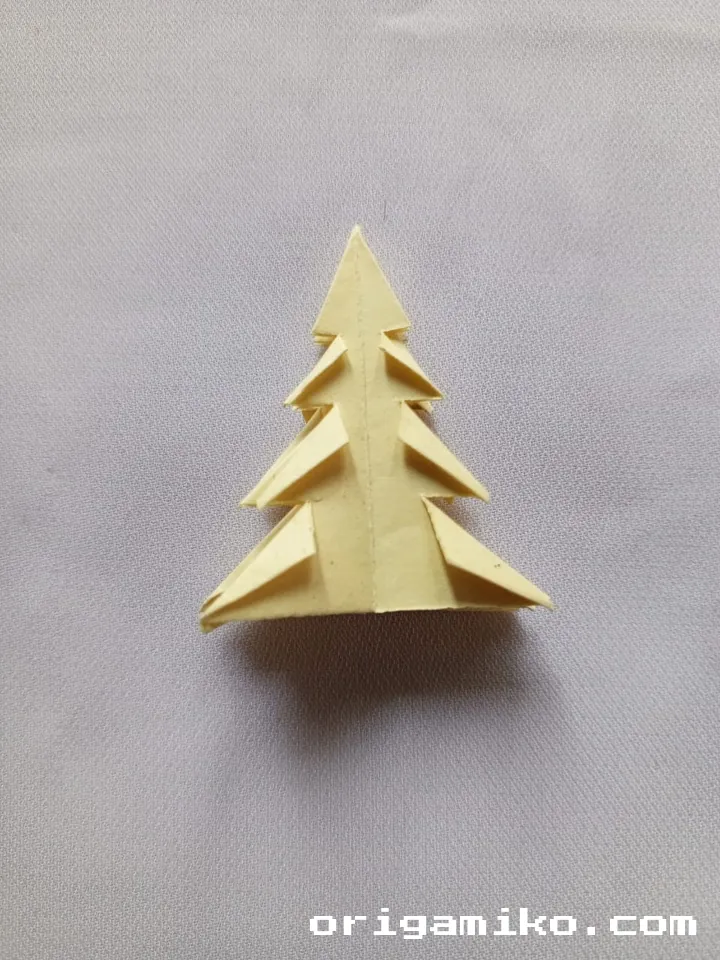
Tweak and fluff the folds slightly until it resembles a tiny, elegant tree!
And there you have it — a stunning Origami Sticky Note Tree!
Pro Tips for a Perfect Sticky Note Tree
Choose the Right Sticky Note
Not all sticky notes are created equal! Choose one that’s thin and flexible — thicker or stiff sticky notes can make folding trickier and the final structure bulkier.
Work with Clean Hands
Since sticky notes can be delicate and lightly adhesive, it’s a good idea to work with clean, dry hands. This prevents dirt or oils from smudging your creation.
Embrace Imperfection
One of the charms of origami, especially with sticky notes, is that no two trees will ever look exactly alike. Every little tilt or twist gives your tree character!
Creative Ideas for Your Origami Sticky Note Trees
- Mini Forest: Make a whole grove in different colors and sizes!
- Desk Décor: Pop a few trees around your workspace for a cheerful vibe.
- Gift Toppers: Attach a little sticky note tree to gift wraps for a handmade touch.
- Holiday Decorations: Use green notes for Christmas trees, or pastel ones for springtime forests!
Troubleshooting Common Problems
My tree won’t stand up!
Make sure you trimmed the bottom tip after collapsing the sticky note. If needed, snip a tiny bit more to create a flat base.
My folds are messy.
It’s okay! Go slow, press firmly when creasing, and practice on a few sticky notes before making your “official” tree.
The paper tears when folding.
Try a gentler touch and fold along the creases you made earlier. Also, make sure you’re not using an old, brittle sticky note.
Final Thoughts: Why You’ll Fall in Love with Origami Sticky Note Trees
There’s something purely magical about creating an enchanting, delicate tree from such a simple item.
This project invites you to slow down, pay attention to small details, and enjoy the peaceful rhythm of folding paper.
When you finally hold your finished tree in your hands, the sense of accomplishment — and wonder — is absolutely worth it.
So grab a sticky note and start folding.
Your desk could be the home of a tiny forest by tonight.