

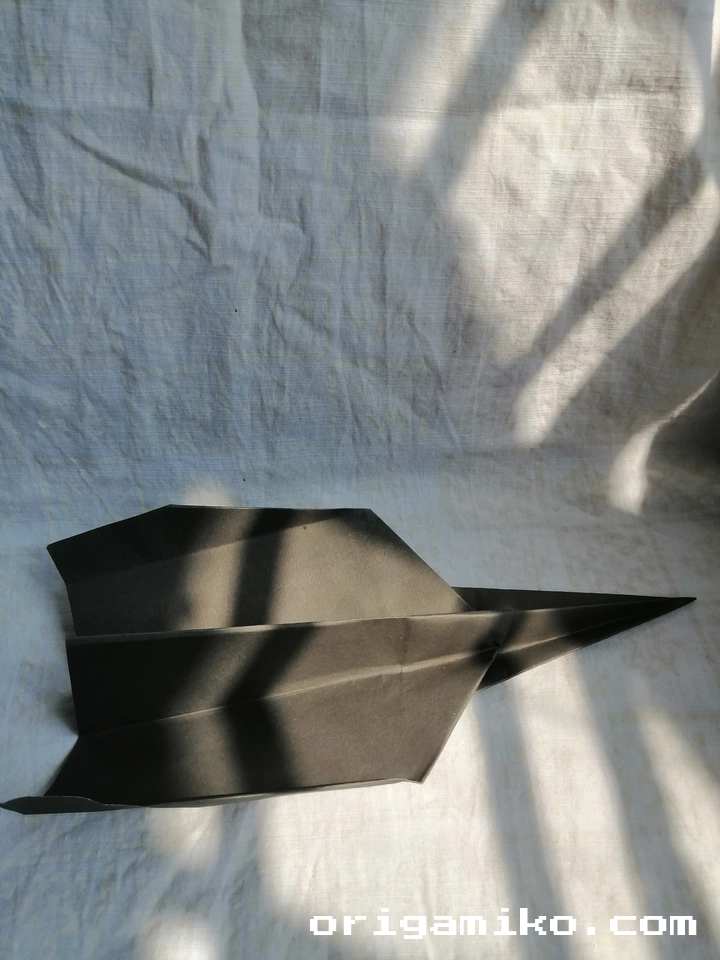
Ever wondered how to create an easy Origami Airplane that soars like a dream? The Uranus Arc III combines elegance with flight performance perfectly.
Today I’ll walk you through this incredible paper folding journey. You’re about to discover something truly special.
Get ready for an adventure in paper aviation!

What is the Uranus Arc III Paper Airplane?
The Uranus Arc III isn’t your typical paper airplane. I’ve been folding aircraft for years, and this design stands out from the crowd.
This particular model gets its name from its distinctive arc-shaped wings that curve gracefully like the planet’s rings. The “III” designation indicates it’s the third iteration of this design family, refined through countless test flights and adjustments.
What makes this airplane special? It’s the perfect balance between simplicity and performance. You don’t need years of origami experience to create something that flies beautifully. The Uranus Arc III delivers both visual appeal and impressive flight characteristics.
Aerodynamic Features:
- Streamlined body design
- Balanced weight distribution
- Curved wing edges for stability
- Reinforced nose section
Skill Level: Beginner to Intermediate Flight Distance: Up to 30 feet indoors Flight Style: Smooth gliding with gentle curves
Materials Needed
Here’s everything you’ll need for your Simple Uranus Arc III paper airplane Step by step creation:
| Material | Specification | Purpose | Notes |
|---|---|---|---|
| Paper | A4 size (8.5″ x 11″) | Main construction | Standard copy paper works best |
| Paper Weight | 20lb (75gsm) | Optimal flight performance | Heavier paper = more stability |
| Paper Color | White or colored | Aesthetic preference | Colored paper adds visual appeal |
| Work Surface | Flat, clean table | Precise folds | Kitchen table or desk ideal |
| Lighting | Good overhead light | Clear fold visibility | Avoid shadows on workspace |
| Ruler (optional) | 12 inches minimum | Measuring accuracy | Helps with precise alignment |
The beauty of this project? You probably have everything you need right at home. I always keep a stack of A4 paper handy for spontaneous folding sessions.
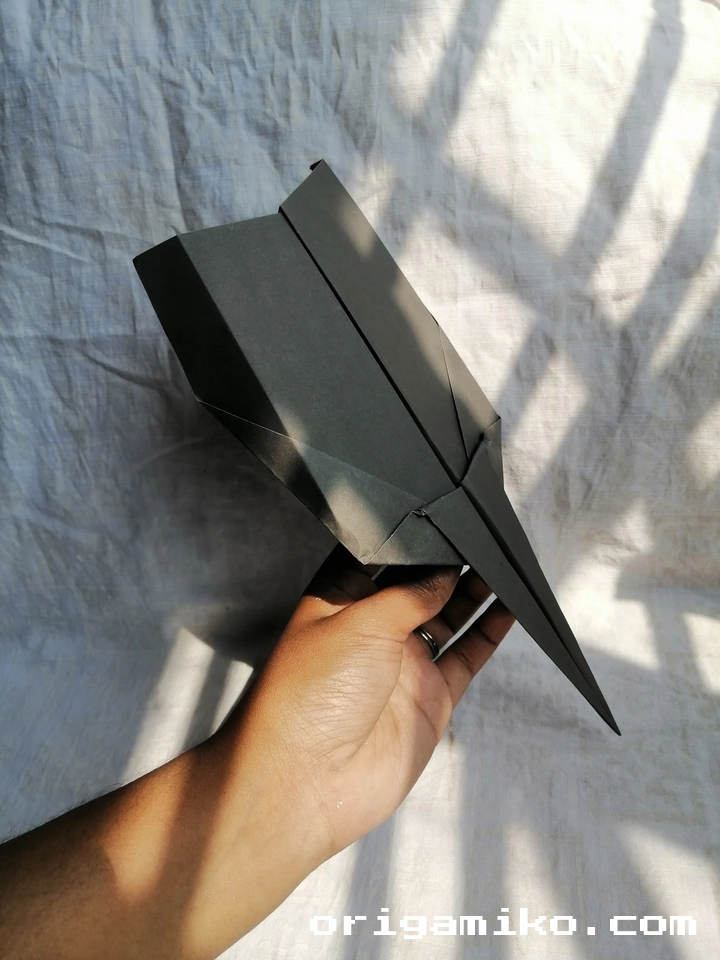
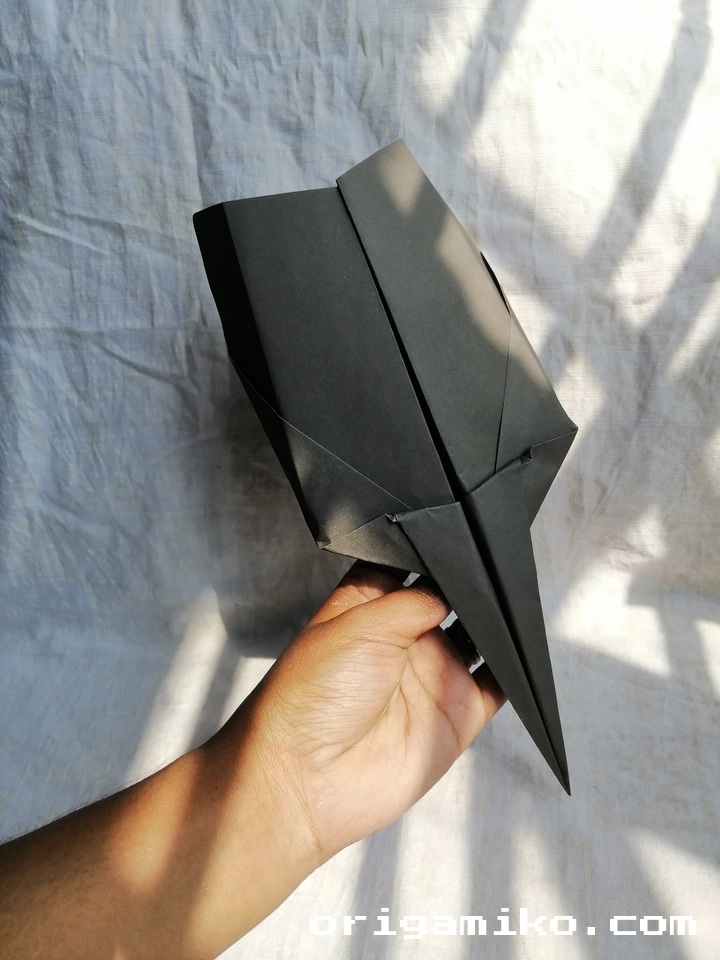
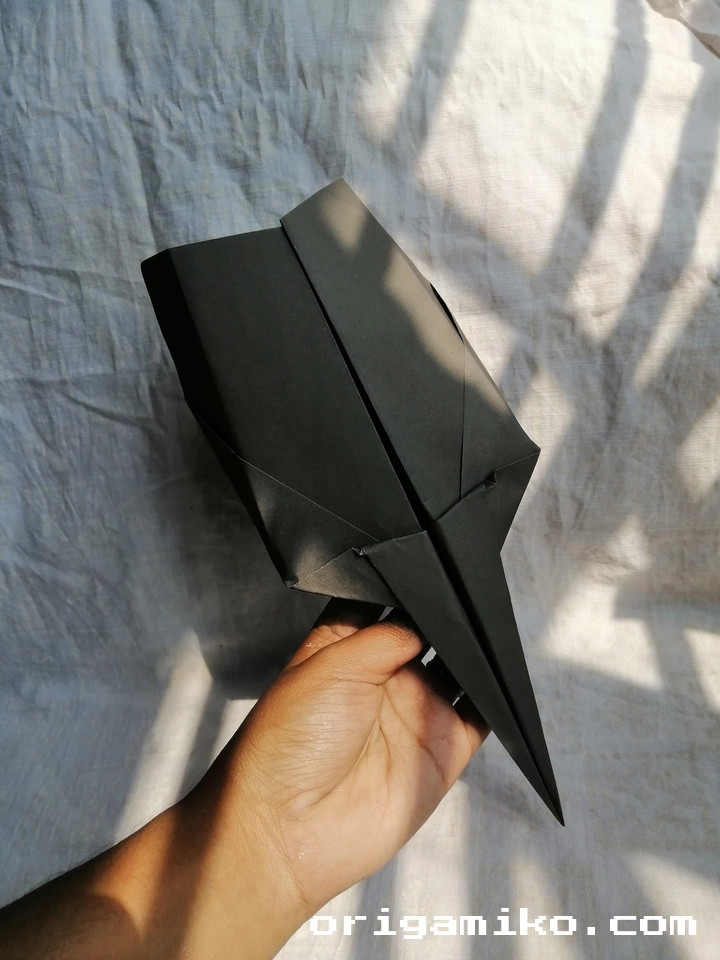
Step-by-Step Uranus Arc III Paper Airplane Instructions
Now comes the exciting part – the actual folding! I’ll guide you through each step with clear directions. Take your time with each fold.
Step 1: Prepare Your Paper
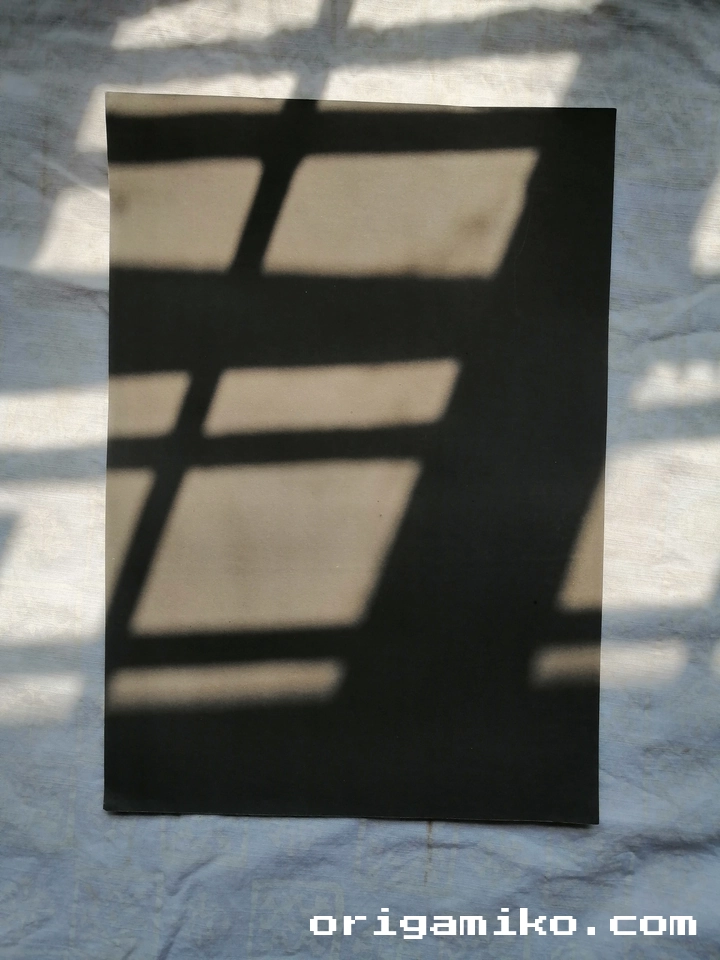
Take your A4 paper and place it on your work surface. Make sure it’s clean and free from wrinkles. The orientation should be portrait (taller than it is wide).
Step 2: Create the Diagonal Reference
Fold one corner to the opposite corner diagonally. Don’t crease it completely – just pinch the center to mark the middle point. This reference point is crucial for the airplane’s symmetry.
Unfold the paper completely. You should see a small pinch mark in the center.
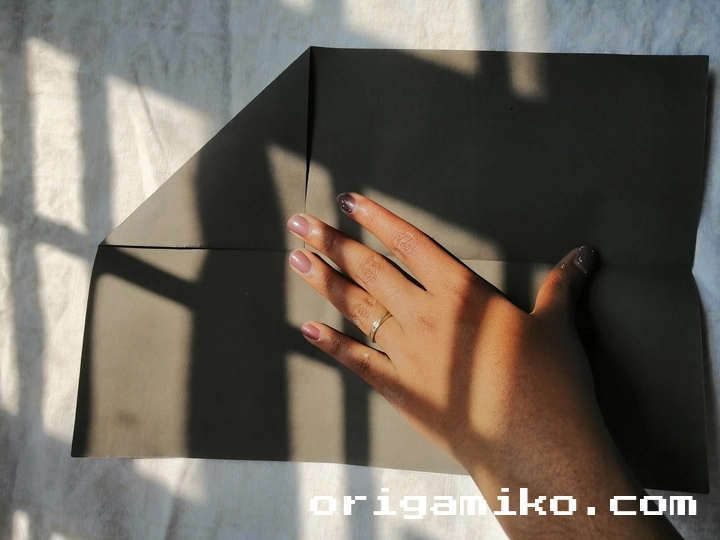
Step 3: First Corner Fold
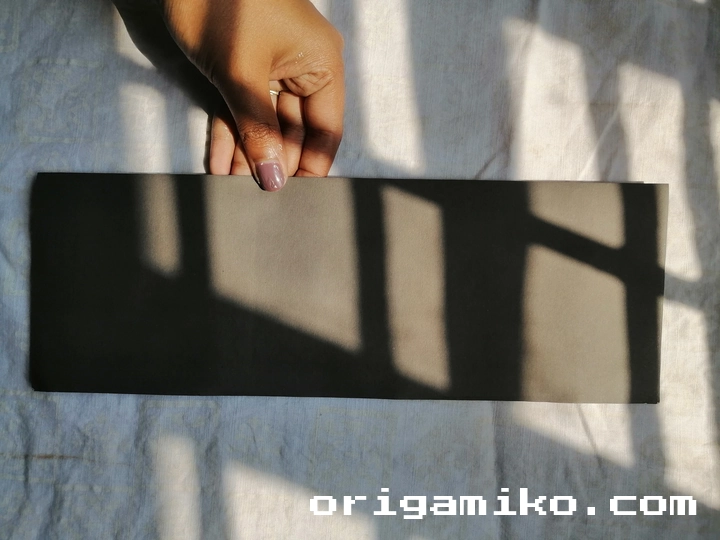
Take the top corner and fold it down to meet the middle point you just created. Press this fold firmly with your finger or fingernail. This creates the nose section of your airplane.
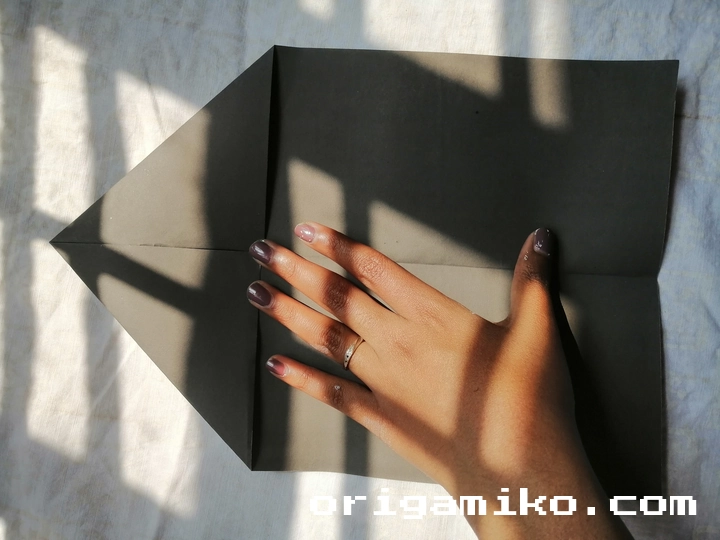
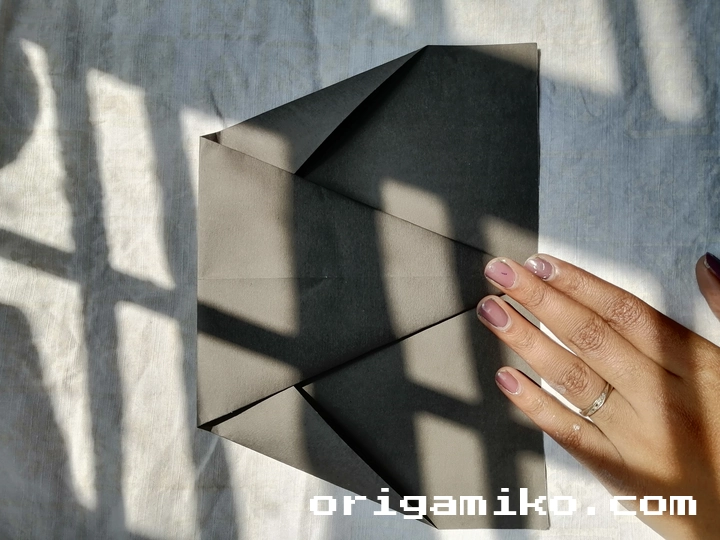
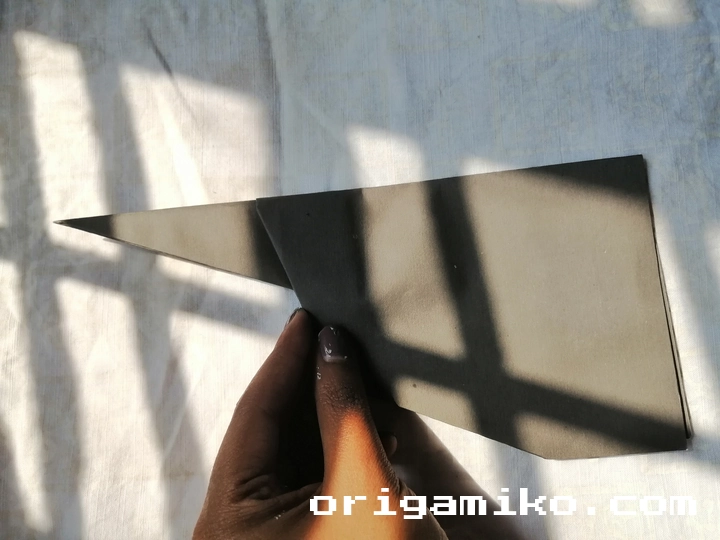
Step 4: Create the Wing Base
Now for the trickier part. Fold the small corners on each side – these will become your wing stabilizers.
Next, fold the top edge down to meet the middle line. This creates the main body of the aircraft.
Finally, fold the entire plane along the back side to create the central crease.
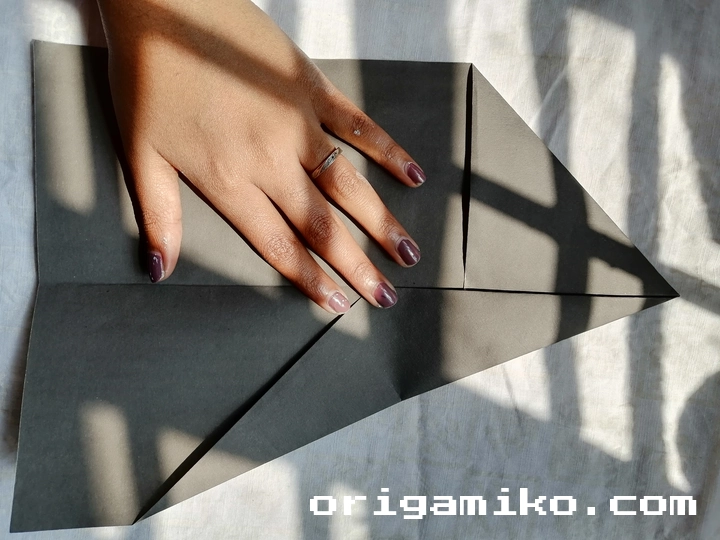
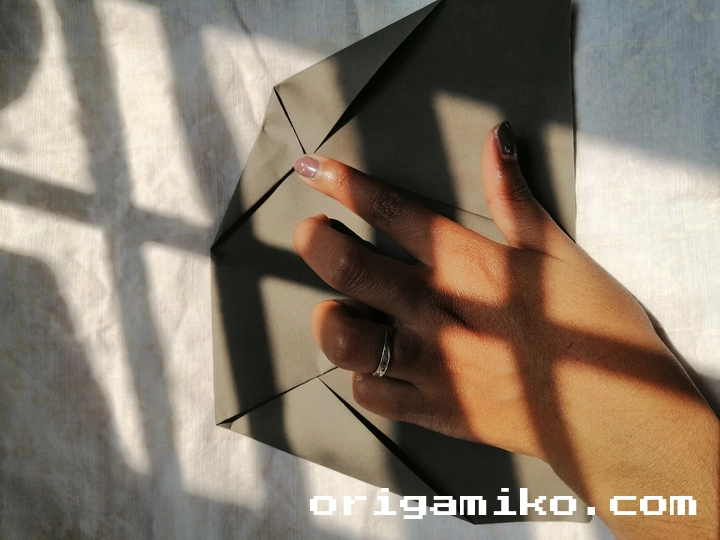
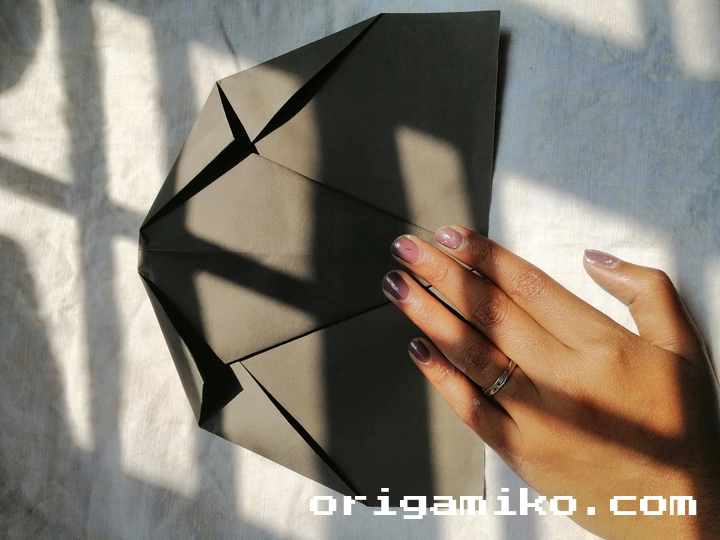
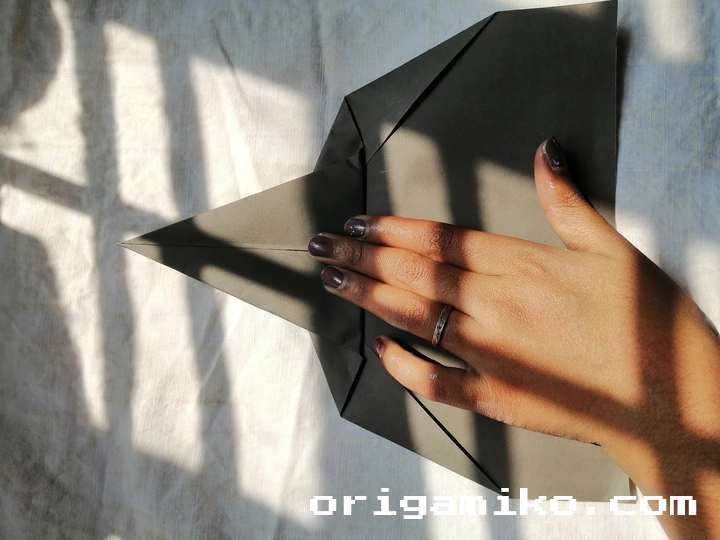
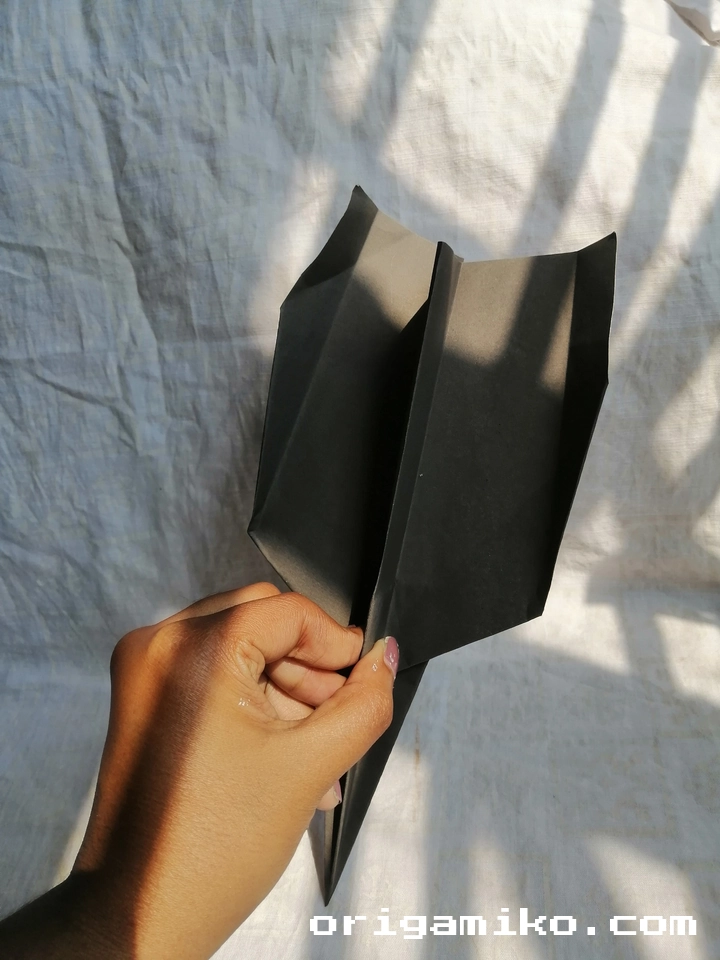
Step 5: Shape the Wings
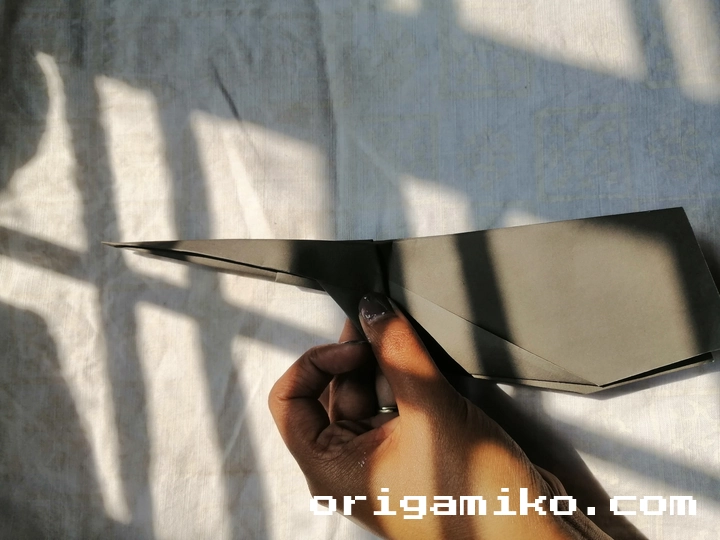
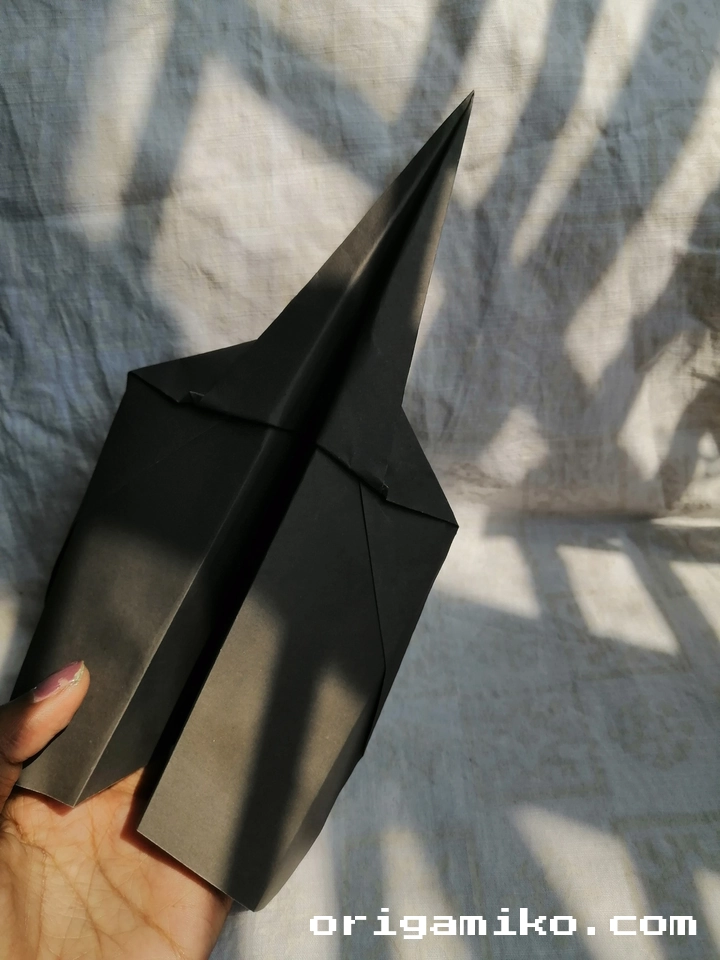
Fold from the middle point outward, creating the wing extensions on both sides. Make sure both sides are symmetrical – this is critical for proper flight.
The wings should have a gentle curve when viewed from above.
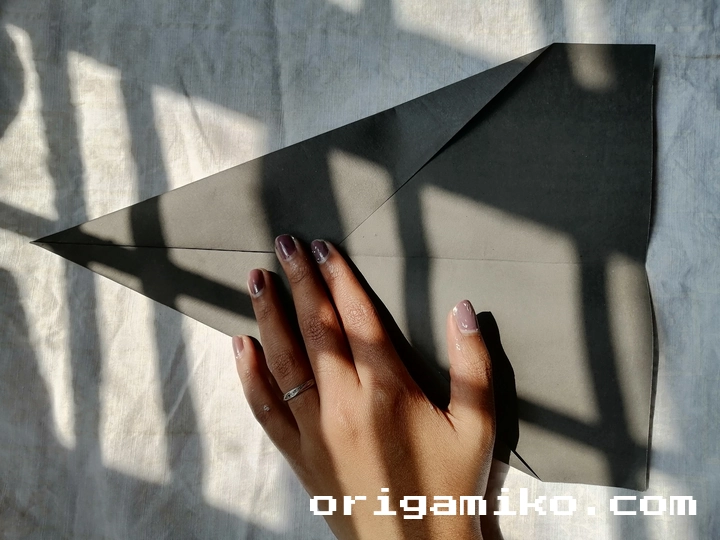
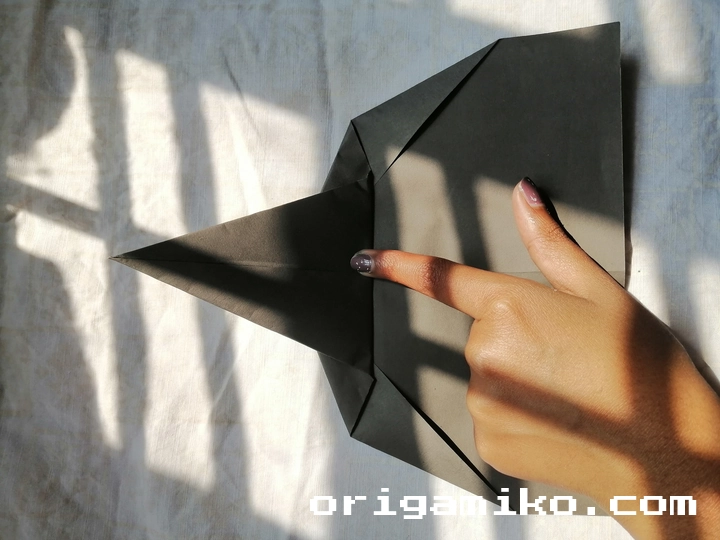
Step 6: Final Assembly
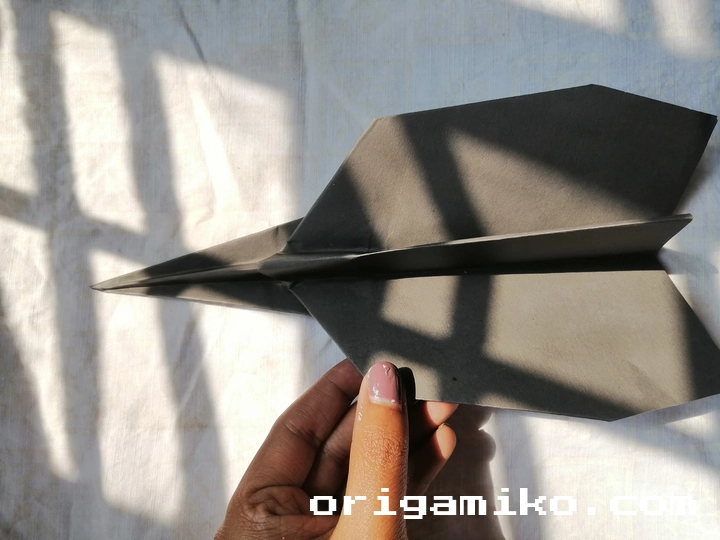
Your Uranus Arc III paper airplane is now ready! Give it a gentle test throw to check the balance.
Tips for Success
After folding hundreds of these aircraft, I’ve learned some valuable lessons. Here are my top tips:
Precision Matters:
- Make sharp, clean creases
- Keep both sides symmetrical
- Take your time with each fold
Paper Selection:
- Standard copy paper works best
- Avoid cardstock (too heavy)
- Slightly wrinkled paper can actually improve flight
Testing Phase:
- Start with gentle throws
- Adjust wing angles if needed
- Practice your throwing technique
Environmental Factors:
- Indoor flying works best
- Avoid windy conditions
- Clear flight path of obstacles
The key to mastering how to make Uranus Arc III paper airplane is patience. I remember my first attempt – it nose-dived immediately! Don’t get discouraged if yours doesn’t fly perfectly right away.
Common Mistakes and How to Avoid Them
Even experienced folders make these errors. I’ve made every single one myself!
Mistake #1: Uneven Folds Problem: One wing is different from the other Solution: Always fold both sides simultaneously when possible
Mistake #2: Soft Creases Problem: Folds come undone during flight Solution: Press firmly with your fingernail on every crease
Mistake #3: Wrong Paper Orientation Problem: Starting with landscape instead of portrait Solution: Double-check orientation before first fold
Mistake #4: Skipping the Reference Point Problem: Airplane becomes lopsided Solution: Always create that diagonal pinch mark first
Mistake #5: Rushing the Process Problem: Sloppy folds lead to poor flight performance Solution: Take breaks between steps if needed
I once taught a group of kids this design. The ones who took their time had airplanes that flew beautifully. The ones who rushed? Well, let’s just say their planes didn’t stay airborne long.
Similar Variations You Can Make
Once you’ve mastered the basic Uranus Arc III, try these exciting variations:
Uranus Arc III Extended
- Add small wing flaps for increased stability
- Slightly longer body for enhanced glide ratio
Uranus Arc III Micro
- Use A5 paper instead of A4
- Perfect for indoor flying in small spaces
Uranus Arc III Heavyweight
- Constructed with slightly heavier paper
- Better for outdoor flying in light winds
Uranus Arc III Decorated
- Add designs before folding
- Use markers or colored pencils for customization
Each variation teaches you something new about paper airplane aerodynamics. The Extended version was my personal favorite for years until I discovered the Micro version’s charm.
Troubleshooting Flight Issues
Not flying as expected? Here’s how I diagnose and fix common problems:
Nose Diving:
- Wings might be angled downward
- Nose could be too heavy
- Try lighter paper or adjust wing angle
Spinning in Circles:
- Check wing symmetry
- One wing might be bent differently
- Straighten both wings carefully
Poor Distance:
- Throwing technique might need work
- Wings could be damaged
- Try a fresh airplane
Immediate Stall:
- Wings angled too high
- Not enough forward momentum
- Practice your release technique
Advanced Techniques
Ready to take your skills to the next level? These techniques separate beginners from experts:
Wing Tuning: Slightly bend the wing tips upward for increased stability. This creates small “winglets” that reduce turbulence.
Weight Distribution: Add tiny pieces of tape to the nose if your plane stalls immediately. Sometimes a little extra weight helps.
Aerodynamic Modifications: Small cuts in the wing edges can create “ailerons” for better control. Be careful – too much modification ruins the design.
Launch Technique: The best throw is firm but not aggressive. Aim slightly upward with a smooth release.
Frequently Asked Questions
Q: What’s the best paper for this airplane? A: Standard 20lb copy paper works perfectly. I’ve tried everything from newspaper to cardstock, and regular copy paper gives the best results.
Q: How far should this airplane fly? A: Indoors, expect 15-30 feet. Outdoors with good conditions, I’ve seen them go 50+ feet.
Q: Can kids make this airplane? A: Absolutely! Kids as young as 8 can handle this with minimal help. The folds aren’t too complex.
Q: Why does my airplane keep crashing? A: Check your wing symmetry first. 90% of flight problems come from uneven wings.
Q: Can I use colored paper? A: Yes! Colored paper works great and makes the airplane more visually appealing.
Q: How long does it take to make one? A: With practice, about 3-5 minutes. Your first one might take 10-15 minutes.
The Science Behind the Flight
Understanding why this design works makes you a better folder. The Uranus Arc III succeeds because of several aerodynamic principles:
Lift Generation: The curved wing design creates different air pressures above and below the wings, generating lift.
Stability: The wide wing base provides lateral stability, preventing unwanted rolling motion.
Balance: The nose weight balances against the wing area, creating proper center of gravity.
Glide Ratio: This design optimizes the relationship between lift and drag for extended flight time.
I find the science fascinating. Every fold affects how air flows around your creation.
Maintenance and Storage
Want your airplane to last? Here’s how I keep mine in flying condition:
Storage:
- Keep in a flat position
- Avoid humid areas
- Stack carefully if storing multiple planes
Maintenance:
- Re-crease worn folds occasionally
- Check for small tears or damage
- Replace when performance degrades
Transportation:
- Carry in a folder or large book
- Avoid crushing in backpacks
- Make fresh ones for demonstrations
I have a special folder just for my favorite paper airplanes. Some designs are worth preserving!
Teaching Others
Sharing this knowledge brings me joy. Here’s how I teach the Uranus Arc III to others:
Start Simple: Focus on one step at a time. Don’t overwhelm beginners with too much information.
Visual Learning: Demonstrate each fold clearly. Most people learn better by watching than listening.
Practice Together: Fold alongside your student. This creates a collaborative learning environment.
Celebrate Success: Every good fold deserves recognition. Building confidence is crucial.
Troubleshoot Together: When something goes wrong, figure it out as a team. This builds problem-solving skills.
Teaching kids this airplane has been some of my most rewarding folding experiences.
Cultural and Historical Context
Paper airplanes aren’t just toys – they’re part of human innovation history. The principles behind designs like the Uranus Arc III have influenced real aircraft development.
Ancient Chinese paper folding techniques laid the groundwork for modern origami. The Japanese refined these methods over centuries. Today, paper airplane competitions happen worldwide.
Some engineers use paper models to test aerodynamic concepts before building full-scale aircraft. Your simple folded paper connects you to this amazing tradition of human flight.
Environmental Considerations
Paper airplane folding is wonderfully eco-friendly. I always use:
- Recycled paper when possible
- Scrap paper from other projects
- Paper scheduled for disposal anyway
When your airplane finally wears out, it’s completely recyclable. No plastic parts or electronic components to worry about.
This hobby teaches environmental consciousness while providing endless entertainment.
Summary
The Uranus Arc III paper airplane represents the perfect intersection of simplicity and performance. Through six straightforward steps, you’ve learned to create an aircraft that combines visual appeal with impressive flight characteristics.
I hope this guide has inspired you to continue exploring the world of paper aviation. Remember, every expert was once a beginner, and every perfect flight started with a simple fold. Keep practicing, keep experimenting, and most importantly, keep having fun with your easy Origami Airplane creations!