


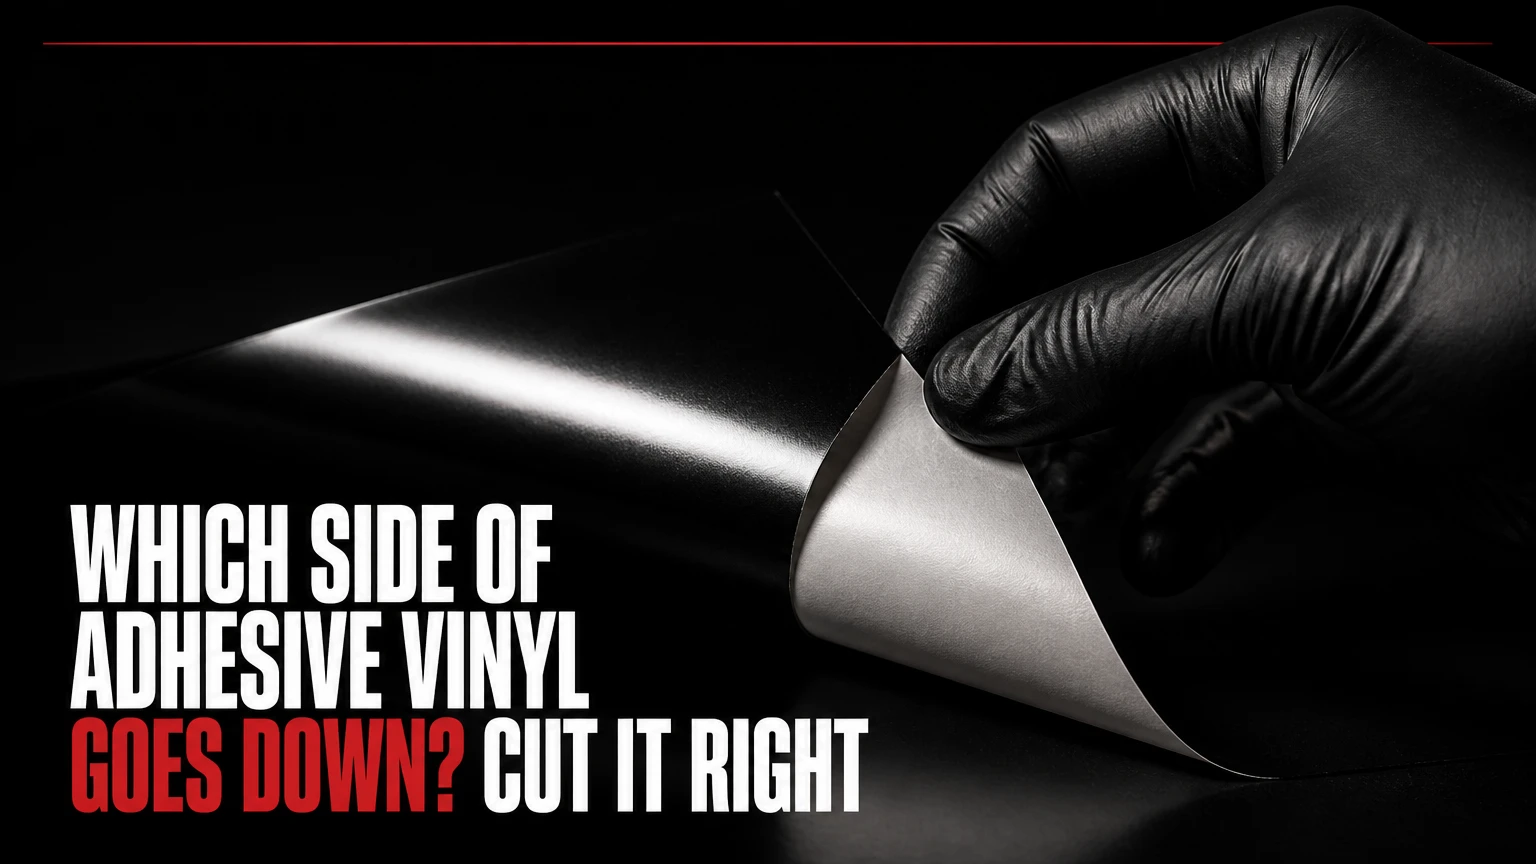
When cutting adhesive vinyl, place the paper or plastic release liner face down on the cutting mat, with the colored vinyl face up. The blade should cut through the vinyl film and adhesive without cutting through the liner. Do not mirror a standard adhesive-vinyl design; mirrored cutting applies to most heat-transfer vinyl instead.
Key Facts
Standard adhesive vinyl goes colored-side up and liner-side down on the mat.
Standard adhesive vinyl normally uses the machine’s regular, unmirrored cutting mode.
A proper kiss cut cuts the vinyl film but leaves the release liner attached.
Heat-transfer vinyl is different: its shiny carrier sheet usually faces down.
Transfer tape lifts the weeded adhesive vinyl from its liner before application.
A test cut is safer than trusting a generic Cricut, Silhouette, or material setting.
Which Side of Adhesive Vinyl Goes Down?
The release liner goes down, touching the cutting mat, while the adhesive vinyl’s colored, printed, glossy, matte, or patterned face points upward. The liner protects the pressure-sensitive adhesive during cutting, and the blade is adjusted to separate the design from the surrounding film without slicing through that backing.
Adhesive vinyl is a layered material. The visible top layer is the vinyl film, the middle layer is pressure-sensitive adhesive, and the bottom layer is a silicone-coated paper or plastic release liner. The liner is not the finished design, so it remains attached until transfer tape is ready to move the decal.
Material orientation at a glance
| Material | Side facing up | Side touching mat | Mirror design? |
|---|---|---|---|
| Standard adhesive vinyl | Colored or patterned film | Paper or plastic liner | No |
| Clear adhesive vinyl | Clear film surface | Release liner | No |
| Glitter adhesive vinyl | Glittered decorative face | Backing liner | No |
| Heat-transfer vinyl | Dull vinyl surface | Shiny carrier sheet | Usually yes |
| Printable adhesive vinyl | Printable coating | Backing liner | No |
A reliable physical check is simple: the side that looks like the finished color or pattern faces you. The side that feels like paper, has a grid, or peels away later belongs against the mat.
How Does Adhesive Vinyl Cutting Work?
A cutting machine normally performs a kiss cut: the blade cuts the design layer while leaving the release liner intact. The result is a weedable decal whose individual letters or shapes remain positioned on the original backing until transfer tape is applied.
A kiss cut is different from a through-cut. A through-cut separates the entire sheet, including its liner, and is appropriate for individual stickers or shapes only when the material and machine profile support it. For ordinary decal-making, cutting through the liner makes weeding harder and can damage the mat.
The three layers of adhesive vinyl
| Layer | Typical material | Function | What the blade should do |
|---|---|---|---|
| Face film | PVC, polyester, or polyurethane | Displays the design color or pattern | Cut completely |
| Adhesive layer | Acrylic pressure-sensitive adhesive | Bonds vinyl to the substrate | Cut through with film |
| Release liner | Silicone-coated paper or PET | Protects adhesive before use | Remain intact |
| Optional laminate | Clear PVC or polyurethane | Adds abrasion and UV protection | Not cut unless specified |
Pressure-sensitive adhesive does not generally require liquid activation. Firm, even pressure improves contact by pushing the adhesive against the microscopic irregularities of glass, painted metal, plastic, or sealed wood.
A practical rule from sign production is to adjust blade depth for the actual material rather than the brand name. Two products both labeled “vinyl” can have different face-film thicknesses, liners, and adhesive coatings.
How Can You Tell Which Side Is Vinyl?
The vinyl side usually has the finished color, sheen, texture, or printed pattern, while the liner looks like paper or translucent plastic and may carry a grid or manufacturer markings. If both sides appear similar, make a small corner test before loading the full sheet.
Use these checks in order:
- Look at the surface. The design color, metallic finish, glitter, or printed image belongs on top.
- Feel the backing. The liner normally feels more fibrous, smooth-coated, or paper-like.
- Bend a corner. The liner often separates more visibly from the flexible face film.
- Use a weeding tool. Lift a tiny edge from a waste corner. The thin colored layer should peel from the liner.
- Check the packaging. Product instructions override assumptions, especially for specialty films.
Some clear and translucent vinyl creates confusion because its face film can look nearly invisible. Hold the sheet against a dark background and inspect the edge. The liner usually appears whiter, cloudier, or more opaque.
What if the liner has no grid?
A grid is helpful but not necessary. Many rolls use plain white paper, translucent PET, or a branded liner without printed squares. In that situation, the side that accepts a temporary weeded edge and exposes a tacky surface when peeled is the adhesive side, while the visible face remains smooth and decorative.
Should You Mirror Adhesive Vinyl?
Do not mirror standard adhesive vinyl when cutting a decal for the outside of a surface. Create the design in its normal readable orientation, place the colored film upward, and cut normally. Mirroring standard adhesive vinyl produces backward text after transfer.
Mirroring becomes appropriate in specific applications:
| Application | Material | Mirror? | Reason |
|---|---|---|---|
| Decal on outside of mug | Adhesive vinyl | No | Design is applied face up |
| Wall lettering | Removable adhesive vinyl | No | Letters remain readable on wall |
| Car graphic on painted exterior | Permanent adhesive vinyl | No | Face is visible from outside |
| Shirt lettering | Heat-transfer vinyl | Yes | Design transfers face down |
| Inside-facing window decal | Adhesive vinyl, reverse weed | Sometimes | Image is viewed through glass |
| Decorative origami surface | Adhesive vinyl | Usually no | Design is placed on the visible fold |
The exception for a window is often called a reverse decal or inside-glass application. The design may require reverse weeding, a second transfer sequence, or a printable product designed for viewing through the glass. The correct workflow depends on which side of the window should display the image.
Cricut’s iron-on guidance uses the instruction, “Place the shiny liner side down,” which applies to heat-transfer material, not ordinary self-adhesive vinyl. The carrier sheet is the defining visual clue.
What Changes With Heat-Transfer Vinyl?
Heat-transfer vinyl, also called HTV or iron-on vinyl, goes shiny-carrier-side down on the mat, with the dull vinyl side facing up. HTV normally requires a mirrored design because the cut material is flipped onto fabric during heat application.
HTV has a carrier sheet that holds the design during pressing. Standard adhesive vinyl has a release liner that protects adhesive until the decal is applied. Both materials can be thin and colorful, but their carrier systems and application methods are different.
Adhesive vinyl and HTV compared
| Attribute | Adhesive vinyl | Heat-transfer vinyl |
|---|---|---|
| Mat orientation | Liner down | Shiny carrier down |
| Design setting | Normal | Mirrored |
| Application method | Pressure-sensitive adhesive | Heat and pressure |
| Typical substrate | Glass, walls, metal, plastic | Cotton, polyester, canvas |
| Transfer carrier | Transfer tape added later | Carrier attached during cutting |
| Main failure | Peeling or bubbles | Incomplete heat bond |
A clear, glossy plastic sheet that is already attached to the material usually indicates HTV. A paper-like backing with a removable adhesive-protecting liner usually indicates adhesive vinyl.
What Should You Do Before Cutting?
Before cutting, confirm the material, inspect the liner, clean the mat, and run a small test cut. A 30-second test can prevent the loss of a full 12-by-12-inch sheet and reveals whether the blade is cutting the film, adhesive, or backing.
Before-you-start checklist
| Item | Typical quantity or value | Purpose | Failure prevented |
|---|---|---|---|
| Adhesive vinyl | 1 sheet or 12-inch roll section | Main material | Wrong-material setup |
| Standard cutting mat | 1, light or standard grip | Holds liner flat | Wrinkles and shifting |
| Weeding tool | 1 hook or fine-point tool | Removes waste vinyl | Torn lettering |
| Transfer tape | Design size plus 1 inch border | Moves decal | Misaligned application |
| Scraper or squeegee | 1 plastic tool | Bonds tape to vinyl | Incomplete pickup |
| Isopropyl alcohol | 70%, small lint-free wipe | Removes oils | Early peeling |
A cutting mat should hold the liner flat without stretching or denting it. Excessively strong adhesive can pull the liner away from delicate vinyl, while a worn mat permits narrow letters to move during cutting.
Step 1: Create the Design in Normal Orientation
Set standard adhesive vinyl to normal, not mirrored, in Cricut Design Space, Silhouette Studio, Brother CanvasWorkspace, or comparable software. Check that letters read correctly on screen before sending the job to the machine.
For small lettering, use a minimum finished stroke width of approximately 0.08-0.12 inches as a practical starting point. Narrower strokes can cut, but they become difficult to weed, especially in glitter, holographic, and metallic films.
Success checkpoint: The design reads correctly and the software preview shows the intended size.
Common mistake: Selecting “mirror” because a previous project used iron-on vinyl.
Step 2: Load the Liner Face Down
Place the adhesive vinyl on the mat with the release liner against the adhesive surface. Smooth the sheet from the center outward, then load the mat squarely into the machine.
Do not press directly on delicate glitter or brushed finishes with a rough scraper. Use a soft brayer or clean hand pressure, because surface abrasion can change the visible finish even when the cut itself succeeds.
Success checkpoint: The colored face is visible, the liner is attached to the mat, and no bubbles cross the design area.
Common mistake: Loading the sheet liner-side up because the liner looks cleaner or has printed grid lines.
Step 3: Run a Test Cut
Cut a small triangle, square, or manufacturer test shape in a waste corner. Inspect the cut with a weeding hook before cutting the complete design.
The correct setting cuts the face film and adhesive but leaves the liner as one continuous sheet. Typical starting points vary by machine and product, so the values below are starting ranges rather than universal prescriptions.
Typical starting cut settings
| Machine or material | Blade starting point | Pressure or force | Speed starting point |
|---|---|---|---|
| Cricut standard adhesive vinyl | Fine-Point blade, depth 1 | 80-110 | 100-150 |
| Cricut premium removable vinyl | Fine-Point blade, depth 1 | 70-100 | 100-150 |
| Silhouette standard vinyl | AutoBlade 1-2 | 8-12 | 5-8 |
| Glitter adhesive vinyl | Fine-Point or premium blade | 120-180 | 60-100 |
| Printable adhesive vinyl | Fine-Point blade | 100-140 | 80-120 |
Cricut force values and Silhouette settings are not directly interchangeable. Product thickness, blade wear, mat grip, humidity, and machine calibration can shift the correct setting.
Success checkpoint: The small shape weeds cleanly and the backing remains uncut.
Common mistake: Increasing pressure immediately after seeing a weak cut instead of checking whether the blade is dull or the material is lifting.
Step 4: Cut the Full Design
Send the job only after the test cut passes. Keep the mat level as it enters and exits, particularly when cutting long lettering from a roll.
A kiss cut should separate the waste vinyl around the design while preserving the liner under every finished element. If the machine begins cutting the liner, pause if possible and reduce pressure or blade exposure before continuing.
Success checkpoint: The design edges are continuous, and the liner has no deep cuts beyond the intended kiss-cut lines.
Common mistake: Choosing “sticker paper,” “cardstock,” or a deep-cut profile because the vinyl is thick. Those settings can cut through the liner.
Step 5: Weed the Excess Vinyl
Remove the large outer waste first, then clear internal spaces such as the centers of letters A, B, D, O, P, and R. Keep the design on its original liner and weed slowly at a low angle.
For fine lettering, cut a border around the design before weeding large waste areas. The border reduces the chance that a long strip will pull up a detached letter.
Success checkpoint: Only the intended design remains on the liner, with no lifted corners or attached waste bridges.
Common mistake: Weeding aggressively from a sharp upward angle, which can pull small design details from the liner.
Step 6: Apply and Burnish Transfer Tape
Cut transfer tape slightly larger than the weeded design, place it adhesive-side down, and press from the center toward the edges. Scrape both directions with firm, overlapping strokes.
Transfer tape must grip the face of the vinyl more strongly than the release liner does, but it should not be so aggressive that it damages the surface or leaves adhesive behind. Low-tack tape suits delicate or small designs; standard tack suits ordinary permanent and removable vinyl.
Success checkpoint: The design lifts with the transfer tape when the original liner is peeled away.
Common mistake: Removing the liner before burnishing. Incomplete contact causes missing letters and separated details.
Step 7: Apply the Decal to the Surface
Clean glass, glazed ceramic, sealed wood, painted metal, or smooth plastic with 70% isopropyl alcohol and allow the surface to dry completely. Position the design, press from the center outward, and peel the transfer tape back at a low angle.
Do not apply adhesive vinyl to dusty, waxed, oily, wet, or heavily textured surfaces unless the product specifically supports them. A smooth surface provides more continuous adhesive contact and fewer channels for water or dirt.
Success checkpoint: No bubbles remain around the main shapes, and the vinyl stays down when the tape is folded back.
Common mistake: Applying to cold ceramic immediately after washing. Let the surface reach room temperature first.
Which Adhesive Vinyl Should You Choose?
Permanent vinyl is the usual choice for outdoor signs, car decals, tumblers, and frequently handled objects, while removable vinyl is better for temporary indoor graphics and painted walls. Specialty vinyl changes the surface finish, and printable vinyl requires compatible ink and often a protective laminate.
Vinyl type decision table
| Vinyl type | Typical thickness | Common life | Best surface or project | Main limitation |
|---|---|---|---|---|
| Removable matte | 2.5-3.0 mil | 1-3 years indoors | Walls, journals, temporary décor | Lower water resistance |
| Permanent gloss | 2.5-3.0 mil | 3-6 years outdoors | Mugs, cars, signs, sealed metal | Removal may damage paint |
| Glitter or holographic | 3.0-4.0 mil | 1-5 years | Decorative labels and gifts | Harder weeding and tape pickup |
| Printable adhesive | 3.0-4.5 mil | 1-2 years unlaminated | Full-color stickers | Needs printer compatibility |
| Cast sign vinyl | Under 2 mil | 7-10 years typical | Vehicle curves and rivets | Higher material cost |
Brand names provide useful starting points. ORACAL 631 is commonly selected for removable indoor graphics, while ORACAL 651 is a common permanent calendered option. Actual durability depends on exposure, surface preparation, cleaning chemicals, and installation quality.
Cast vinyl is thinner and more conformable than calendered vinyl. It is better for deep vehicle curves, rivets, and long outdoor service, but ordinary craft projects rarely justify its higher price.
How Much Time and Money Does a Decal Take?
A small adhesive-vinyl decal usually takes 10-25 minutes to design, cut, weed, transfer, and apply, excluding curing time. Typical material cost is $0.80-$5.00 per 12-by-12-inch sheet, depending on whether the vinyl is removable, permanent, glitter, holographic, or printable.
Typical project cost and timing
| Project | Vinyl cost | Transfer-tape cost | Active time | Recommended cure |
|---|---|---|---|---|
| Small wall label | $0.80-$1.75 | $0.10-$0.40 | 10-15 minutes | 24 hours |
| Mug or tumbler decal | $1.00-$2.50 | $0.15-$0.50 | 15-25 minutes | 48-72 hours |
| Outdoor sign lettering | $1.50-$3.50 | $0.25-$0.75 | 20-40 minutes | 48-72 hours |
| Glitter gift decoration | $2.00-$5.00 | $0.20-$0.75 | 20-45 minutes | 24-48 hours |
| Printable sticker sheet | $1.50-$3.50 | $0.25-$1.00 | 30-60 minutes | 24 hours |
Initial tack occurs immediately after burnishing, but the adhesive continues forming contact over time. Avoid soaking, dishwashing, pressure washing, or severe outdoor exposure during the first 24-72 hours.
Why Is Adhesive Vinyl Lifting or Peeling?
Adhesive vinyl lifts when the substrate is contaminated, too cold, porous, textured, chemically incompatible, or insufficiently burnished. Vinyl can also peel when the product is mismatched to the application, such as removable indoor film used on an outdoor tumbler.
Troubleshooting table
| Symptom | Likely cause | Corrective action | Prevention |
|---|---|---|---|
| Vinyl stays on liner | Transfer tape has too little tack | Burnish again or use standard-tack tape | Match tape to finish |
| Liner tears during weeding | Cut is too deep | Lower pressure or blade exposure | Test-cut first |
| Corners lift immediately | Surface has oil or dust | Remove decal, clean with alcohol, reapply | Avoid waxed surfaces |
| Bubbles appear under film | Design applied too quickly | Lift and hinge smaller sections | Use center-out squeegee strokes |
| Entire decal peels after washing | Cure was too short | Allow 48-72 hours before washing | Keep item dry initially |
| Small letters disappear | Details are too narrow | Increase stroke width or simplify design | Use 0.08-0.12-inch strokes |
A hair dryer can gently warm cold glass or ceramic, but excessive heat can soften adhesive, distort thin film, or create premature bonding. Warm the substrate slightly, not until it feels hot.
An honest limitation matters here: removable vinyl is not a substitute for permanent outdoor signage. It may adhere temporarily to a smooth surface, but sunlight, rain, detergents, and repeated handling can shorten its service life substantially.
Can Adhesive Vinyl Be Removed Cleanly?
Removable adhesive vinyl usually comes off more cleanly than permanent vinyl, especially from smooth painted surfaces, but no product guarantees damage-free removal from every paint, varnish, plastic, or aged finish. Heat and slow peeling reduce residue and surface stress.
Warm the decal with a hair dryer for 10-20 seconds, lift one corner with a plastic scraper or fingernail, and pull the film back over itself at roughly 180 degrees. For adhesive residue, use a surface-compatible cleaner and test it in an inconspicuous area first.
Permanent vinyl may remove cleanly from glass and metal but can pull weak paint, leave adhesive, or tear into small fragments after long exposure. On vehicle paint, follow the vinyl manufacturer’s removal and temperature guidance rather than using a metal blade.
What Changes for Specialty Materials and Origami?
Adhesive vinyl on folded paper or origami should be applied only after the fold structure is complete, because vinyl adds stiffness and can restrict later creases. Use small, low-tack pieces on clean, dry paper instead of covering a crease that still needs to collapse.
Origami paper is porous and fibrous, so ordinary adhesive vinyl may bond unevenly and can tear the paper during removal. For a decorative origami model, removable matte vinyl or small cut details is safer than large permanent panels; press gently with a soft cloth rather than a hard scraper.
Surface-specific recommendations
| Surface | Recommended vinyl | Preparation | Application caution |
|---|---|---|---|
| Glass | Permanent or removable | 70% isopropyl alcohol | Avoid applying below 50°F |
| Glazed ceramic | Permanent | Wash, alcohol, dry fully | Cure 48-72 hours before washing |
| Painted wall | Removable matte | Dust-free, cured paint | Test hidden area first |
| Sealed wood | Permanent gloss | Light cleaning, dry surface | Avoid unfinished grain |
| Fabric | HTV, not adhesive vinyl | Lint-roll and prepress | Use heat and mirror design |
| Origami paper | Small removable details | Dry, flat, finished folds | Avoid active crease lines |
Adhesive vinyl is not ideal for flexible fabric, unfinished paper, or heavily textured walls. HTV, paper stickers, or liquid adhesive may be better alternatives when the substrate bends, absorbs adhesive, or requires repeated handling.
Expert Rules That Prevent Expensive Mistakes
Test the waste corner, not the finished center
Testing in a waste corner preserves the usable design area and confirms both orientation and cut depth. Testing only on a separate scrap can mislead you when the production sheet has a different liner, finish, or thickness.
Transfer tape should be chosen by surface finish
Glitter and holographic vinyl often need firmer burnishing but can resist ordinary low-tack tape. Very aggressive tape can lift glitter particles or leave residue, so increase burnishing pressure before automatically increasing tape strength.
Adhesion is a surface problem before it is a pressure problem
Repeatedly pressing a decal cannot compensate for silicone, wax, dust, moisture, or uncured paint. Cleaning and drying usually produce a larger improvement than raising machine pressure or adding extra adhesive.
FAQ
Can I put adhesive vinyl directly on the cutting mat?
Yes. Put the release liner directly against the mat and keep the colored vinyl face up. The liner protects the adhesive and provides a stable cutting surface. Do not remove the liner before cutting, because exposed adhesive can stick to the mat, collect debris, and distort the material.
Which side of clear vinyl is sticky?
The side that was protected by the removable release liner is sticky. On clear vinyl, the decorative face may be difficult to see, so peel a tiny corner from a waste section and identify the exposed tacky side before loading the sheet.
Why did my Cricut cut through the vinyl backing?
The blade depth, pressure, or material profile is too aggressive for that product, or the blade is miscalibrated. Run a test cut, reduce pressure in small increments, inspect the blade for debris, and select a standard vinyl profile instead of a deep-cut setting.
Can I use transfer tape without burnishing?
You can try, but pickup becomes unreliable, especially with small lettering, glitter, and intricate shapes. Burnish the transfer tape from the center outward, then test one corner. The complete design should lift before you remove the original backing liner.
Is permanent vinyl dishwasher-safe?
Some permanent vinyl manufacturers rate particular products for dishware, but ordinary adhesive vinyl should not automatically be treated as dishwasher-safe. Hand-wash decorated items unless the product specifically permits dishwasher use, and allow at least 48-72 hours for adhesive development first.
What side of adhesive vinyl goes down for a window decal?
For an outside-applied window decal, the release liner goes down during cutting and the design is not mirrored. For an inside-applied decal viewed from outdoors, the artwork may need reversing or reverse weeding so the readable face appears through the glass. Confirm the intended viewing side before cutting.
The Bottom Line
For standard adhesive vinyl, place the paper or plastic release liner down on the cutting mat and the colored vinyl face up. Cut without mirroring, preserve the liner with a kiss cut, weed the excess, apply transfer tape, and then move the design to a clean, dry surface. If the material has a shiny carrier sheet and will be heat-pressed onto fabric, it is HTV, so mirror the design and place the shiny side down.
