


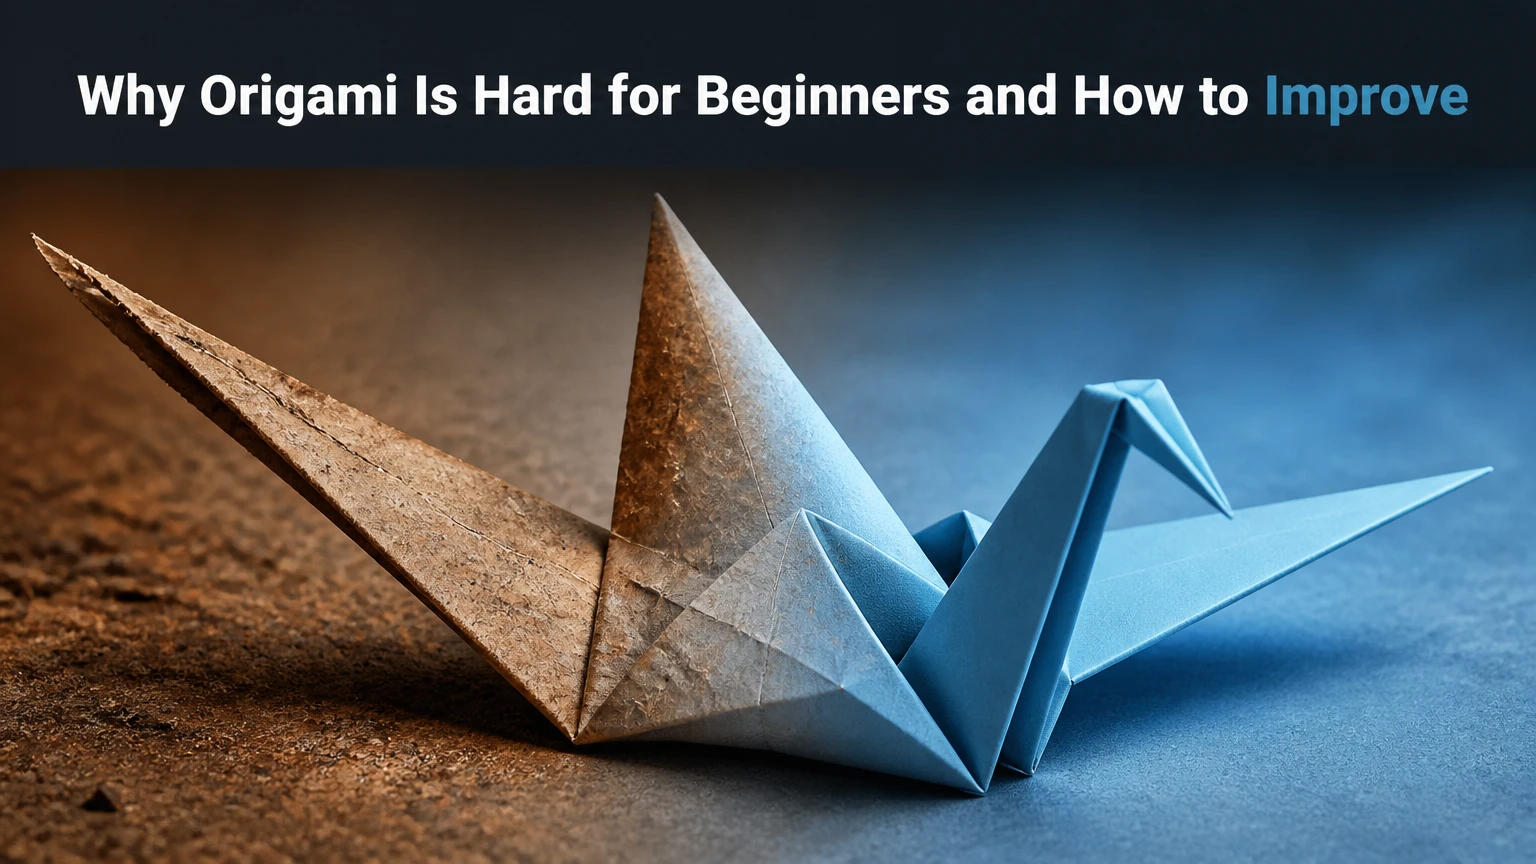
Origami is hard for beginners because a flat sheet must be converted into a precise three-dimensional structure while the folder interprets unfamiliar diagrams, controls small alignment errors, and manages increasingly thick paper layers. Improvement comes from learning fold vocabulary, using forgiving paper, practicing one technique at a time, and checking alignment before errors compound.
Key Facts at a Glance
- Origami difficulty comes mainly from spatial translation, precision, sequence memory, and layer management.
- A 0.5-millimeter alignment error can become significant after many folds, especially in symmetrical models.
- Standard 15-by-15-centimeter kami paper is the most forgiving starting material for most learners.
- Beginners usually improve faster with 10-20 minute focused sessions than with repeated attempts at complex models.
- Mountain folds usually point toward the folder’s side of the paper, while valley folds usually point away from it.
- A model that is too thick, torn, or badly misaligned may be impossible to repair without restarting.
Why Is Origami Hard for Beginners?
Origami is difficult for beginners because several unfamiliar demands occur at the same time: spatial reasoning, fine motor control, diagram interpretation, sequencing, and geometric accuracy. A beginner may understand each individual instruction yet still lose the model because the instructions must be executed in the correct order and preserved through every later fold.
The visual result also hides the work. A simple-looking crane may depend on a preliminary base, several hidden layers, reverse folds, and exact symmetry. The final figure looks organic, but the underlying structure is a tightly constrained arrangement of creases, flaps, and locked layers.
Which Skills Make Origami Difficult?
| Skill | Beginner task | Typical failure | Improvement exercise |
|---|---|---|---|
| Spatial reasoning | Rotate a model mentally | Fold is made on the wrong flap | Rotate the paper after every diagram |
| Fine motor control | Pinch a vertex precisely | Tips miss by 1-2 millimeters | Practice corner-to-corner folds |
| Sequencing | Preserve earlier creases | A later step becomes impossible | Mark completed diagram steps |
| Visual interpretation | Read arrows and symbols | Fold is left folded instead of unfolded | Pause and verbalize each arrow |
| Pressure control | Fold several layers | Paper tears or wrinkles | Use fingertip pressure before a bone folder |
| Symmetry checking | Match left and right sides | Animal or bird leans sideways | Compare reference points before shaping |
Origami is therefore not a test of intelligence or artistic talent. It is a coordination task with a specialized visual language. Children, adults, and experienced crafters can all struggle when the model exceeds their current combination of paper control and diagram literacy.
How Does Origami Work?
Origami works by storing deformation in paper fibers and using connected creases to redistribute tension across a flat sheet. Traditional origami generally uses one uncut square and no adhesive, so the finished structure depends on crease memory, friction between layers, locking folds, and the stiffness of the paper.
A crease pattern contains mountain folds, valley folds, boundaries, layers, and sometimes hidden edges. Standard bases allocate flaps that later become wings, legs, tails, or heads. Sinks, pleats, crimps, and reverse folds then alter the direction and thickness of those flaps.
Origami has a rigorous mathematical foundation. Maekawa’s theorem states that, at a flat-foldable vertex, the numbers of mountain and valley creases differ by two. Kawasaki’s theorem states that alternating angles around a flat-foldable vertex add to 180 degrees. These theorems explain why some crease arrangements can collapse flat, but beginners rarely need to calculate them.
Why Do Creases Hold a Three-Dimensional Shape?
Paper fibers resist bending, then retain part of the deformation after a crease is opened. Repeated folding weakens the same line, while intersecting folds spread force through the sheet. Friction between layers helps prevent flaps from sliding back, and locking folds trap one section beneath another.
Paper thickness changes the design problem. A model with 16 layers at one spine does not behave like a single sheet, because each layer occupies physical space and resists the same fold. Complex designers use thickness accommodation, wider layers, offset creases, or thinner paper to manage this effect.
How Should Beginners Read Origami Diagrams?
Beginners should read an origami diagram in four passes: identify the paper orientation, inspect the symbol, determine whether the fold remains or unfolds, and check the result against the next image. Origami diagrams are instructions for changing a state, not illustrations of a finished object.
Common symbols require careful interpretation:
| Diagram feature | Meaning | Beginner check |
|---|---|---|
| Dashed line | Existing or planned crease | Confirm whether it is mountain or valley |
| Dash-dot line | Often a fold location or crease type | Read the book’s symbol key |
| Solid edge | Paper boundary or visible fold | Do not treat every solid line as new |
| Curved arrow | Movement or rotation | Follow the arrow from base to tip |
| Looping arrow | Fold, unfold, or turn | Inspect the next diagram for confirmation |
| Shaded region | A paper side or hidden layer | Compare the color key before folding |
Do not memorize every symbol in isolation. Compare the before-and-after diagrams. If a line appears in the next image but the layers return to their original position, the instruction probably means “fold and unfold,” which creates a reference crease.
Should Beginners Use Videos or Printed Diagrams?
Videos are usually faster for learning hand movement, while printed diagrams build stronger independent reading skills. Beginners who repeatedly pause, reverse, and replay videos may complete a model successfully but still struggle to transfer the method to a new design.
| Learning format | Best use | Typical session length | Main limitation |
|---|---|---|---|
| Real-time video | First reverse fold or sink | 15-30 minutes | Camera may hide layers |
| Printed diagrams | Repeating a known technique | 20-45 minutes | Symbols require study |
| Crease pattern | Advanced design analysis | 1-5 hours | No sequential guidance |
| In-person instruction | Hand position and correction | 30-90 minutes | Access varies by location |
A practical route is to use a video for the first model, then fold a similar model from diagrams. That transfer step exposes whether the learner understood the technique or merely copied a sequence.
Which Paper Makes Origami Easier?
Standard kami paper, usually 15-by-15 centimeters and around 60-70 grams per square meter, is the best starting point for most beginners. Kami is inexpensive, evenly cut, easy to crease, and often has different colors on each side, which makes layer orientation easier to see.
Paper choice should match the model rather than its visual appeal. Thin paper helps dense models, while stronger long-fiber paper handles curves and moderate shaping better.
| Paper type | Typical specification or cost | Best beginner use | Main drawback |
|---|---|---|---|
| Kami | 15 x 15 cm, 60-70 gsm, $5-$12 per 100 sheets | Cranes, boxes, frogs | Weak under repeated stress |
| Copy paper | A4, 75-90 gsm, about $0.05-$0.20 per sheet | Large simple folds | Thick layers and spring-back |
| Tant | 15-20 cm, roughly 70-100 gsm, $15-$35 per pack | Modular forms and animals | Creases can scar |
| Foil paper | 15-20 cm, often 50-80 gsm, $0.50-$3 per sheet | Action models and sharp shaping | Mistakes remain visible |
| Washi or mulberry | 15-30 cm, variable gsm, $2-$10 per sheet | Curved animals and durable models | Texture can obscure creases |
| Tissue foil | Custom size, thin tissue over foil, $1-$5 per sheet | Complex insects and dragons | Requires preparation |
Printer paper is acceptable for a large preliminary practice model, but it is usually a poor choice for a small, layered design. Beginners often blame their hands when the real problem is that an A4 sheet creates bulky intersections that kami would handle more cleanly.
What Tools Do Beginners Actually Need?
Beginners need square paper, a flat surface, clean hands, and optionally a ruler. A bone folder is useful for crisp creases, but the back of a fingernail can perform the same job while a learner develops pressure control.
| Item | Typical quantity | Typical cost | Purpose |
|---|---|---|---|
| Kami paper | 100 sheets | $5-$12 | Low-risk repetition |
| Metal ruler | 1, 15-30 cm | $5-$15 | Checking and cutting practice squares |
| Bone folder | 1 | $5-$12 | Sharpening selected creases |
| Cutting mat | 1 A4 or A3 | $10-$25 | Safe paper preparation |
| Pencil | 1 | $1-$3 | Marking temporary reference points |
| Spray bottle for wet folding | 1 small bottle | $3-$8 | Controlled moisture for advanced shaping |
Traditional origami does not require scissors or glue. Scissors are appropriate for preparing paper or practicing kirigami, but adding cuts changes the craft and does not solve a beginner’s folding problem.
Which Origami Types Should Beginners Try?
Pureland, simple traditional models, and selected action models are the most suitable starting points because they use fewer nested layers and introduce fewer specialized folds. Modular origami can also work well when each unit is simple, although assembling many units creates a separate accuracy challenge.
| Origami type | Typical first project | Skill level | Paper requirement |
|---|---|---|---|
| Pureland | Simple animal or boat | Beginner | 15 cm kami |
| Traditional | Crane or masu box | Beginner to intermediate | 15 cm kami |
| Action | Jumping frog or flapping bird | Beginner to intermediate | 15-20 cm kami |
| Modular | Sonobe cube | Beginner to intermediate | 6-30 equal squares |
| Tessellation | Repeating pinwheel | Intermediate to advanced | Thin large sheet |
| Wet-folding | Rounded animal | Advanced | Strong, damp-tolerant paper |
Wet-folding is not an easier version of ordinary origami. Moisture softens paper and permits rounded shaping, but too much water destroys crease definition and weakens the sheet. Tessellations demand repeated geometric spacing, so a small early error can affect an entire field of cells.
What Is the Fastest Way to Improve at Origami?
The fastest improvement comes from separating skills instead of repeatedly attempting complete models. A useful 20-minute practice session includes five minutes of corner alignment, five minutes of reverse folds, five minutes of opening and collapsing layers, and five minutes reviewing the failed step.
Use the following routine:
- Choose one model below your maximum level. Select 10-25 steps rather than a 60-step design.
- Prepare three sheets. Use the first for reading, the second for accuracy, and the third for an uninterrupted attempt.
- Study the entire sequence once. Identify bases, changes of orientation, and any unfamiliar fold.
- Fold slowly to reference points. Match corners, edges, and crease intersections before sharpening.
- Stop at every checkpoint. Compare the paper with the diagram before continuing.
- Record one failure. Write the step number, paper layer, and movement that caused the problem.
- Repeat the failed technique separately. Make five small practice folds instead of restarting the whole model immediately.
You will know the routine is working when the same fold succeeds on two consecutive attempts and the final model remains symmetrical without force. Speed should increase later. Accuracy is the first measurable gain.
How Precise Should a Beginner Be?
A beginner should aim for clean reference-point matches rather than perfect microscopic precision. On a 15-centimeter sheet, a one-millimeter mismatch may be harmless on a simple box but noticeable on a symmetrical bird with several layers.
Use these practical checkpoints:
- Match corners before pressing the center of a crease.
- Pinch the endpoints first, then slide pressure along the fold.
- Keep the paper flat instead of lifting it during alignment.
- Open a flap fully before inserting another layer beneath it.
- Check both sides after every major collapse.
- Stop forcing a fold when paper resistance rises sharply.
A counterintuitive rule matters here: pressing harder does not correct bad alignment. It only permanently records the error. Align first, sharpen second.
How Long Does Improvement Take?
Most beginners can complete simple models during their first session, gain reliable diagram control after 3-6 focused sessions, and begin handling intermediate models after 4-12 weeks of regular practice. The range depends more on session frequency and model selection than on a fixed talent threshold.
| Stage | Typical practice | Model complexity | Expected result |
|---|---|---|---|
| First session | 20-40 minutes | 8-20 steps | Basic folds and one simple model |
| First week | 3-5 sessions | 15-30 steps | Fewer orientation errors |
| First month | 8-16 sessions | 25-60 steps | Reliable bases and reverse folds |
| Months 2-3 | 12-30 sessions | 50-100 steps | Better layer control and symmetry |
| Advanced study | 50+ sessions | 100+ steps | Sinks, shaping, crease patterns |
Typical completion times vary widely. A simple helmet or box may take 3-10 minutes once familiar, an intermediate rose can take 30-60 minutes, and a complex dragon may require many hours or separate work sessions.
What Models Should Beginners Fold Next?
Beginners should progress by technique, not by choosing increasingly impressive pictures. A crane introduces a base and reverse folds, a jumping frog adds layered compression, and a simple modular cube develops repeated measurement and assembly.
| Progression point | Model example | Approximate steps | Primary skill |
|---|---|---|---|
| 1 | Masu box | 10-20 | Grid folds and symmetry |
| 2 | Traditional boat | 10-20 | Opening layers |
| 3 | Jumping frog | 20-35 | Reverse folds and compression |
| 4 | Crane | 25-40 | Bird base and layered flaps |
| 5 | Sonobe cube | 8-12 per unit | Repetition and locking |
| 6 | Simple animal | 30-60 | Shaping and proportion |
Do not move up because the previous model looked attractive. Move up when you can repeat its hardest fold without watching a tutorial and when the finished structure holds without glue or hidden tape.
Why Does My Origami Keep Springing Open?
Origami springs open when the creases are weak, the paper is too thick for the layer count, or the model lacks a completed locking fold. The safest fix is to reopen the affected section, confirm the layer order, and sharpen only the intended creases rather than crushing the whole model.
| Symptom | Likely cause | Recovery action | Prevention |
|---|---|---|---|
| Flap lifts | Locking layer missed | Reopen and tuck beneath the correct flap | Trace layer order |
| Spine opens | Thick paper stack | Use thinner paper or larger sheet | Test paper on a small base |
| Curved section relaxes | Dry shaping incomplete | Re-shape and hold briefly | Use suitable wet-folding paper |
| Corner unfolds | Weak endpoint crease | Pinch endpoints again | Align before sharpening |
| Whole model twists | Uneven layer tension | Flatten and compare both sides | Rotate checks during folding |
A tiny amount of moisture can help advanced wet-folding, but beginners should not spray a finished model casually. Water can blur creases, stain kami, and make a stressed vertex tear.
Why Is My Origami Asymmetrical?
Origami becomes asymmetrical when the first reference fold is inaccurate, layers shift during a collapse, or the folder shapes one side before establishing the other. Symmetry must be checked at structural checkpoints, not only after the final model is complete.
Check these landmarks:
- The original square’s diagonal endpoints.
- The center of the preliminary base.
- The matching edges of left and right flaps.
- The head, wing, or leg reference points.
- The final silhouette viewed from above and from the side.
Never assume a commercial square is exact. For homemade paper, fold one diagonal, align the edges, and trim any overhang before beginning. A ruler is more reliable than visual judgment when preparing multiple modular units.
When Should You Restart a Model?
Restart when a key vertex is displaced by several millimeters, a required layer has been trapped permanently, or the paper has developed white stress marks and tears. Continue when the error affects only a decorative tip and the model still collapses, locks, and remains structurally symmetrical.
Experienced folders save time by restarting earlier. A five-minute restart often beats spending 20 minutes forcing later steps around a damaged base.
How Do Paper Thickness and Fatigue Change the Result?
Paper thickness increases at every multilayer intersection, while paper fatigue reduces the sheet’s ability to hold a crisp, stable crease. Beginners often repeat a difficult fold until the fibers weaken, then interpret the resulting softness as a technique failure.
Use these rules:
- Use a larger sheet when a model contains many layers.
- Use thinner paper for dense bases and compact insects.
- Use stronger paper for long points and rounded animal shaping.
- Avoid refolding the same vertex more than necessary.
- Replace paper after visible tearing, whitening, or permanent distortion.
- Test an unfamiliar paper on the model’s base before committing to details.
Foil paper holds a shape well but records every mistake. Tissue foil offers a useful compromise for advanced models because it combines a thin flexible surface with a metal core, although making it consistently requires adhesive and drying time.
Can Origami Improve Spatial Reasoning?
Origami can exercise spatial reasoning because the folder repeatedly translates two-dimensional diagrams into rotations, layer relationships, and three-dimensional forms. Research on origami-based learning and therapy, including reviews indexed in PubMed Central, connects folding activities with visual-spatial practice, fine motor coordination, attention, and sequencing, but origami is not a guaranteed treatment or standardized cognitive test.
The strongest benefit comes from deliberate explanation. Ask a child or learner to predict which flap will become the tail, describe whether a crease is mountain or valley, and explain why a model must rotate. Those prompts turn imitation into spatial reasoning.
Origami is also useful for practicing patience and error diagnosis, but it is not equally accessible to everyone. Large paper, high-contrast diagrams, slower instruction, and pre-creased practice sheets can help people with limited dexterity or visual processing differences.
How Much Does Beginner Origami Cost?
A practical beginner setup costs about $5-$30, depending on whether the learner already has paper and a flat work surface. A 100-sheet kami pack is normally enough for repeated practice, while Tant, washi, Origamido, and specialty tissue foil belong later in the progression.
| Budget level | Materials | Typical total cost | Suitable projects |
|---|---|---|---|
| Minimal | Recycled square paper, pencil | $0-$3 | Boats and large simple folds |
| Starter | 100-sheet kami pack | $5-$12 | Cranes, boxes, frogs |
| Equipped | Kami, ruler, bone folder, mat | $20-$50 | Regular diagram practice |
| Intermediate | Tant or washi pack | $15-$35 additional | Animals and modular forms |
| Advanced | Specialty single sheets and tools | $5-$40 per sheet | Complex shaping and design |
Spend money on more paper before buying specialized tools. Ten low-risk repetitions teach more than one expensive sheet used for a model beyond the learner’s current level.
Common Beginner Mistakes That Slow Improvement
The most damaging beginner mistakes are skipping reference checks, choosing a model by appearance, and using force to compensate for unclear layer order. Each mistake creates a different failure pattern, so the correction must target the cause rather than the final symptom.
- Folding directly from a moving video: Pause after every state change and compare the paper with the screen.
- Ignoring the symbol key: Read the book’s notation page before interpreting unusual arrows.
- Sharpening every crease immediately: Keep temporary folds light until alignment is confirmed.
- Using a tiny sheet for a complex model: Move from 15 centimeters to 20-30 centimeters when layers become crowded.
- Practicing only complete models: Isolate reverse folds, sinks, and pleats in five-minute drills.
- Treating failure as a verdict: Record the exact step and repeat that technique with fresh paper.
The practitioner’s rule is simple: a model is a diagnostic tool, not an exam. If step 18 fails three times, step 18 is the practice target.
The Bottom Line
Why origami is hard for beginners and how to improve can be reduced to one principle: control the information and the paper at the same time. Use thin, square kami; begin with short models; learn mountain folds, valley folds, reverse folds, and bases; verify reference points before sharpening; and practice failed techniques separately.
Origami becomes easier when accuracy replaces force and deliberate progression replaces random model selection. The first goal is not a spectacular sculpture. It is a repeatable fold that stays aligned, locks correctly, and can be explained.
Frequently Asked Questions
Is origami harder than drawing?
Origami is usually more demanding in spatial sequencing, while drawing often places greater demands on visual observation and continuous hand control. Origami gives immediate structural feedback because a misplaced crease changes later steps, whereas a drawing can sometimes be corrected through layering, erasing, or revision.
Can I learn origami without natural spatial ability?
Yes. Spatial ability develops through repeated rotations, layer checks, and prediction exercises. Start with large paper and diagrams containing fewer than 25 steps, then describe each flap’s destination before folding it. Video support can reduce the initial barrier, but diagram practice improves independent transfer.
Is a crane a good first origami model?
A crane is a reasonable early goal but not always the easiest first model. The traditional crane includes a bird base, several layers, and reverse folds, so a masu box, boat, or jumping frog may provide better preparation for the same techniques.
Why does my paper tear during a sink fold?
Paper usually tears during a sink fold because the vertex has been over-creased, the folder pulls against an incorrect layer, or the paper is too brittle for the stress. Reopen the fold, identify the hinge, and use a larger or stronger sheet before trying again.
Should I fold wet origami as a beginner?
Beginners should postpone wet-folding until they can make accurate dry folds and understand layer order. Wet paper allows rounded shaping, but excess moisture weakens the sheet, hides reference creases, and makes recovery from an incorrect fold more difficult.
Can I use glue in origami?
Traditional origami uses one uncut sheet without glue, but modular origami, display sculptures, and paper engineering may use adhesive in defined contexts. Glue can stabilize a finished craft, but it cannot replace an accurate crease or repair a wrongly collapsed base.
