

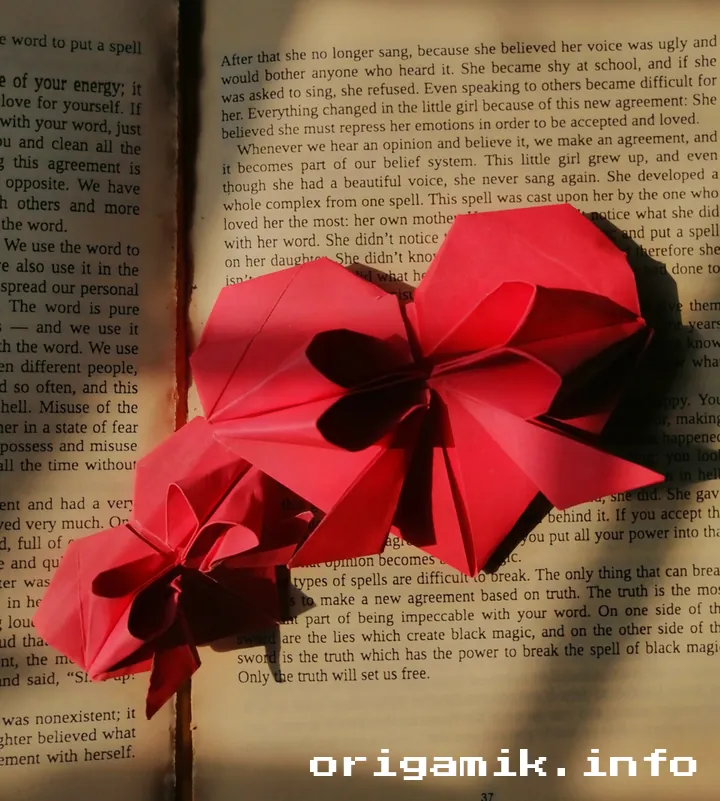
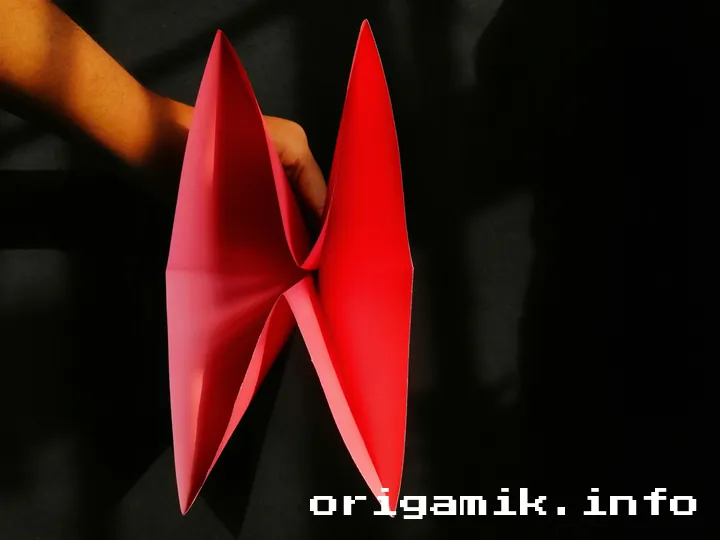
Origami is a captivating art form that transforms simple paper into intricate works of art. One of the most charming creations you can make is the origami heart with a bow. It’s a perfect blend of romance and craftsmanship, making it ideal for any occasion—from gifts to decorations. Ready to dive in? Let’s unfold the magic of this delightful origami design!
In this guide, I will walk you through the entire process of creating an easy Origami heart with bow. Whether you’re a beginner or an experienced folder, this project offers a rewarding challenge. Each step is designed to guide you smoothly, ensuring you end up with a beautiful heart with a bow that you can be proud of!

Materials Needed
Before we begin folding, let’s gather everything we need. The materials for this origami heart with a bow are simple, yet the result is stunning.
| Item | Details |
|---|---|
| Paper | 10″ × 10″ square, any color or design |
| Flat surface | A table or smooth desk |
| Patience | Essential for perfect folds! |
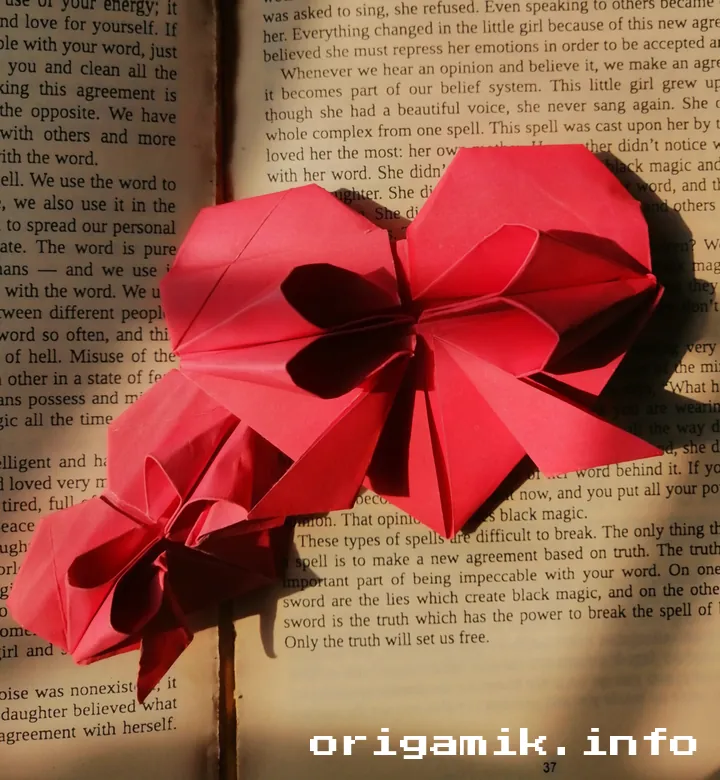
The Origami Heart with Bow: What You’ll Create
The origami heart with bow is a heart-shaped design tied together with a neat bow. It’s a perfect way to showcase your paper folding skills while adding a personal touch to your gift-giving or home decor. The bow adds a delicate flair that makes the heart feel extra special—ideal for Valentine’s Day, anniversaries, or just because.
In this guide, I’ll show you exactly how to make heart box with bow step by step. Trust me, once you finish, you’ll feel the same joy I felt when I first created one of these hearts. Let’s get started!
Step-by-Step Instructions: How to Fold the Origami Heart with Bow
1. Take a Paper
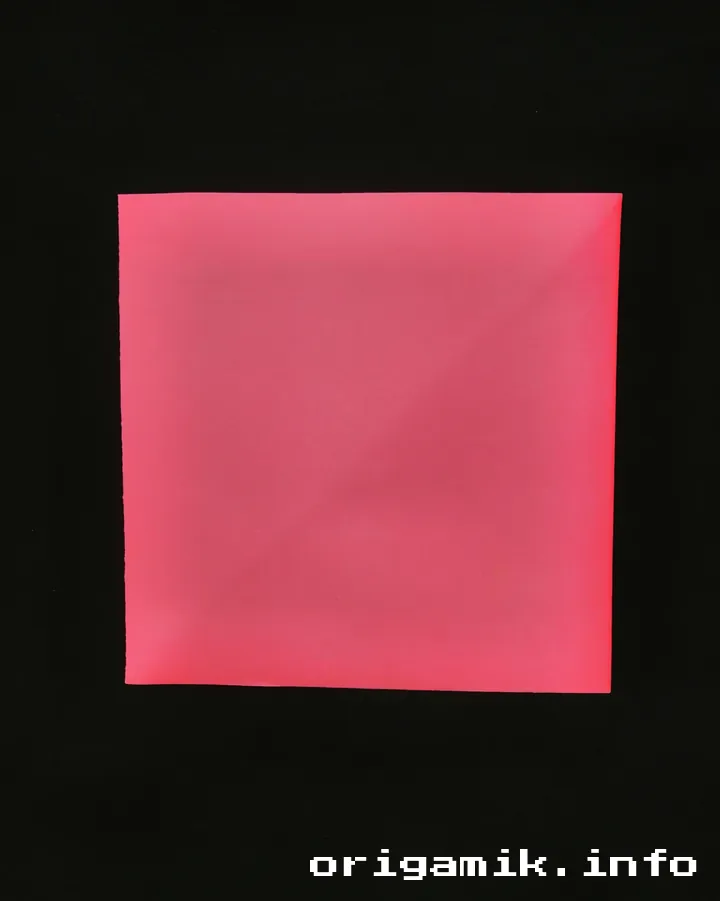
Start by grabbing a 10″ × 10″ square piece of paper. Choose a color that suits the occasion—whether it’s red for love or a pastel for a soft, delicate touch.
2. Fold in Half, Rotate, and Fold Again
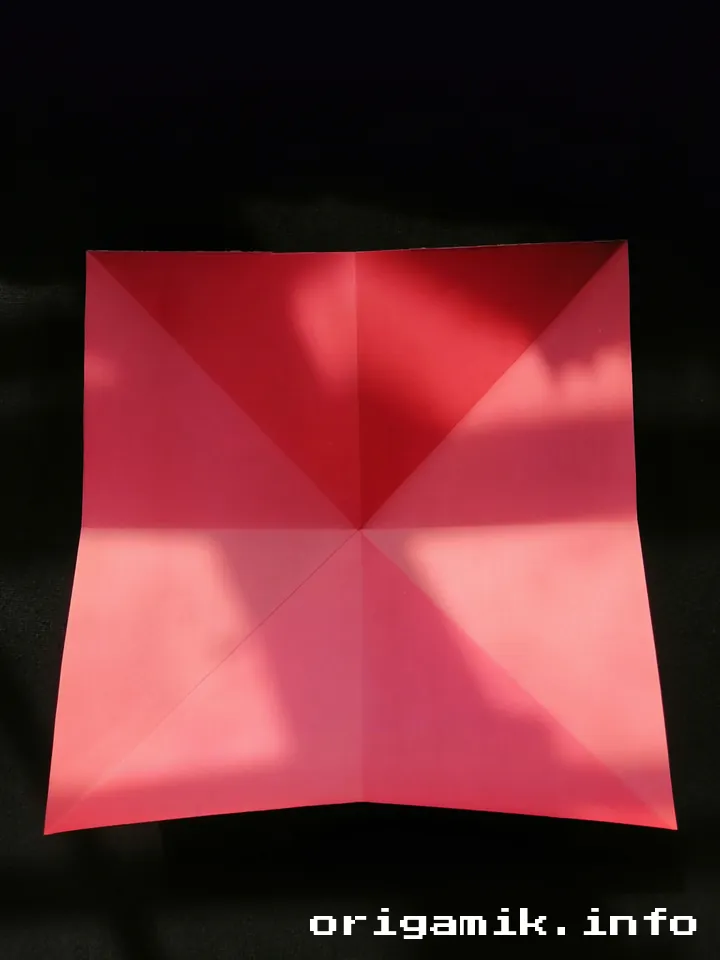
- First fold: Fold the paper in half diagonally. Then, rotate the paper and fold it in half again.
- Second fold: Turn the paper over and fold the bottom edge to meet the upper edge. Fold it again with the opposite side, then unfold everything. This will give you creases to help with the following folds.
3. Turn Over and Fold Using Creases
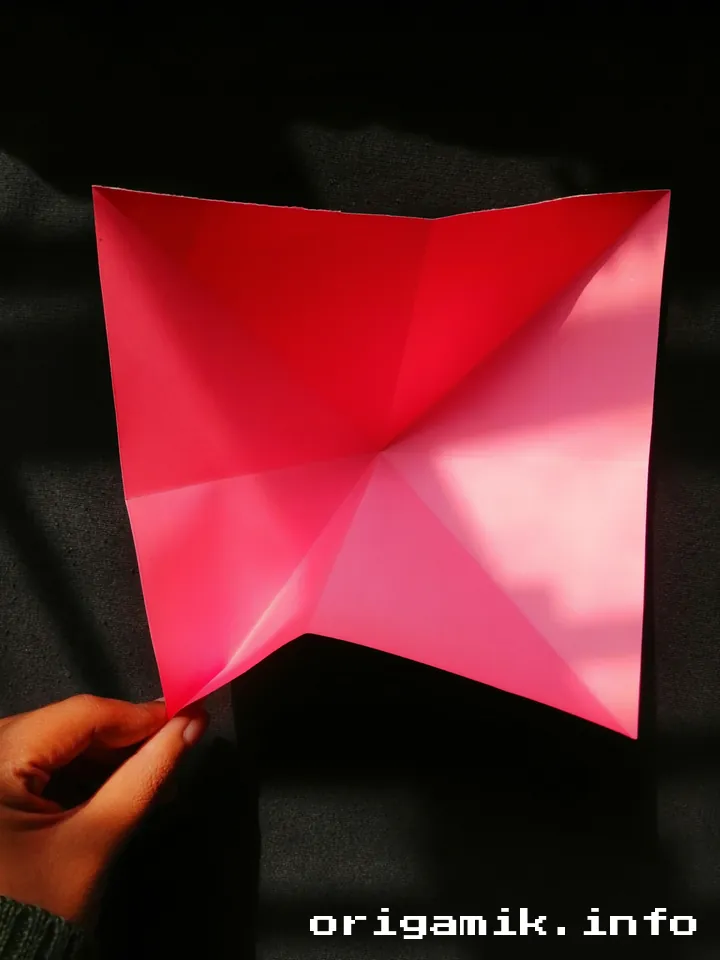
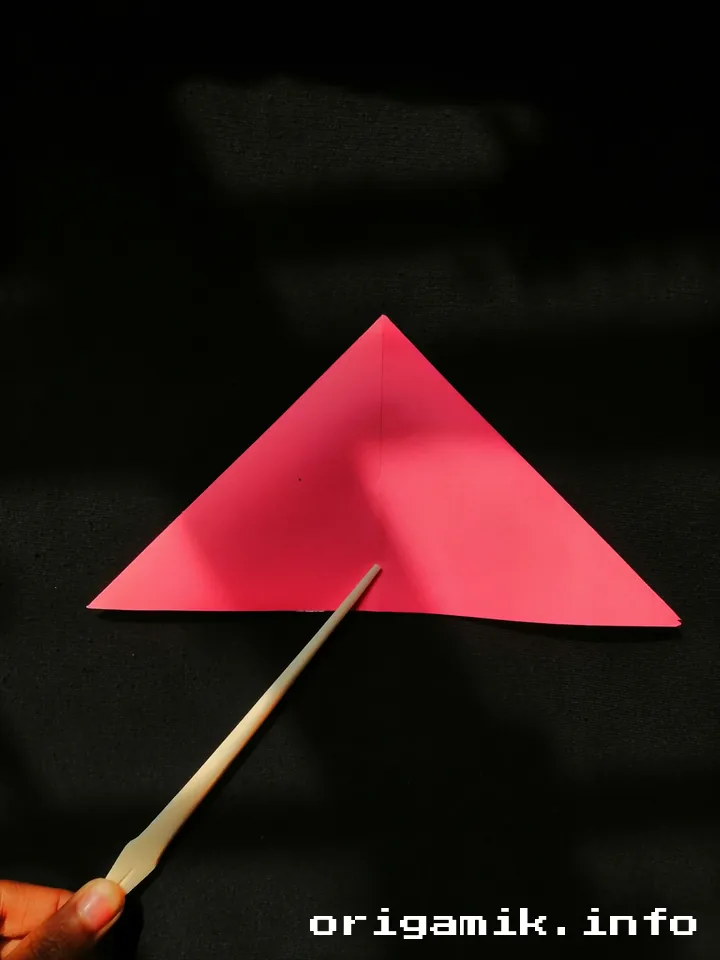
Now, turn the paper over. You’ll notice the creases you’ve made. Use these creases to guide the next folds, ensuring everything is aligned perfectly.
4. Fold the Top to the Bottom Edge
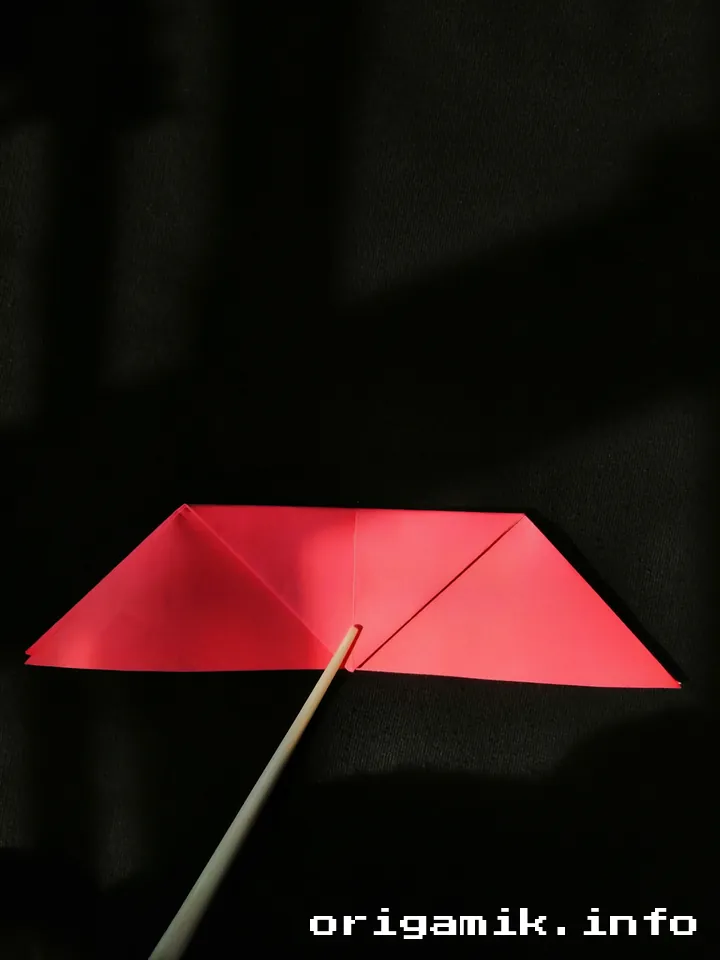
Fold the top edge of the paper down to meet the bottom edge. This step sets up the base of the heart and is crucial for symmetry.
5. Open Both Corners and Flatten
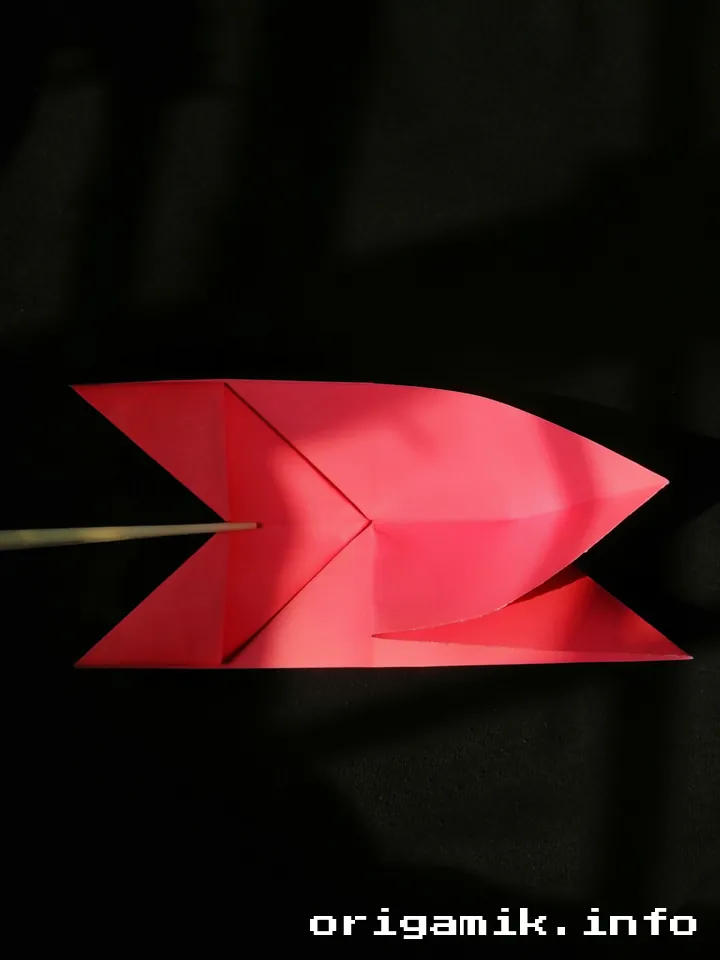
Now, gently open both of the top corners and flatten them. This is where the shape of the heart starts to take form.
6. Fold the Upper Corners to the Upper Edge

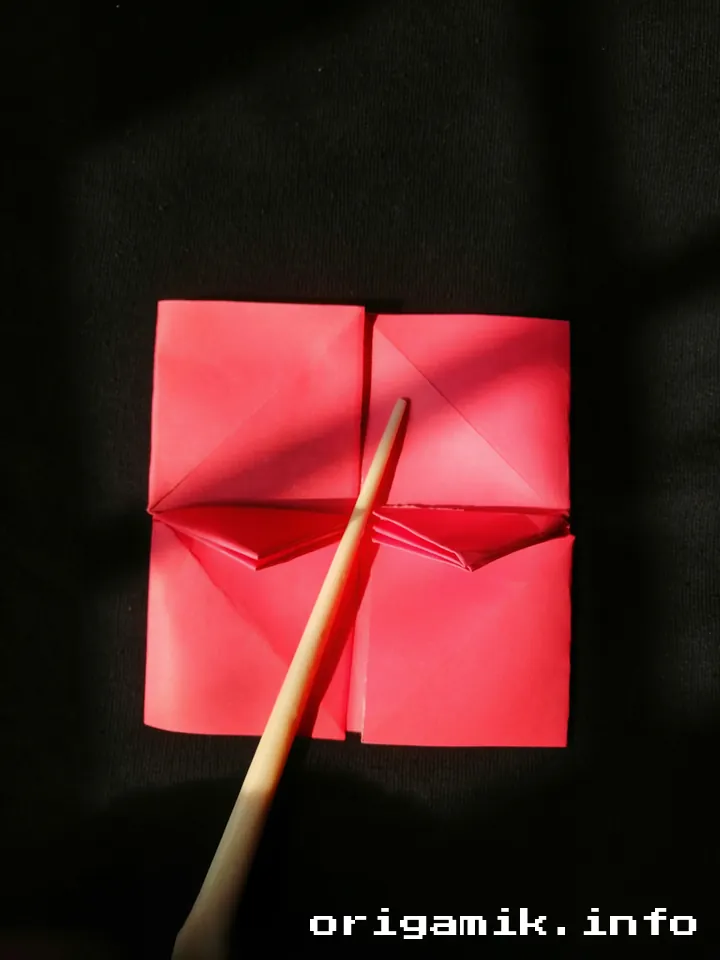
Take the upper corners of the paper and fold them toward the top edge. Then, fold the bottom corner upward to meet the bottom edge. These folds begin creating the heart’s upper shape.
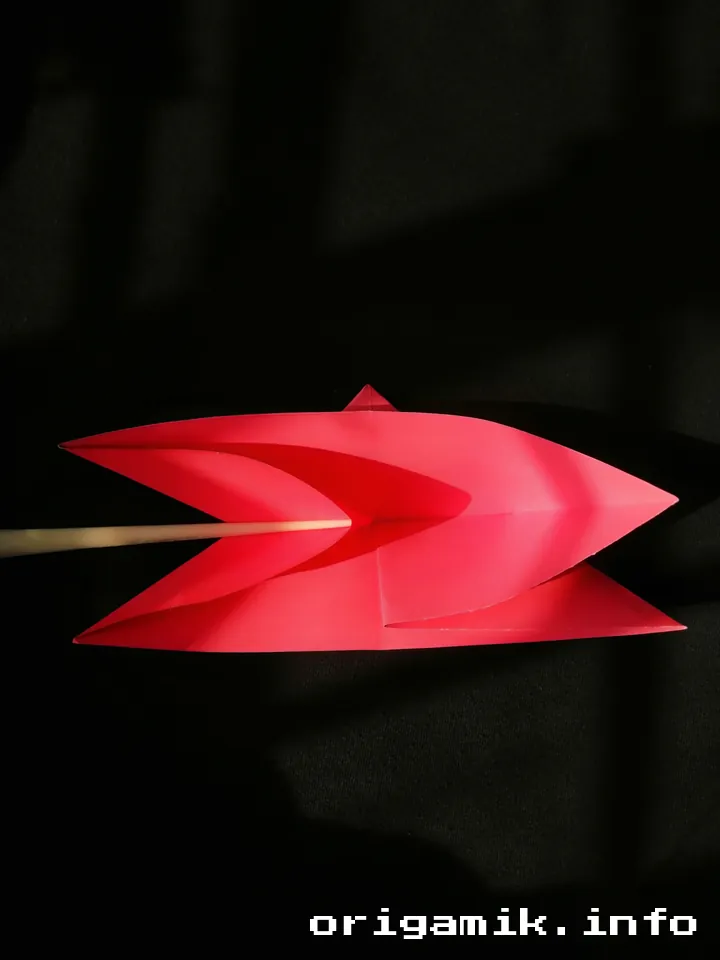
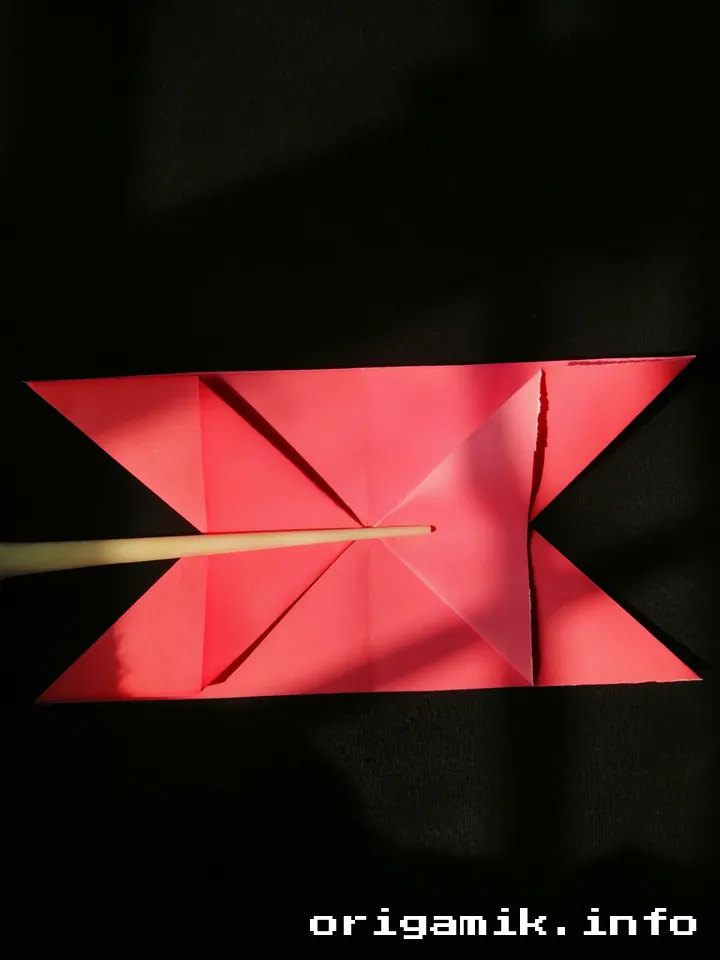
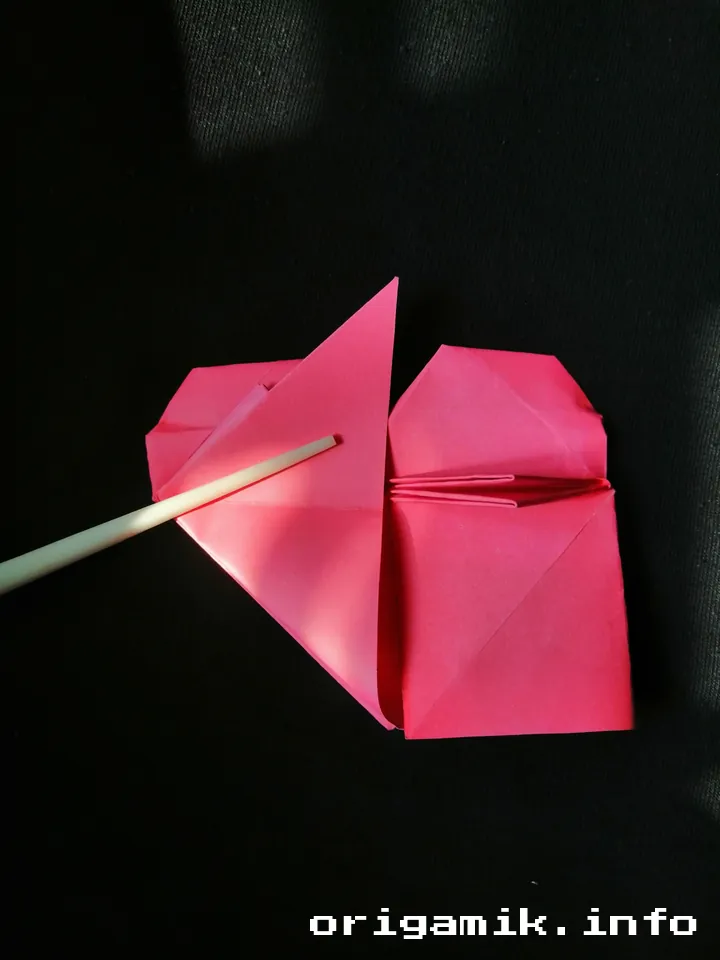
7. Turn Over and Divide the Edge in Three Parts
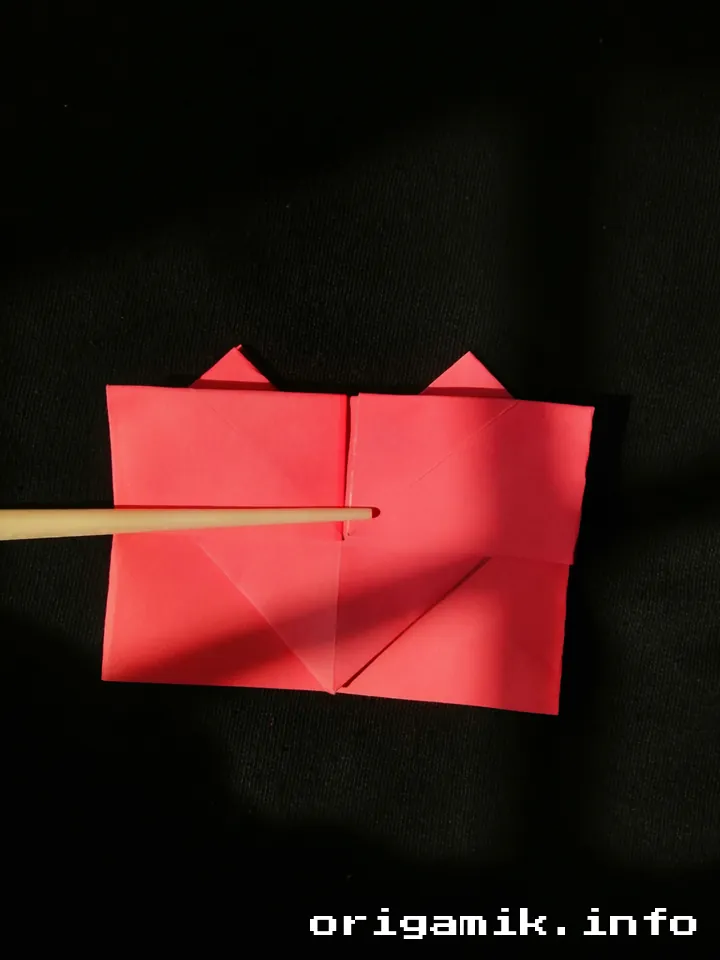
Flip the paper over again. Divide the edge of the paper into three equal sections. Then, fold one part down to create a small triangular shape that will form the bow.
8. Fold Both Corners as Shown

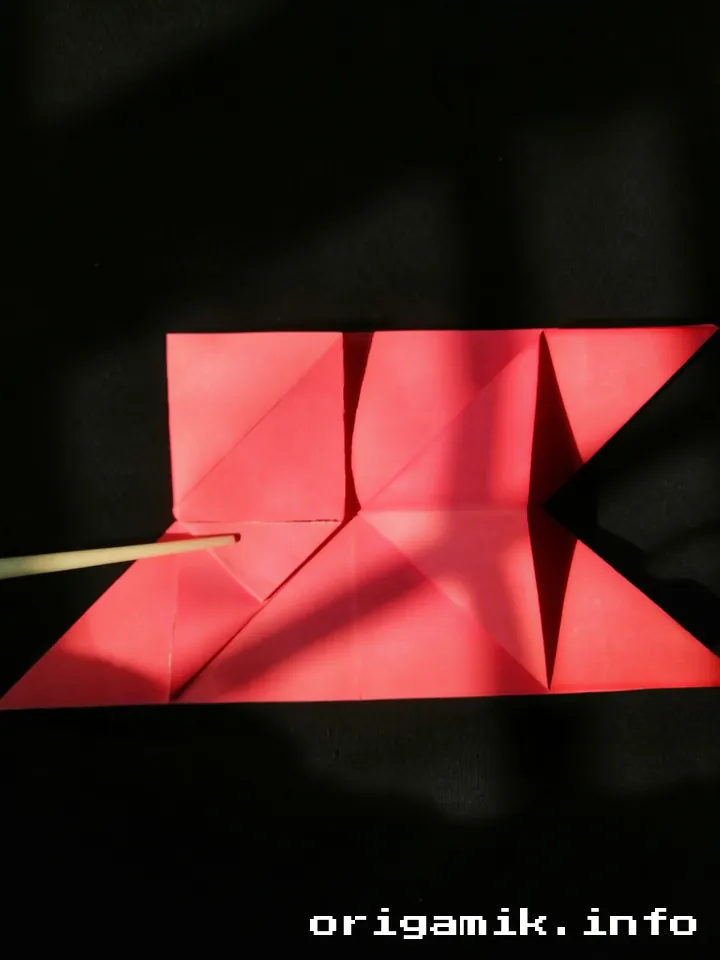
Fold both corners inward to mimic the shape of a bow, as shown in the example. This step is key to creating the decorative bow effect.
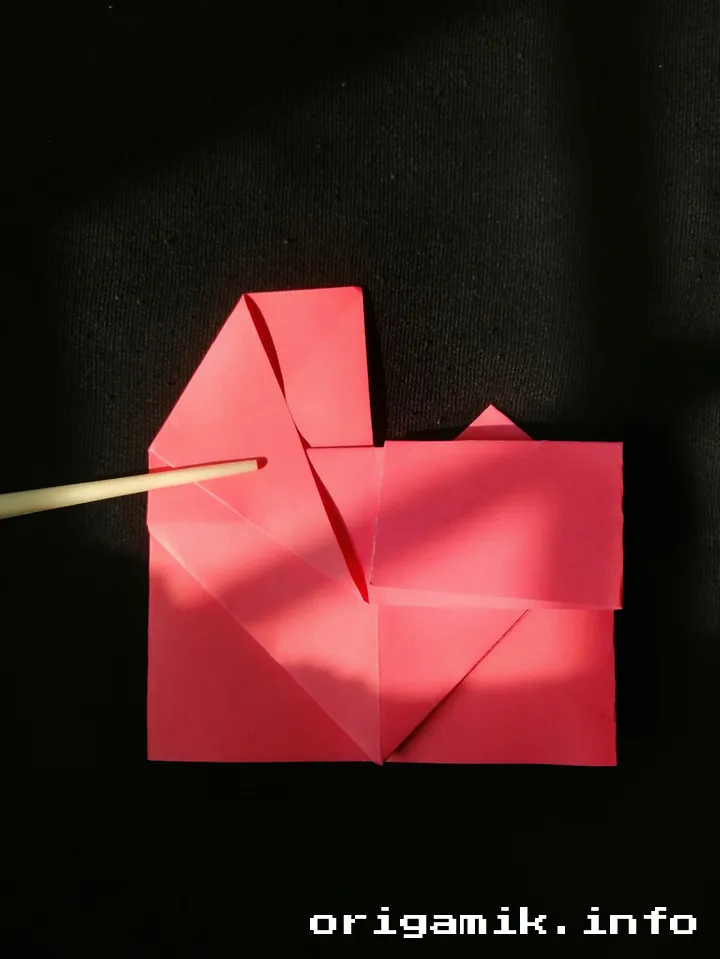
9. Fold the Bottom Corners Inside
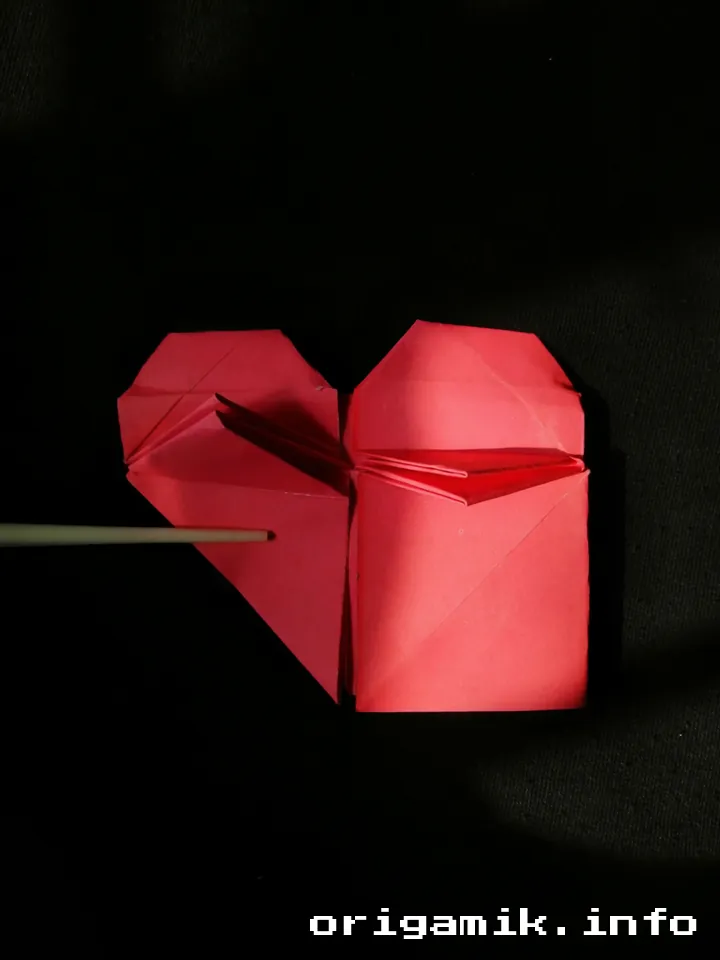
Fold the bottom corners of the paper inside to help define the heart shape and keep the design neat. These folds give the piece its clean, refined edges.
10. Fold the Down Corner as Shown

Fold the bottom corner as shown in the picture, ensuring that the folds are symmetrical. This completes the heart’s base structure.
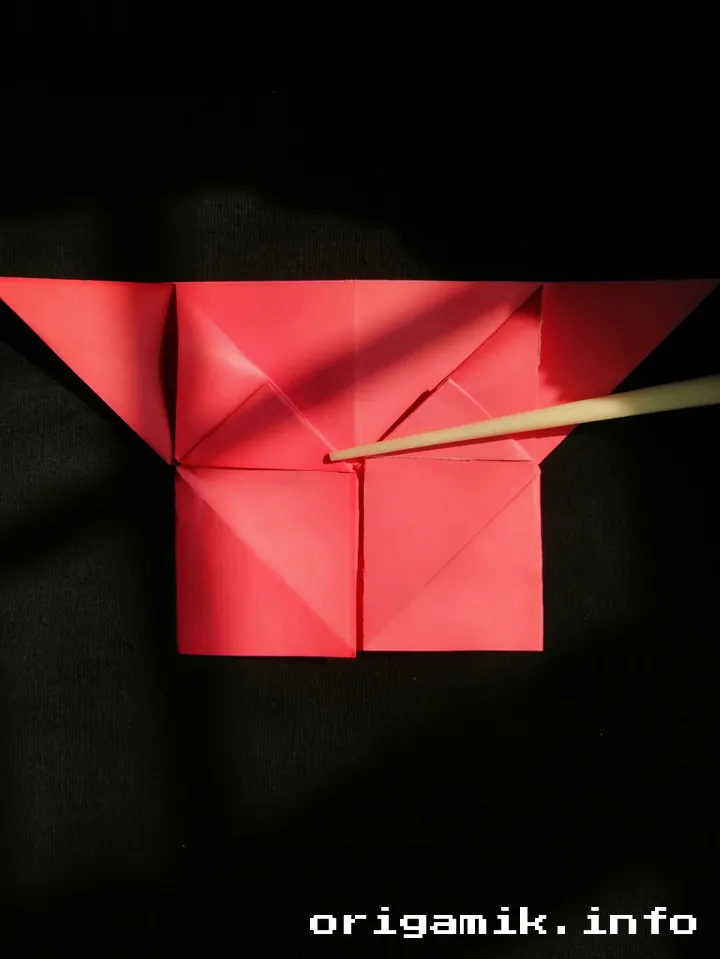
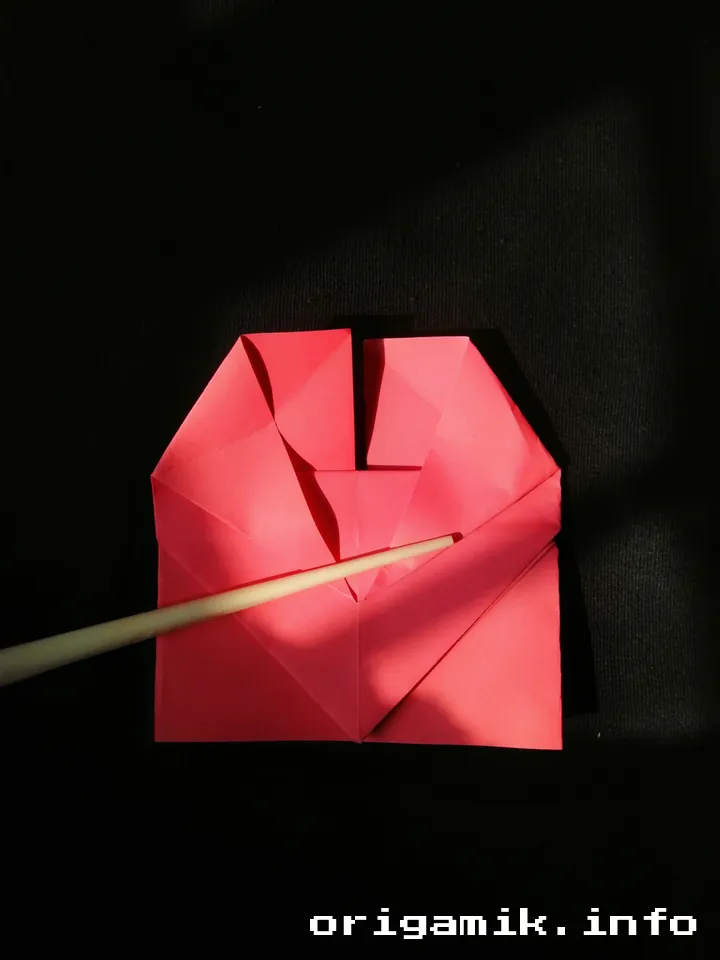
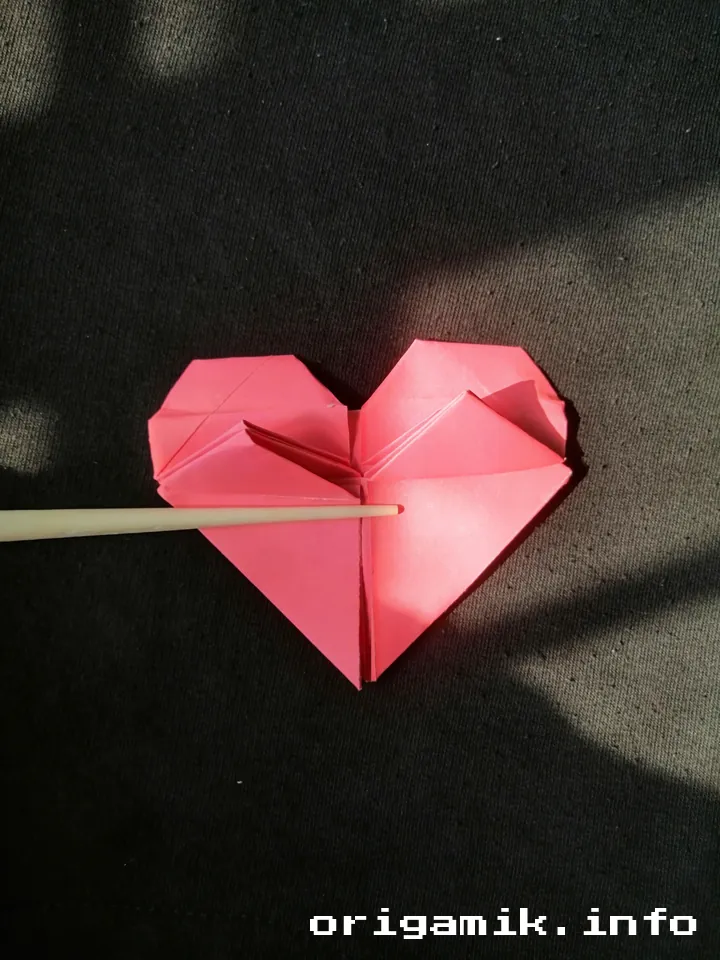
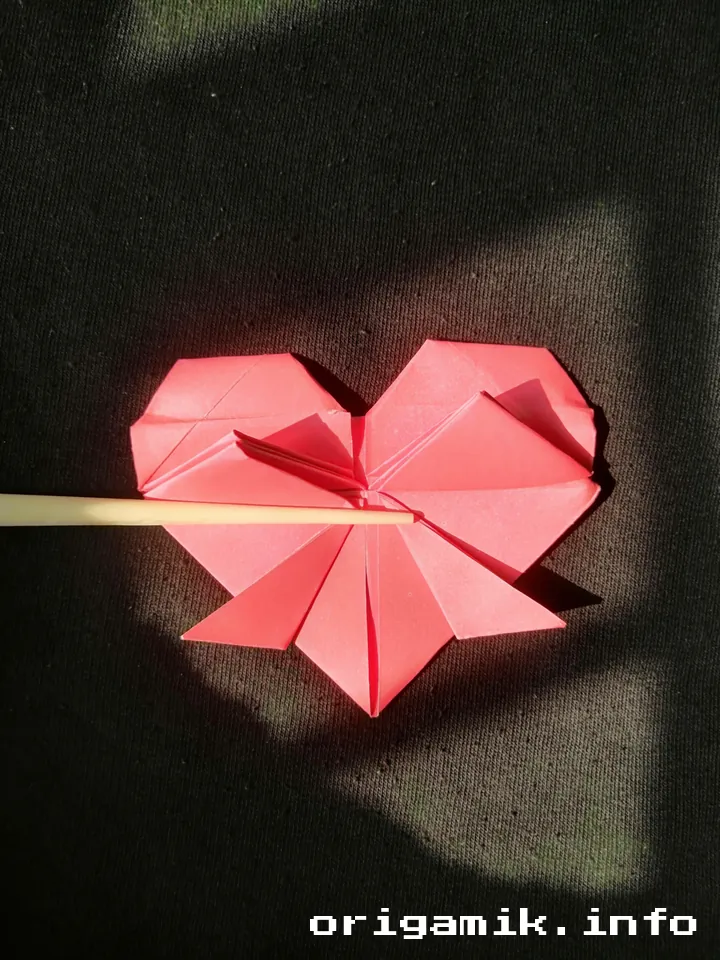
11. Open Each Part and Flatten

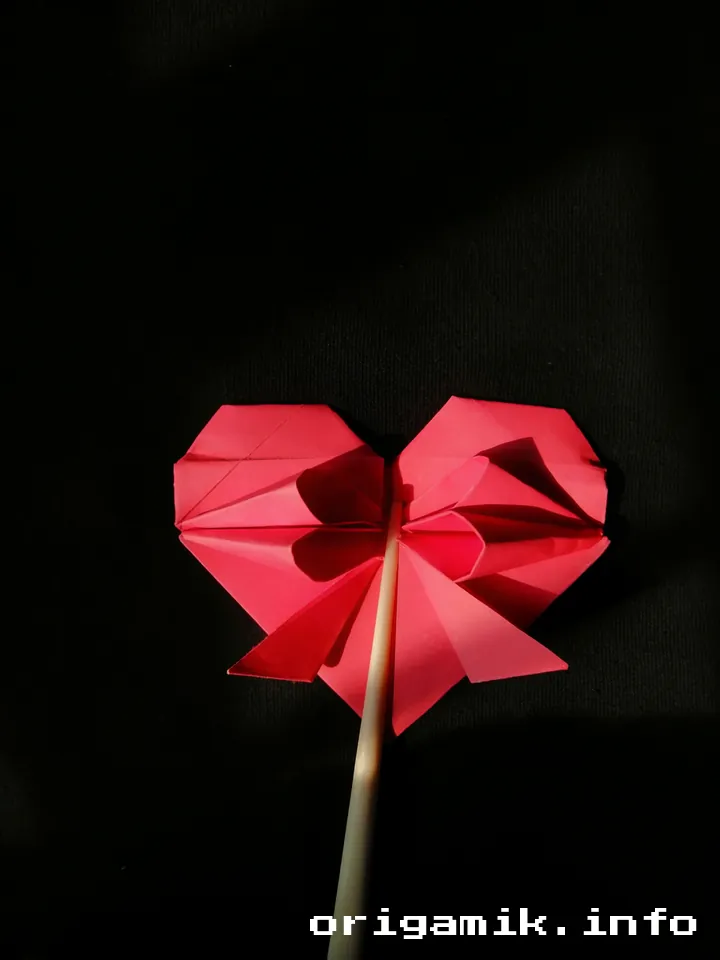

Finally, open each part of the heart and flatten them. Your heart with a bow is now ready!
Tips for Success
Creating an origami heart with a bow can be a bit tricky, but with some attention to detail, you’ll master it in no time! Here are a few tips to help you along the way:
- Use crisp, clean folds: The sharper your folds, the cleaner your heart and bow will turn out.
- Take your time: It’s easy to rush through folds, but each step matters for the final result.
- Try different paper types: For a unique touch, try using patterned or metallic paper to make your heart with bow stand out.
- Practice makes perfect: Don’t be discouraged if your first attempt isn’t perfect. Keep trying, and soon you’ll create beautiful hearts every time.
Common Mistakes and How to Avoid Them
Even experienced paper folders sometimes run into a few bumps in the road. Here are some common mistakes and how to avoid them:
- Uneven folds: Make sure to line up your edges carefully when folding. Use a bone folder or your fingernail to press down each crease for precision.
- Skipping steps: Each fold plays an important role in shaping the heart and bow. Don’t skip any steps, or your design may not come together correctly.
- Incorrect paper size: Stick to the 10″ × 10″ square for the best proportions. Larger or smaller paper might not create the perfect heart.
Similar Variations You Can Make
Once you’ve mastered the easy origami heart with bow, you might want to explore other fun variations:
- Origami heart box with bow: This design turns the heart into a box, adding a special twist to the classic shape.
- Mini heart with bow: A smaller version of the heart is perfect for cards or small gifts.
- Colorful heart with bow: Use multiple pieces of paper for a multi-colored effect that makes your origami even more eye-catching.
Conclusion
The origami heart with bow is a simple yet enchanting paper folding project that’s sure to bring a smile to anyone who receives it. By following these heart with bow step by step instructions, you’ll be able to create a charming decoration or gift in no time. Whether you’re making an origami heart box with bow instructions or just folding for fun, this project offers a rewarding experience that’s both easy and beautiful.
Keep practicing, and let your creativity guide you to new designs. Happy folding!