

Ever wondered how to transform a simple sheet of paper into a soaring ninja warrior? Today I’ll teach you the secrets of creating an easy flying ninja paper airplane that cuts through air like a samurai’s blade.
Picture this: your paper creation gliding silently across the room, spinning and diving with ninja-like precision. The magic happens when ancient folding techniques meet modern aerodynamics.
Get ready for an adventure in paper folding that’ll have you hooked from the first throw!
What Makes a Flying Ninja Paper Airplane Special?
Let me tell you something. I’ve folded hundreds of paper airplanes over the years. But nothing quite compares to the thrill of watching a ninja-style plane perform its aerial acrobatics.
The flying ninja paper airplane isn’t your typical childhood creation. It’s engineered for performance. The unique folding pattern creates multiple flight surfaces that work together. Think of it as origami meets aviation engineering.
What sets this design apart? Stability. Distance. Style.
Unlike basic paper planes that nose-dive after a few feet, the ninja airplane maintains its flight path. The secret lies in its balanced weight distribution and aerodynamic profile.
Key Characteristics of Ninja Paper Airplanes
Flight Performance : Extended glide time with stable flight patterns
Aerodynamic Design : Multiple wing surfaces create lift and control
Visual Appeal : Sleek, angular appearance resembling stealth aircraft
Throwing Versatility : Works with various launch techniques and angles
Materials Needed for Your Flying Ninja Paper Airplane
Here’s everything you’ll need to create your masterpiece:
| Material | Specification | Purpose | Quality Tips |
|---|---|---|---|
| A4 Paper | 20lb (75gsm) standard copy paper | Main construction material | Avoid paper that’s too thick or thin |
| Work Surface | Flat, clean table or desk | Precise folding area | Ensure surface is smooth and stable |
| Bone Folder (Optional) | Plastic or bone creasing tool | Sharp, clean folds | Can substitute with ruler edge |
| Ruler | 12-inch standard ruler | Measuring and creasing | Metal rulers work best for crisp edges |
| Clean Hands | Dry, oil-free fingers | Prevents paper damage | Wash hands before starting |
The beauty of this project? You probably have everything you need right now. I always keep a stack of A4 paper handy for spontaneous folding sessions.
Simple Flying Ninja Paper Airplane Step by Step Instructions
Ready to dive in? I’ll walk you through each fold with precision. These flying ninja paper airplane instructions have been tested countless times.
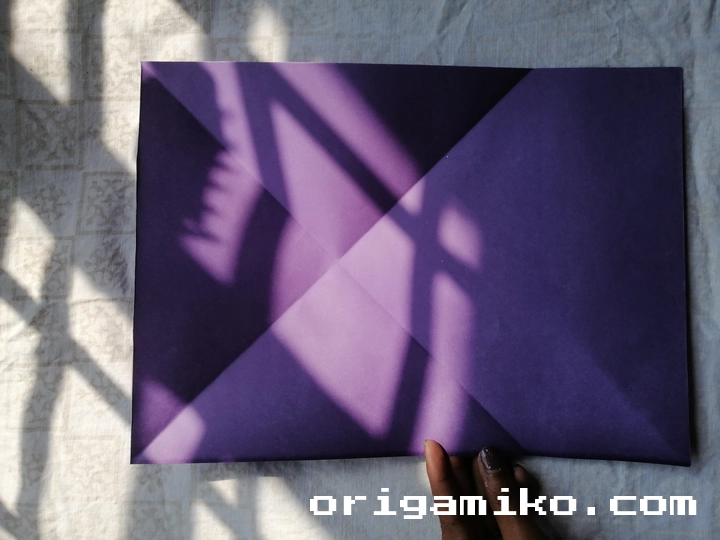
Step 1: Prepare Your Paper
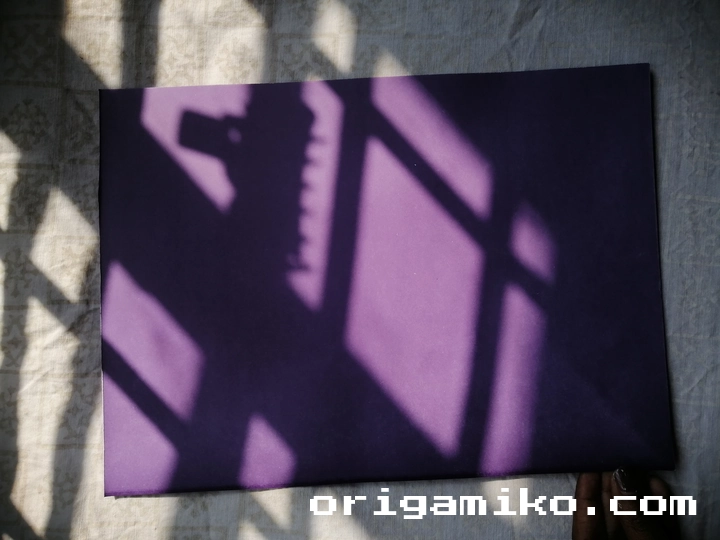
Take your A4 paper and place it landscape orientation in front of you. The long edge should be horizontal. Make sure your work surface is clean and flat.
I always start by running my hand across the paper to remove any wrinkles. Even small imperfections can affect flight performance.
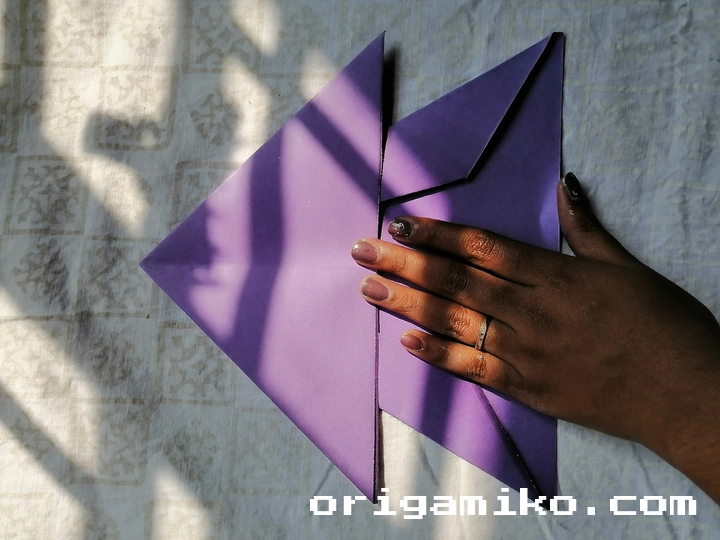
Step 2: Create the Initial Valley Folds
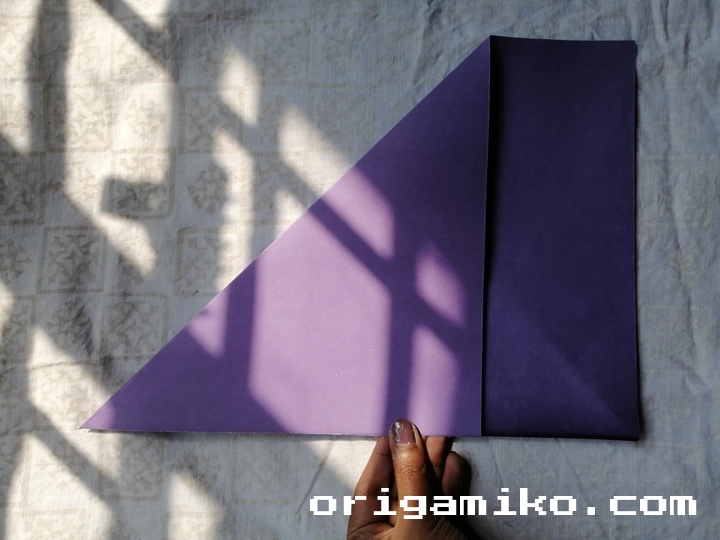
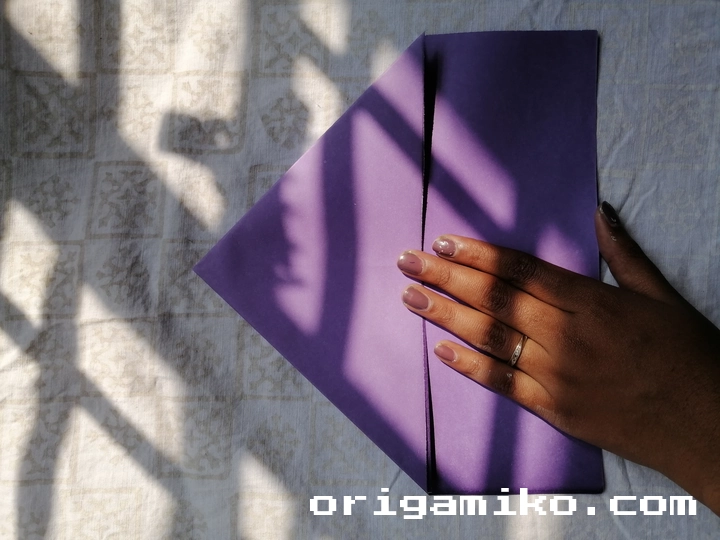
Fold the top both sides of the paper down toward the center. This creates two triangular flaps at the top edge. The points should meet exactly in the middle.
Press down firmly to create sharp creases. This is where that bone folder comes in handy. If you don’t have one, use your fingernail or a ruler edge.
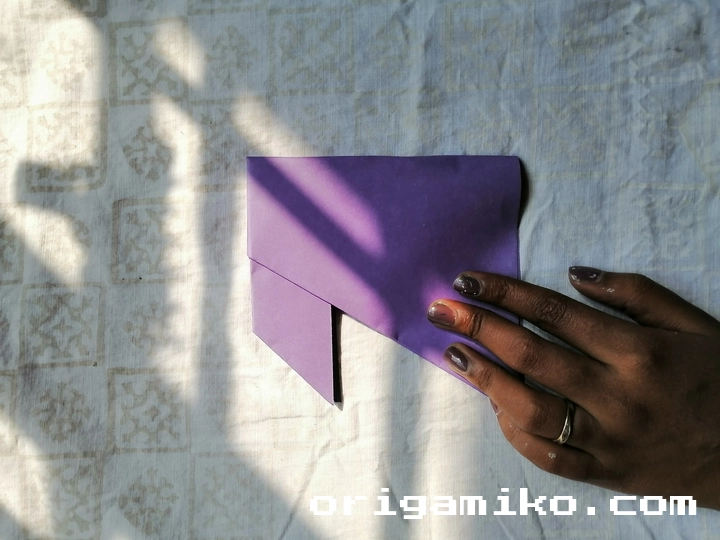
Step 3: Form the Wing Base
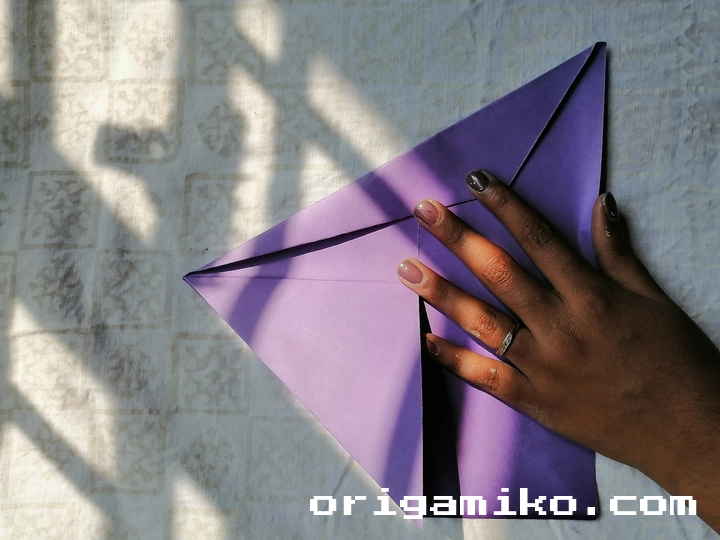
Fold each side of the paper toward the center line. Turn the paper over and repeat the fold on the back side. You’re creating the foundation for your ninja’s wings.
The key here is symmetry. Both sides need to match perfectly for balanced flight.
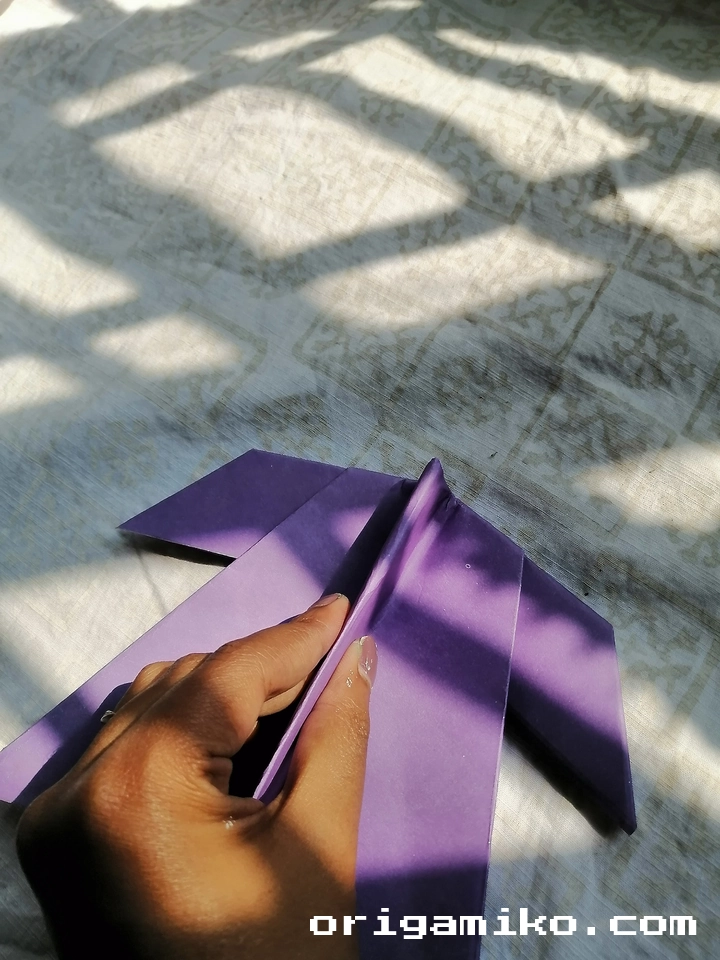
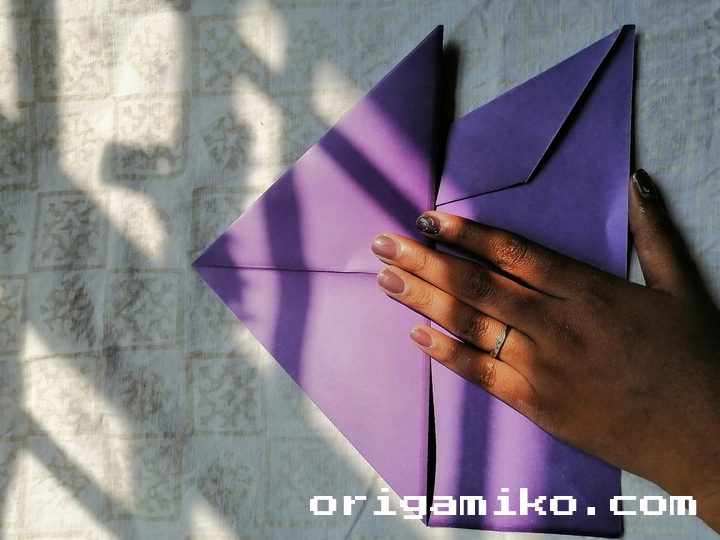
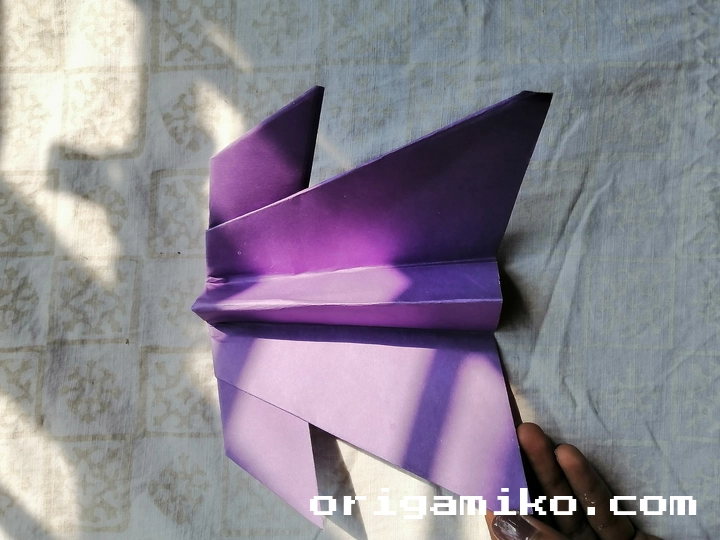
Step 4: Shape the Central Body
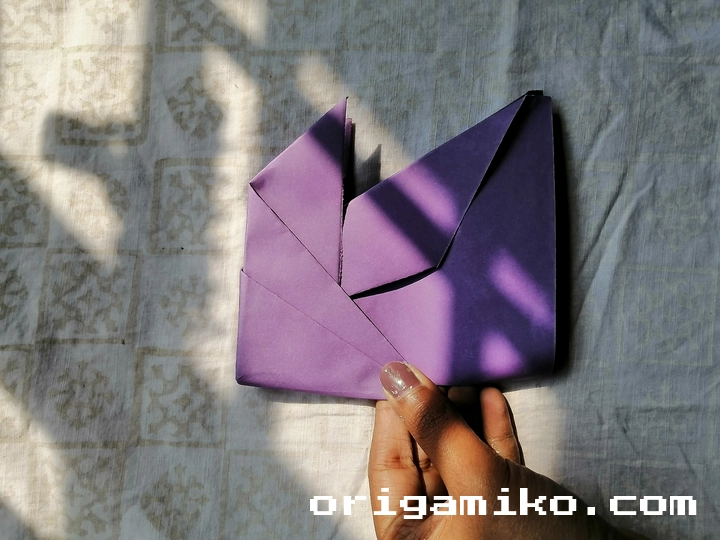
Fold along the middle crease, then fold the two outer sections inward. This creates the distinctive ninja airplane silhouette.
Take your time with this step. The precision of these folds determines your plane’s aerodynamic properties.
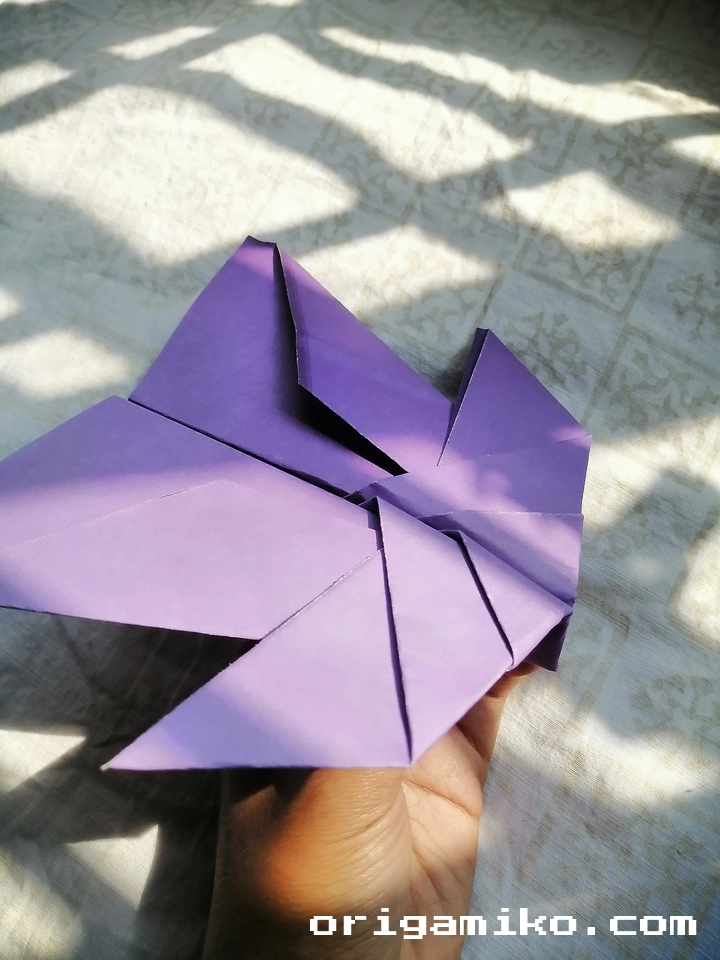
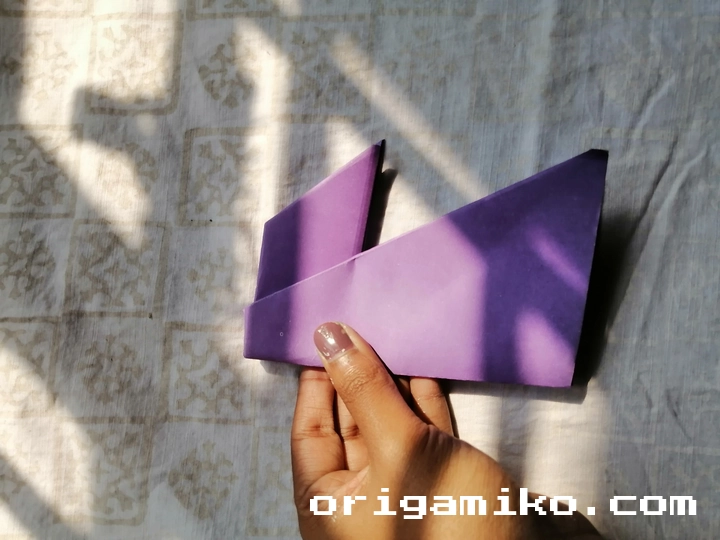
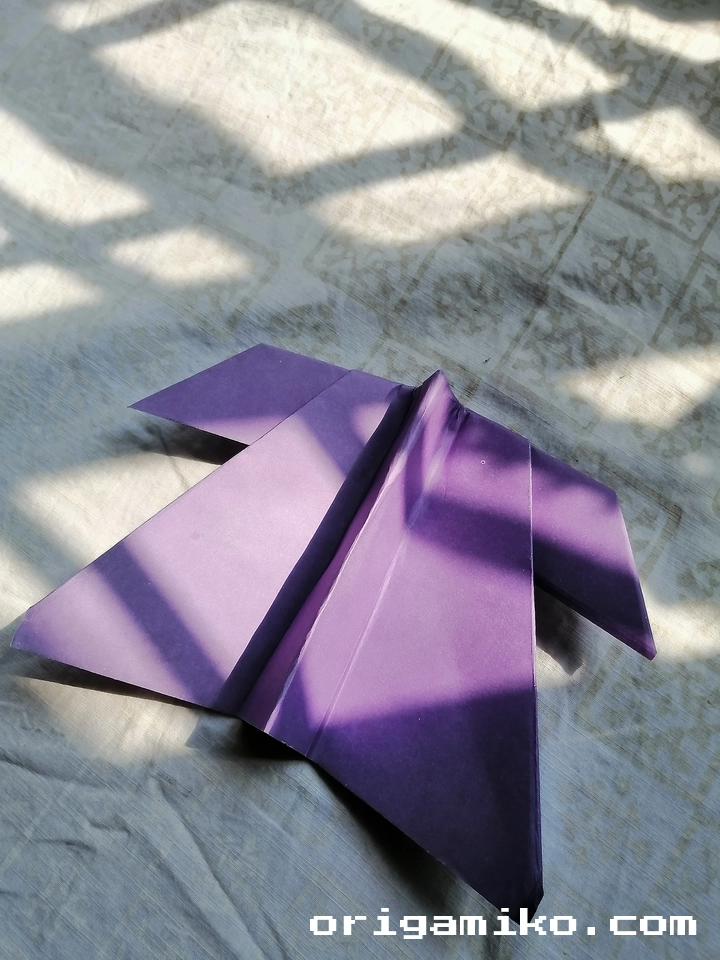
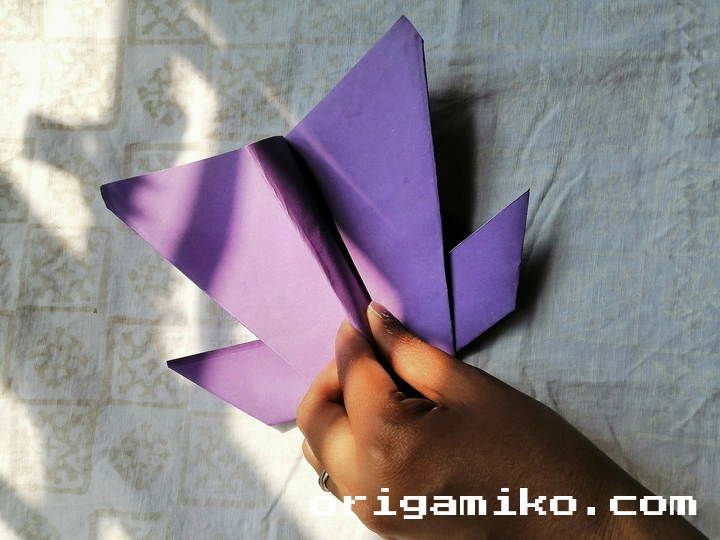
Step 5: Final Assembly
Your flying ninja paper airplane is now ready for action! Give it a gentle test flight to check the balance.
The finished product should feel solid but not heavy. The wings should be evenly positioned and the nose should come to a clean point.
Tips for Success: Making Your Ninja Soar
After years of perfecting this craft, I’ve learned some insider secrets that make all the difference.
Perfect Your Creases Sharp, clean folds are everything. Spend extra time pressing each crease. Sloppy folds equal sloppy flight.
Symmetry is King Measure twice, fold once. Even a slight imbalance will send your ninja into a death spiral.
Paper Choice Matters Standard copy paper works best. Avoid cardstock (too heavy) or tissue paper (too flimsy).
Launch Technique Hold the plane at the center bottom. Use a firm but smooth throwing motion. Aim slightly upward, not straight ahead.
Test and Adjust Your first throw might not be perfect. Small adjustments to wing angle can dramatically improve performance.
Common Mistakes and How to Avoid Them
Let me save you some frustration by sharing the most common pitfalls I see beginners make.
Mistake #1: Rushing the Folds
The Problem: Hurried folding creates uneven creases and poor alignment.
The Solution: Take your time. Each fold builds on the previous one. A rushed foundation means a wobbly ninja.
Mistake #2: Using Wrong Paper
The Problem: Choosing paper that’s too thick, thin, or textured.
The Solution: Stick with standard 20lb copy paper. I’ve tested dozens of paper types, and this consistently performs best.
Mistake #3: Ignoring Symmetry
The Problem: Uneven folds create flight instability.
The Solution: Constantly check that both sides match. Hold the plane up to the light to spot asymmetries.
Mistake #4: Poor Launch Technique
The Problem: Throwing too hard or at the wrong angle.
The Solution: Practice gentle, controlled releases. The ninja airplane glides, it doesn’t rocket.
Mistake #5: Giving Up Too Soon
The Problem: Expecting perfection on the first try.
The Solution: Make several planes. Each one teaches you something new about how to make flying ninja paper airplane designs work better.
Similar Variations You Can Explore
Once you’ve mastered the basic ninja design, why stop there? Here are some exciting variations to try.
The Stealth Ninja
Add an extra fold to create a more angular, stealth-bomber appearance. This version flies slightly slower but looks incredibly cool.
The Speed Demon
Modify the wing angle for maximum velocity. This ninja sacrifices some stability for raw speed.
The Acrobat
Adjust the center of gravity by adding small folds to the nose. This creates a plane that performs loops and barrel rolls.
The Long-Distance Cruiser
Extend the wingspan slightly for maximum glide time. Perfect for outdoor flying sessions.
The Mini Ninja
Scale down the design using half-size paper. These tiny ninjas are perfect for indoor flying.
Each variation teaches you more about aerodynamics and paper engineering. I encourage you to experiment and find your favorite style.
Advanced Flying Techniques
Ready to take your ninja to the next level? These throwing techniques will maximize your plane’s potential.
The Gentle Glider Use a smooth, horizontal release for maximum distance. Let the ninja find its own flight path.
The Power Dive Angle your throw slightly downward for speed runs. Watch your ninja streak across the room.
The Updraft Rider Find air currents (near heating vents or open windows) and launch your ninja into them. You’ll be amazed how long it can stay airborne.
The Precision Strike Practice accuracy by setting up targets. A skilled ninja pilot can hit specific landing zones consistently.
Troubleshooting Flight Problems
Even experienced folders sometimes encounter issues. Here’s how to diagnose and fix common flight problems.
Problem: Nose Diving
Cause: Nose too heavy or launch angle too steep. Fix: Adjust the nose fold or throw more horizontally.
Problem: Stalling Mid-Flight
Cause: Not enough forward momentum or air resistance too high. Fix: Throw with more force or check for drag-causing folds.
Problem: Veering Left or Right
Cause: Asymmetrical wings or uneven weight distribution. Fix: Carefully examine both sides and adjust accordingly.
Problem: Fluttering or Wobbling
Cause: Loose folds or damaged wings. Fix: Re-crease all folds and check for tears in the paper.
The Science Behind Your Flying Ninja
Understanding the physics makes you a better pilot. Your ninja airplane works through four fundamental forces.
Lift keeps your ninja airborne. The wing shape creates different air pressures above and below.
Thrust comes from your throwing motion. The initial energy you provide determines flight distance.
Weight pulls your ninja downward. The paper’s mass and fold distribution affect flight time.
Drag slows your ninja down. Smooth surfaces and clean folds minimize air resistance.
The magic happens when these forces balance perfectly. That’s when your ninja achieves that graceful, extended glide.
Creating Your Own Ninja Squadron
Why stop at one? Building multiple ninjas opens up new possibilities.
You can organize flying competitions with friends. Set up distance challenges, accuracy contests, or freestyle aerobatic shows.
Different colored paper creates a colorful fleet. I love using origami paper for special occasions – the patterns make each ninja unique.
Try building ninjas in different sizes. A squadron of varied aircraft creates an impressive display.
Frequently Asked Questions
Q: How far can a flying ninja paper airplane travel? A: With perfect conditions and technique, I’ve seen ninjas glide over 50 feet indoors. Outdoor flights can go much further with favorable wind.
Q: Can I decorate my ninja airplane? A: Absolutely! Light decorations like markers or colored pencils won’t significantly affect flight. Avoid heavy additions like stickers.
Q: What’s the best paper size for beginners? A: Standard A4 copy paper is perfect. It’s the right balance of size, weight, and availability.
Q: How long does it take to fold a ninja airplane? A: With practice, you can complete one in about 3-5 minutes. Beginners should expect 10-15 minutes for their first attempt.
Q: Can kids make this design? A: Yes! Children as young as 8 can successfully fold ninja airplanes with adult guidance. It’s a great way to develop fine motor skills.
Q: Do weather conditions affect flight? A: Indoor flying provides the most consistent results. Light outdoor breezes can actually help, but strong winds make control difficult.
Taking Your Skills Further
The journey doesn’t end with your first successful ninja airplane. This hobby can grow into a lifelong passion.
Consider joining local origami clubs or paper airplane enthusiast groups. You’ll learn new designs and techniques from fellow folders.
Document your experiments. Keep notes on which paper types, fold variations, and throwing techniques work best for you.
Challenge yourself with increasingly complex designs. The ninja airplane is just the beginning of what’s possible with paper engineering.
Conclusion
Creating your first easy flying ninja paper airplane is more than just folding paper – it’s about discovering the perfect blend of art and science. I’ve watched countless people light up when their ninja takes its maiden flight, and that moment never gets old.
Remember, every expert was once a beginner. Your first ninja might not be perfect, but each fold teaches you something new. Keep practicing, keep experimenting, and most importantly, keep having fun with this amazing craft that turns simple paper into soaring dreams.