

Origami is a wonderful art form that allows you to turn a simple piece of paper into a work of beauty. In this guide, I’ll show you how to make an easy Origami carnation flower that will impress anyone who sees it. Whether you’re a beginner or an experienced artist, the step-by-step process is simple and fun!
Materials Needed
Before we start folding, let’s take a look at the materials you’ll need to create your origami carnation flower. Here’s a table to help you gather everything you’ll need:
| Item | Description |
|---|---|
| Paper | 10×10 cm square paper (color of your choice) |
| Glue | For sticking the layers together |
| Scissors | Optional, to trim edges if needed |
Introduction to the Origami Carnation Flower
If you’re looking for a beautiful and easy Origami project, the Origami carnation flower is a fantastic choice. Not only is it visually stunning, but the process is also straightforward, even for beginners. Trust me, this flower will leave you feeling proud of your folding skills!
Creating an Origami carnation flower is not just about folding paper; it’s about enjoying the process and getting immersed in the art. Each step brings you closer to something amazing! Now, let’s dive into how to make this flower from start to finish.
Step-by-Step Instructions to Make an Origami Carnation Flower
Ready to get started? Let’s begin the simple carnation flower step by step.
Step 1: Take a Paper
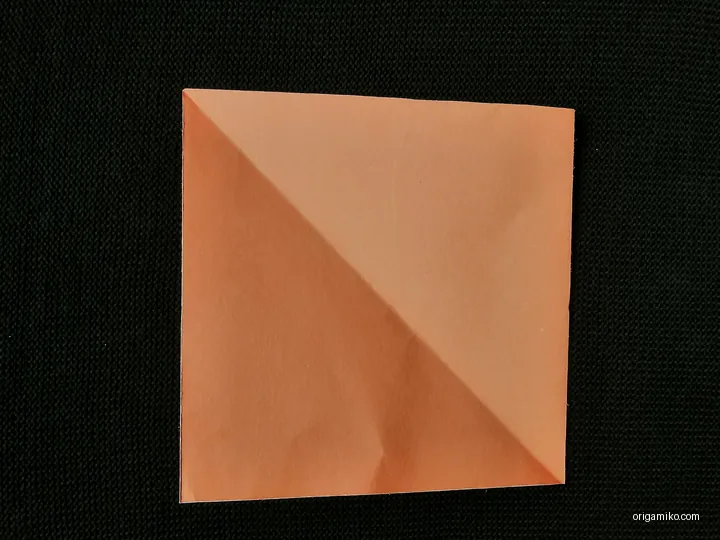
Start with a square piece of paper. The size should be 10×10 cm. If you’re using colored paper, make sure the color is vibrant, as it will help enhance the beauty of the carnation.
Step 2: Fold Just Like a Picture
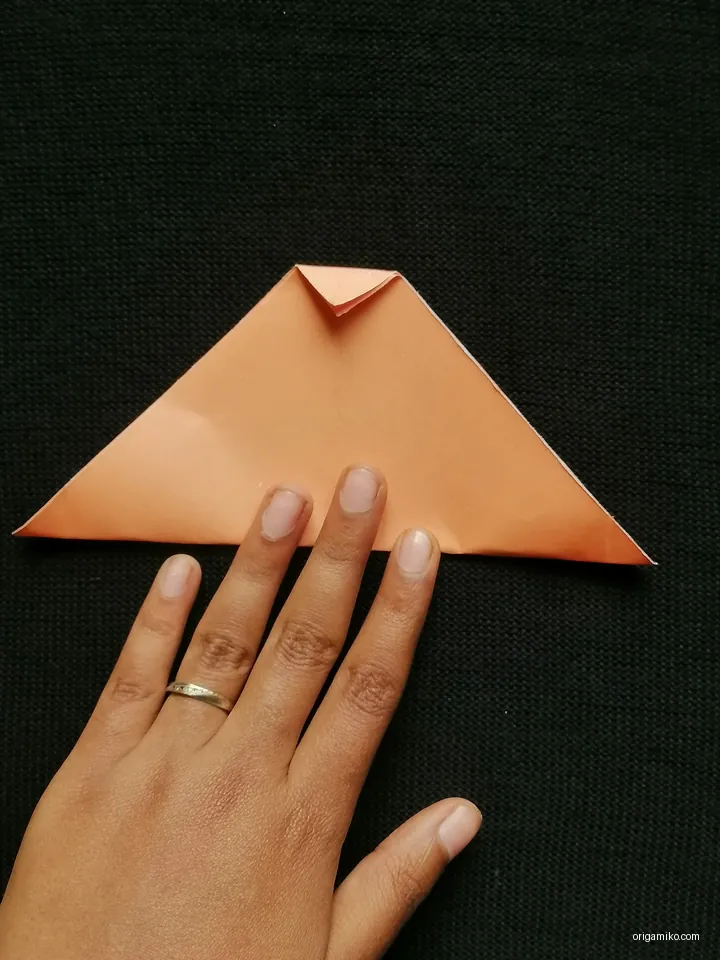
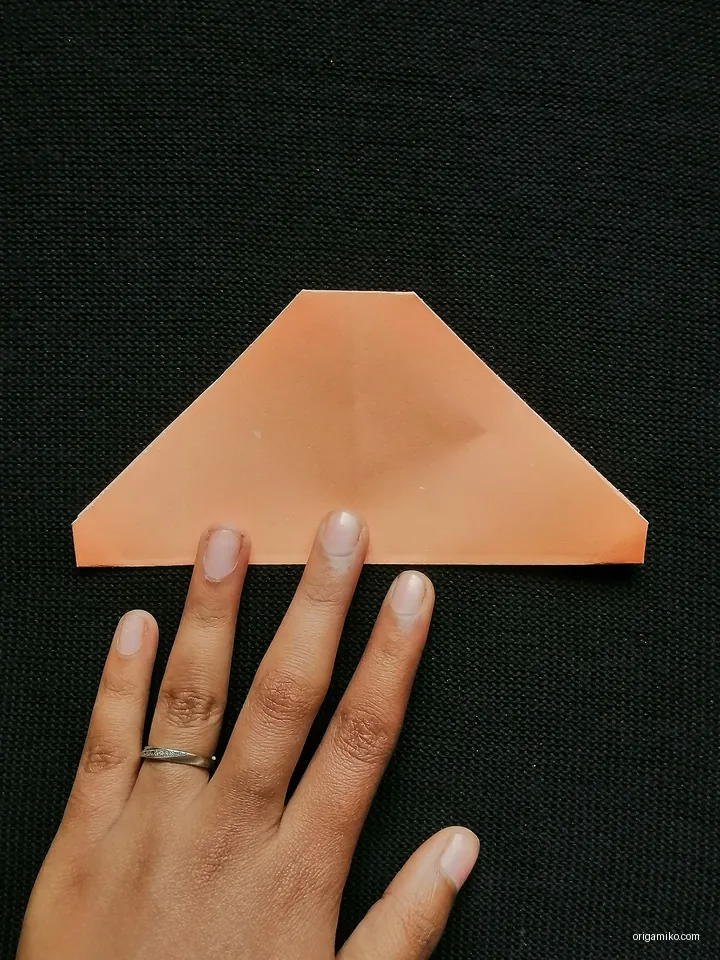
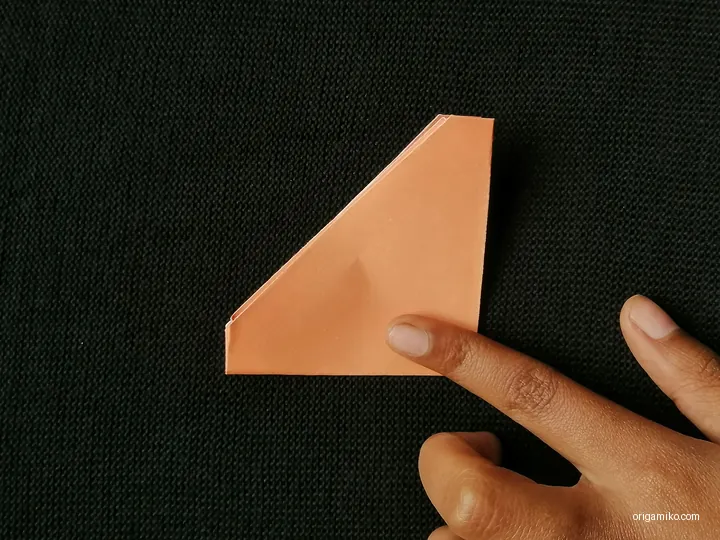
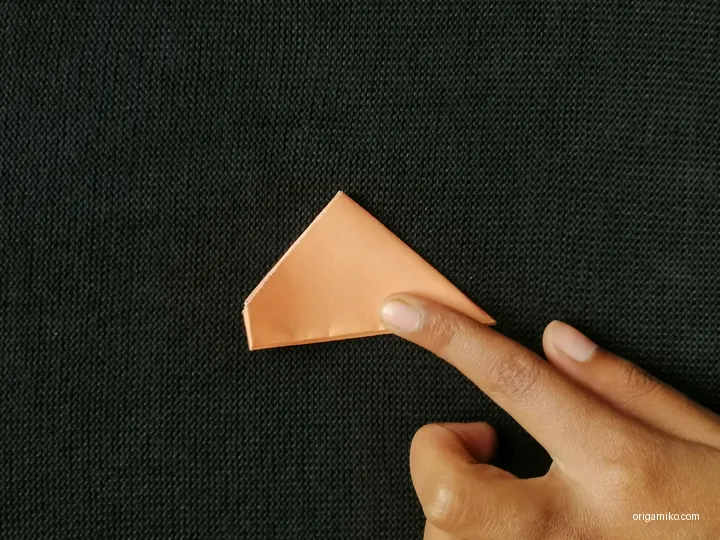
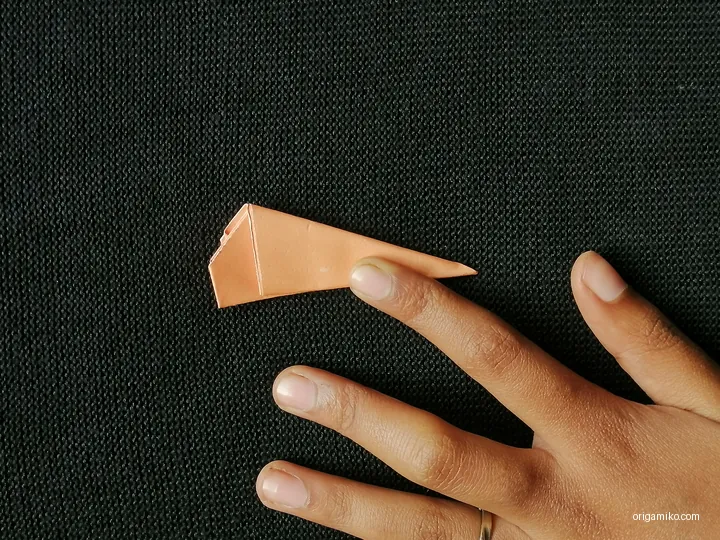
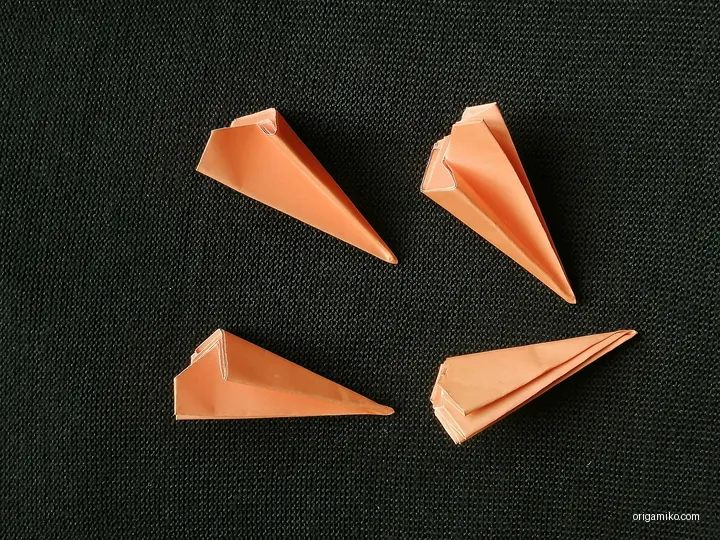
Now, follow the folding instructions exactly as shown in the picture. The folds need to be sharp, so take your time and make sure each crease is well-pressed. This is the most crucial part of the process.
Step 3: Unfold the Paper and Apply Glue
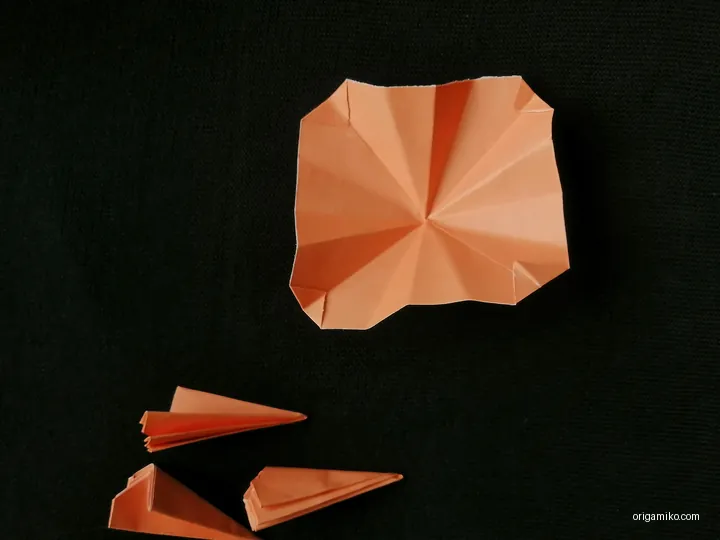
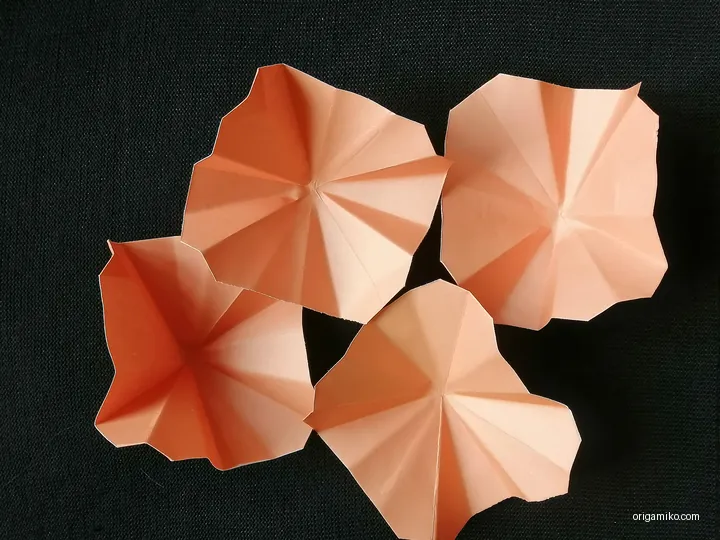
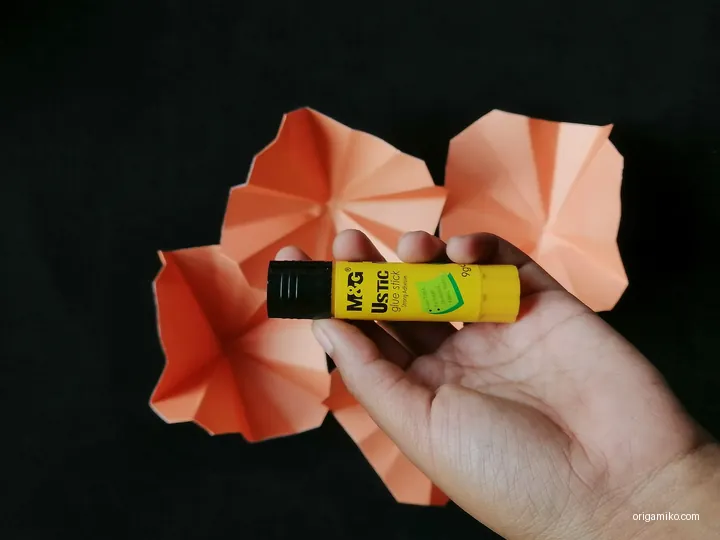
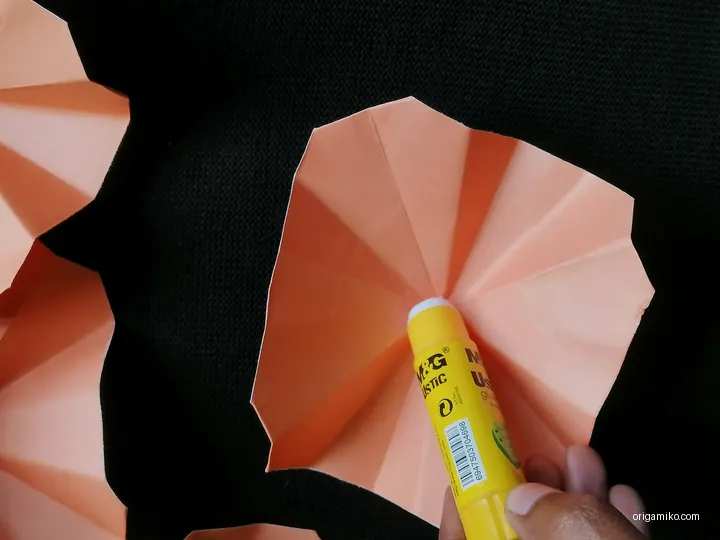
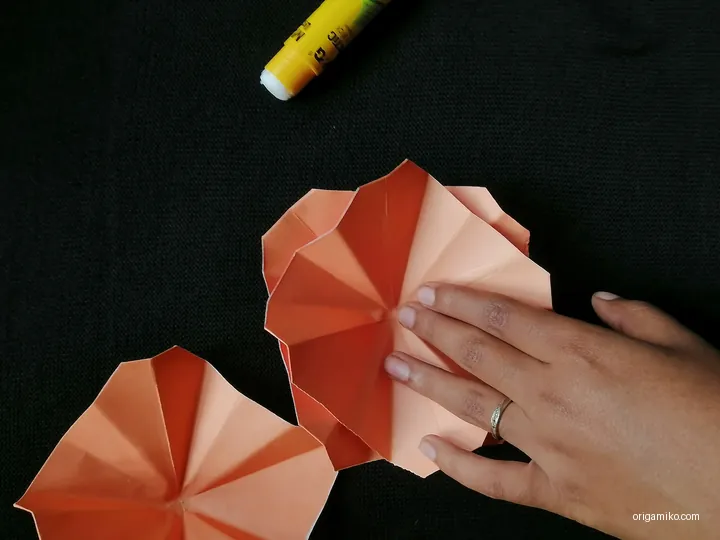
After you’ve folded the paper as shown in the picture, unfold it. Then, apply glue to the edge of one paper and attach it to another paper. This will create the layers for your carnation.
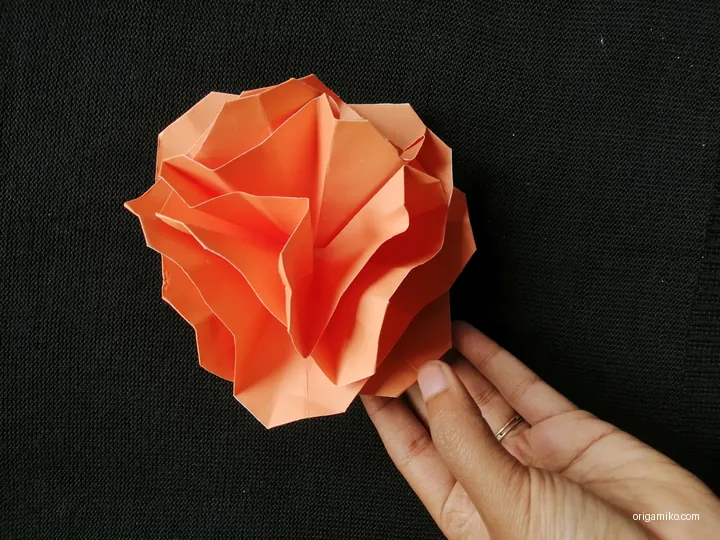
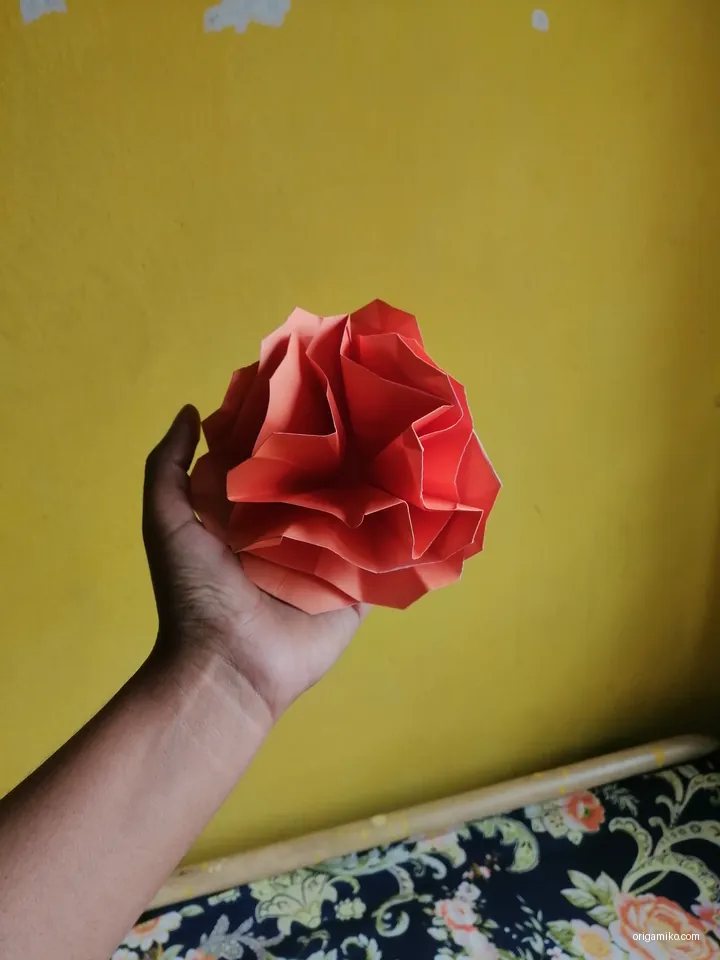
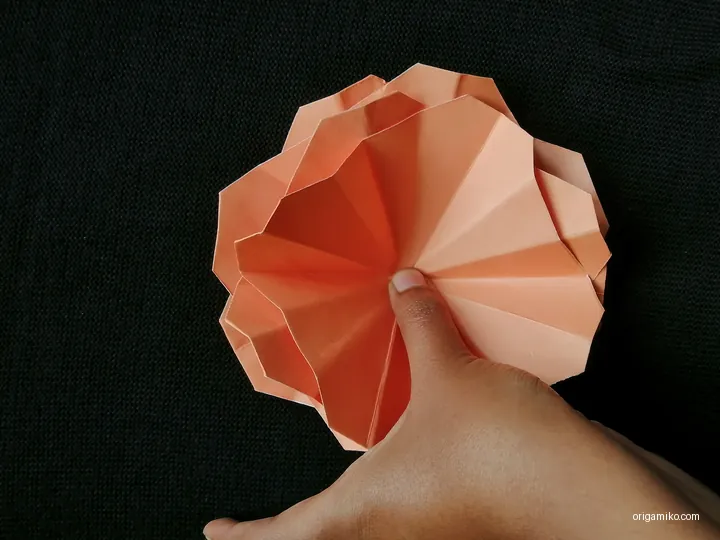
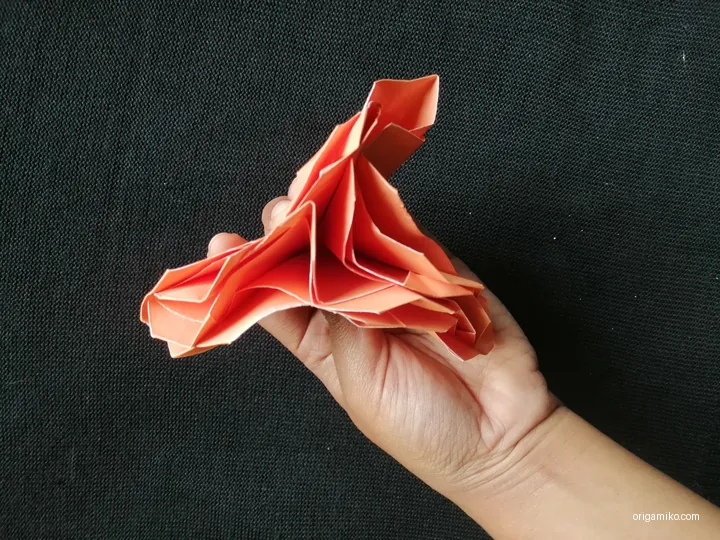
Step 4: Now the Carnation Flower Is Ready
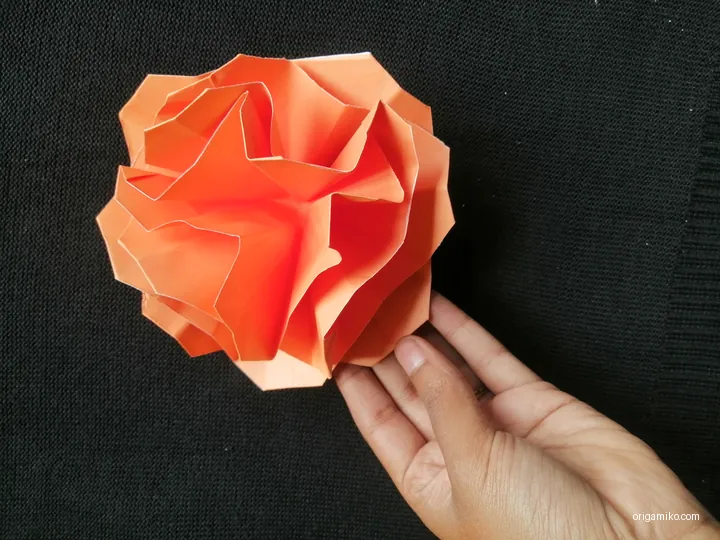
Once the glue has dried, your Origami carnation flower is complete! Carefully adjust the petals and shape the flower to your liking. You now have a beautiful handmade carnation to admire or share with others.
Tips for Success
Making an origami flower can be tricky at times, so here are a few tips to help you succeed:
- Sharp Creases: Make sure to fold the paper sharply for crisp folds. A flat surface and a bone folder can help achieve perfect creases.
- Use Colorful Paper: The brighter the paper, the more striking your carnation flower will look.
- Don’t Rush: Take your time with each step. The slower you go, the more beautiful the result.
Common Mistakes and How to Avoid Them
Origami can be frustrating, especially if you’re new to the art. Here are a few common mistakes and tips on how to avoid them:
- Wrong Fold Direction: Always check that you’re folding in the correct direction as shown in the picture. If not, your flower might not take the right shape.
- Uneven Folds: If the folds aren’t symmetrical, your flower may look uneven. Take your time to make sure each fold is as neat and even as possible.
- Skipping Steps: Each step plays a vital role in achieving the final shape. Skipping any step can mess up the design, so follow each one carefully.
Similar Variations You Can Make
The Origami carnation flower is a versatile project, and there are several variations you can try:
- Double Layer Carnation: Add another layer of petals to make your flower look fuller and more intricate.
- Color Combinations: Use different colored papers for each layer to create a multicolored carnation.
- Miniature Carnation: If you’re feeling adventurous, try creating a smaller version of this flower.
Conclusion
Creating an Origami carnation flower is a fun and rewarding experience. Whether you’re a beginner or an experienced folder, the process is simple and enjoyable. I hope you found this guide helpful and that you’re excited to start making your own beautiful flowers!
FAQs
Q: Can I use any size paper for the carnation?
A: While 10×10 cm is ideal, you can use any square paper. Just adjust the folds to match the size of your paper.
Q: How can I make the flower more realistic?
A: You can experiment with different colors of paper and make the petals more curved for a more lifelike appearance.
Q: Do I need special tools for origami?
A: No, all you need is paper and some patience! A bone folder can help, but it’s not necessary.
By following these Origami carnation flower instructions, you can create a stunning piece of paper art! Have fun folding!