
")
Have you ever wondered how to make an origami speed boat that looks sleek and moves like a real boat? You’re in the right place! The world of origami is fascinating, and this project offers the perfect introduction to the exciting world of paper folding. If you’ve ever tried folding a simple paper boat, this is your chance to take your skills to the next level with a boat that’s faster, sharper, and more exciting to create.
Creating an origami speed boat is a fun, satisfying challenge that combines creativity with technique. No scissors, no glue—just one square sheet of paper and some easy folds, and you’ll have yourself a paper speed boat that’s ready to race across your desk or bathroom sink. Whether you’re a beginner or a seasoned origami artist, this step-by-step guide will help you create your very own paper boat that’ll impress everyone around you.
Let’s get started and dive into the world of paper folding!
What Are We Making?
Today, we’re folding a simple speed boat using origami techniques—no glue, no scissors (well, just one small cut at the end), and no stress. This isn’t just paper folding; this is a mini crafting adventure. Whether you’re totally new or you’ve folded cranes in your sleep, this little boat is a fun, quick project with big charm.
Why a speed boat? Because it’s slick, angular, and a lot more fun than your usual paper boat. This one actually looks like something that could cruise the water in style. Trust me, once you fold your first, you’ll want to make a whole fleet.
What Is an Origami Speed Boat?
Let’s break it down:
Origami:
The Japanese art of paper folding, turning a flat square into 3D magic—no scissors, no tape. Just folds.
Speed Boat:
A sleek watercraft designed to move fast. In this case? A cool paper version that captures that vibe.
Origami Speed Boat:
A paper-folded model that looks like a speed boat. Great for display, dioramas, or just passing time creatively.
Materials Needed
Before we jump into the origami speed boat instructions, let’s first gather everything you’ll need. While origami is all about simplicity, having the right materials makes a big difference in how well your boat will turn out.
| Item | Description |
|---|---|
| Square Paper (15″ × 15″) | The perfect size for an easy origami speed boat fold. |
| Scissors (optional) | Only needed for a small cut at the end. |
| Flat Surface | A smooth, hard surface to make crisp folds. |
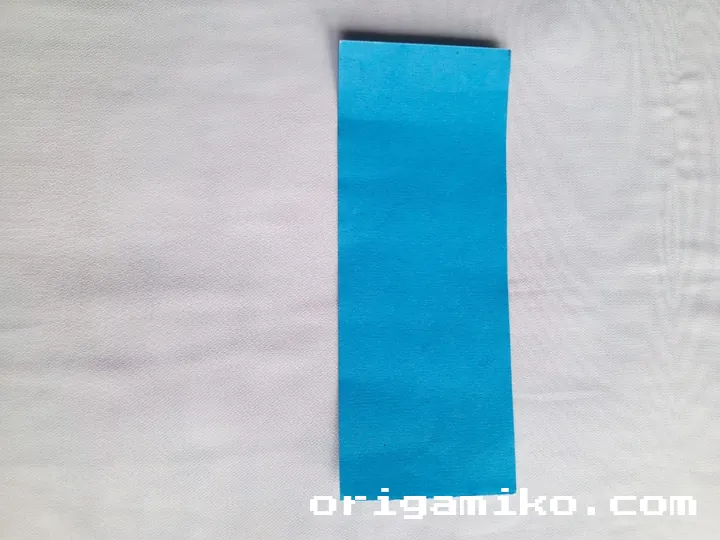
Step 1: Take a Square Shape Paper
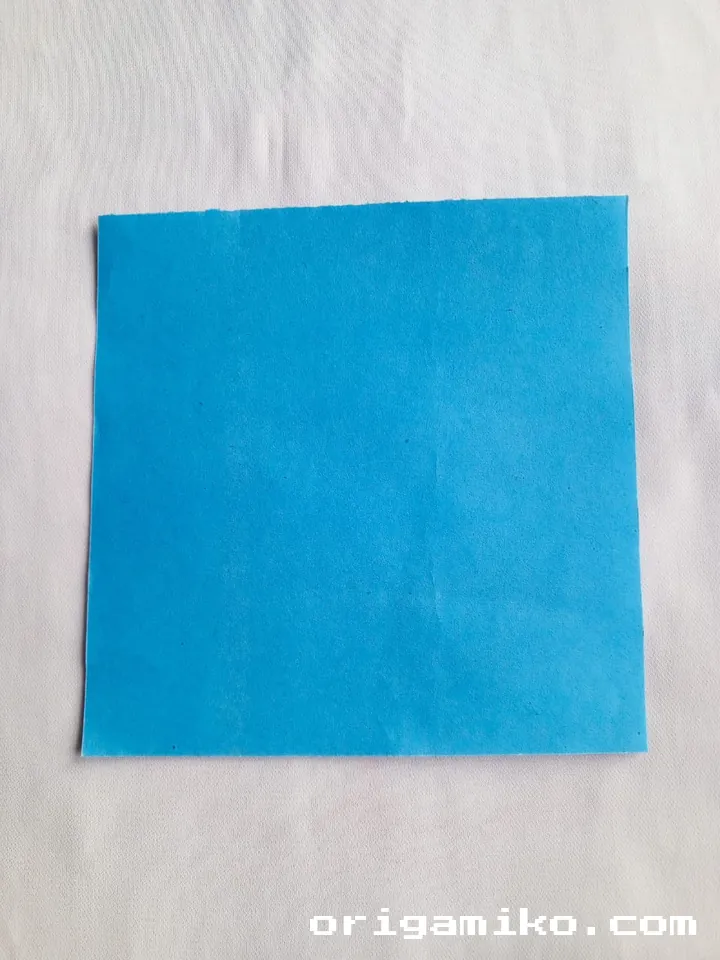
Start by selecting a square piece of paper. The recommended size is 15″ × 15″, as this size gives enough room for clear, precise folds. If you don’t have this exact size, any square paper will work, but the larger the square, the easier it will be to work with.
Step 2: Fold Along the Middle and Housefold, Then Unfold
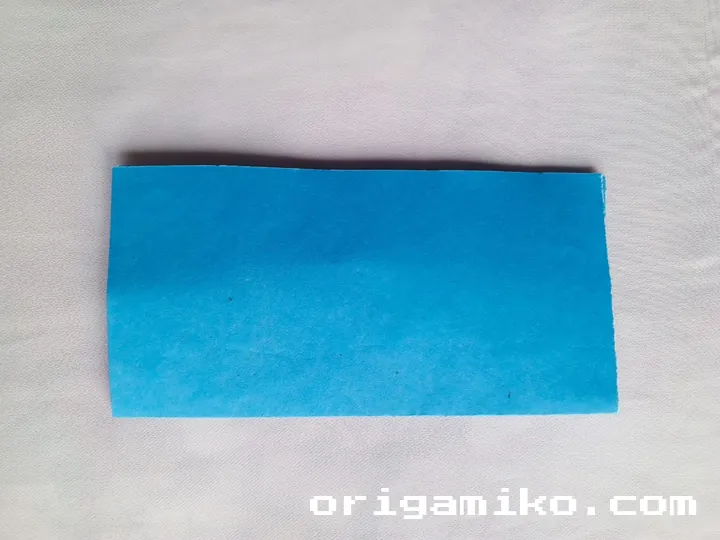
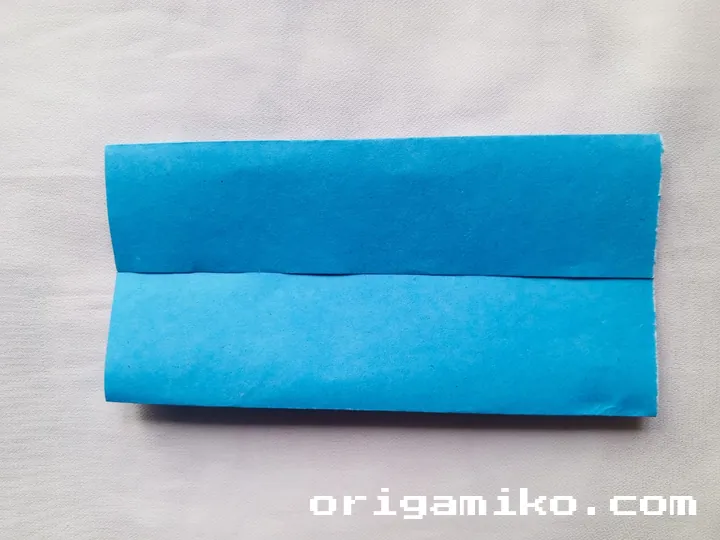
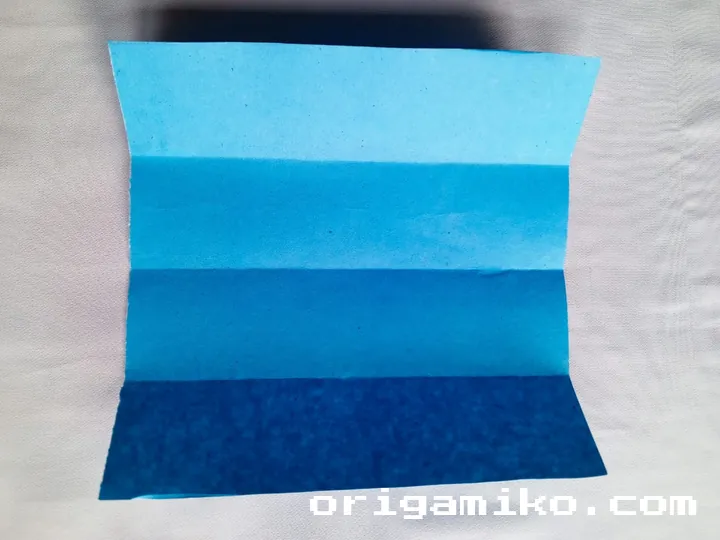
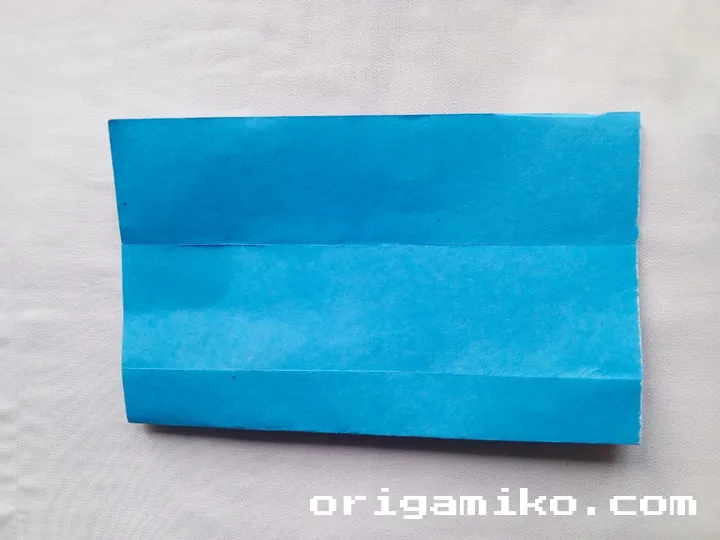
Now, fold the paper in half horizontally. You’ll want to crease it well and then unfold it so that you have a center line in the middle of your paper. This fold helps guide the rest of your steps.
Next, fold the paper vertically along the center and unfold again. These initial folds will give you a clear guide for later steps.
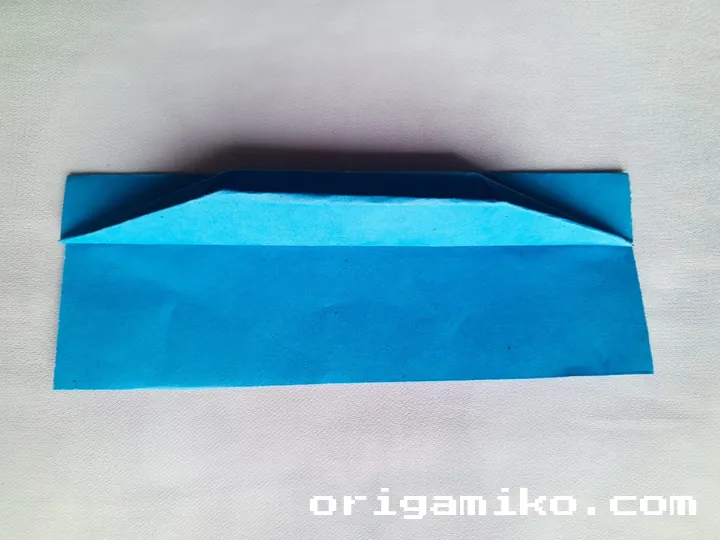
Step 3: Fold Two More Times and Unfold
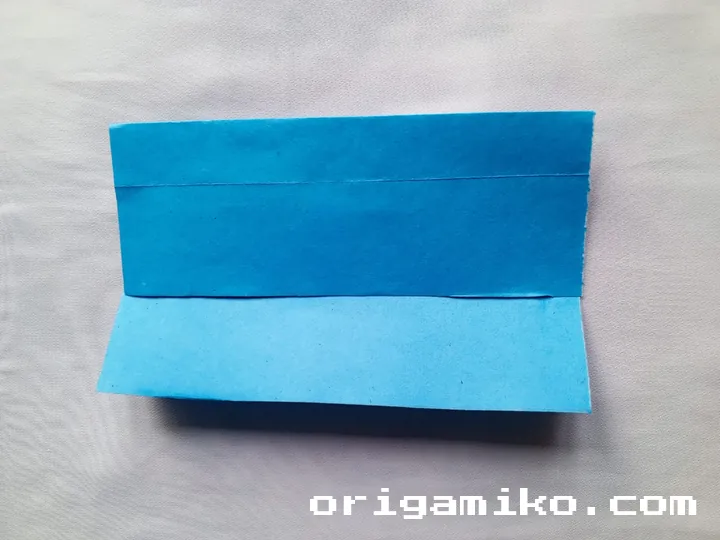
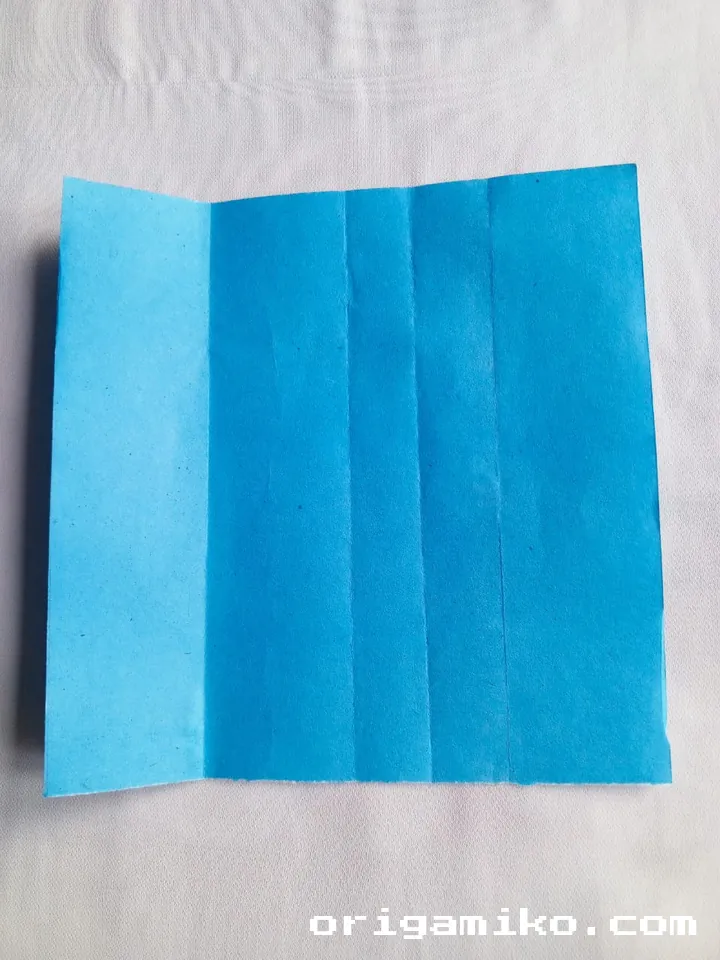
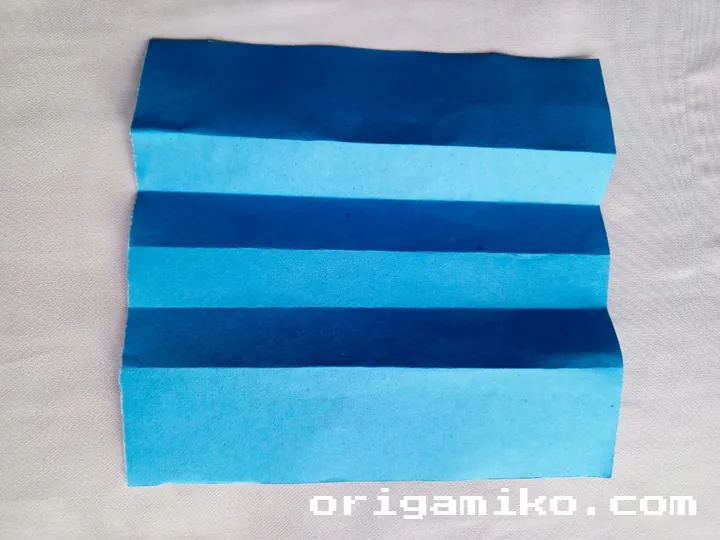
Take the top edge of your square and fold it down to meet the center crease. Do the same with the bottom edge, folding it up to the center line. After both folds, unfold them to leave nice crisp creases, and you’ll have additional guidelines for the next folds.
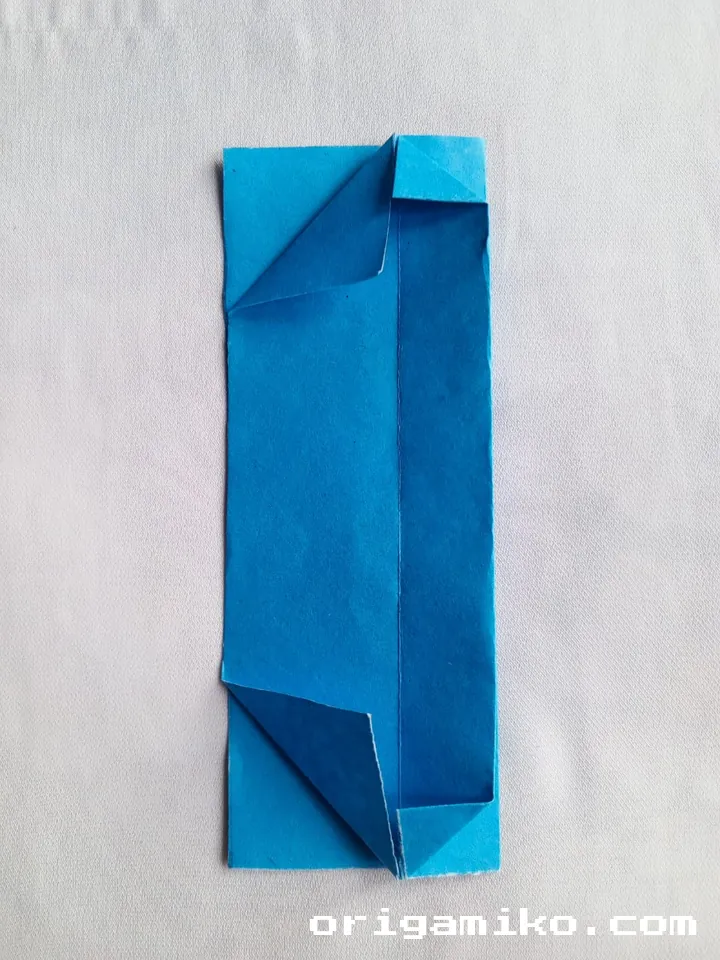
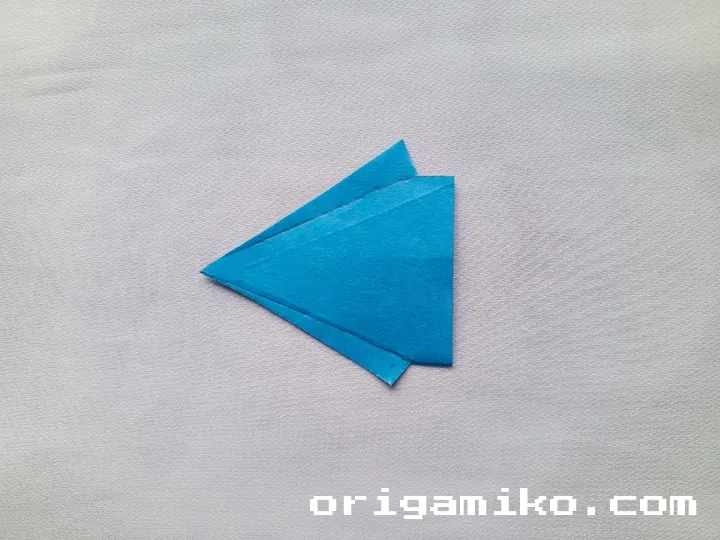
Step 4: Fold Inwards and Fold the Top and Bottom Four Corners

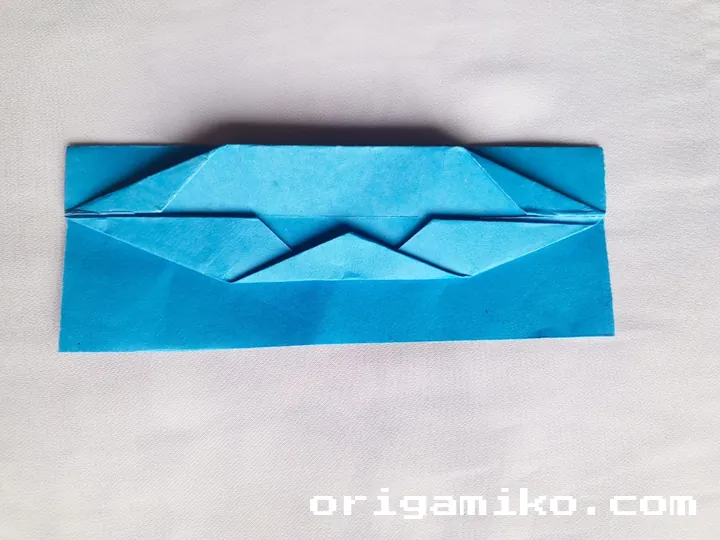
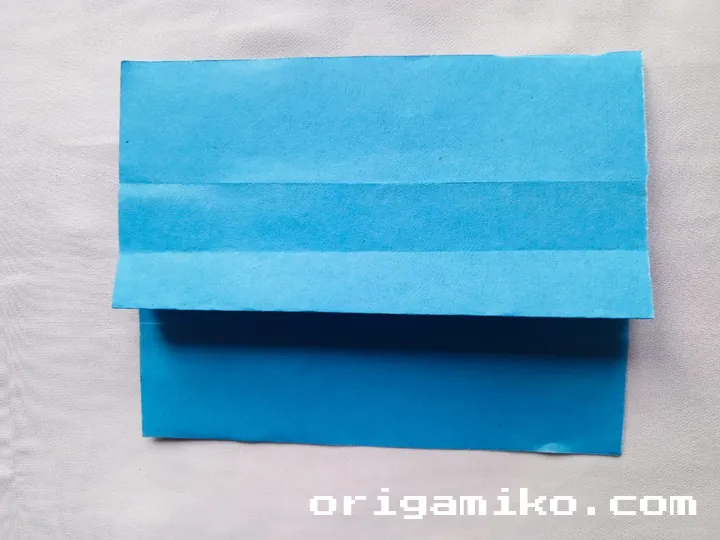
At this point, fold the top and bottom corners inward so they meet in the middle of the paper. The result should look like a pointy triangular shape at the top and bottom. The goal here is to narrow the shape into a more streamlined form that begins to resemble the hull of a boat.
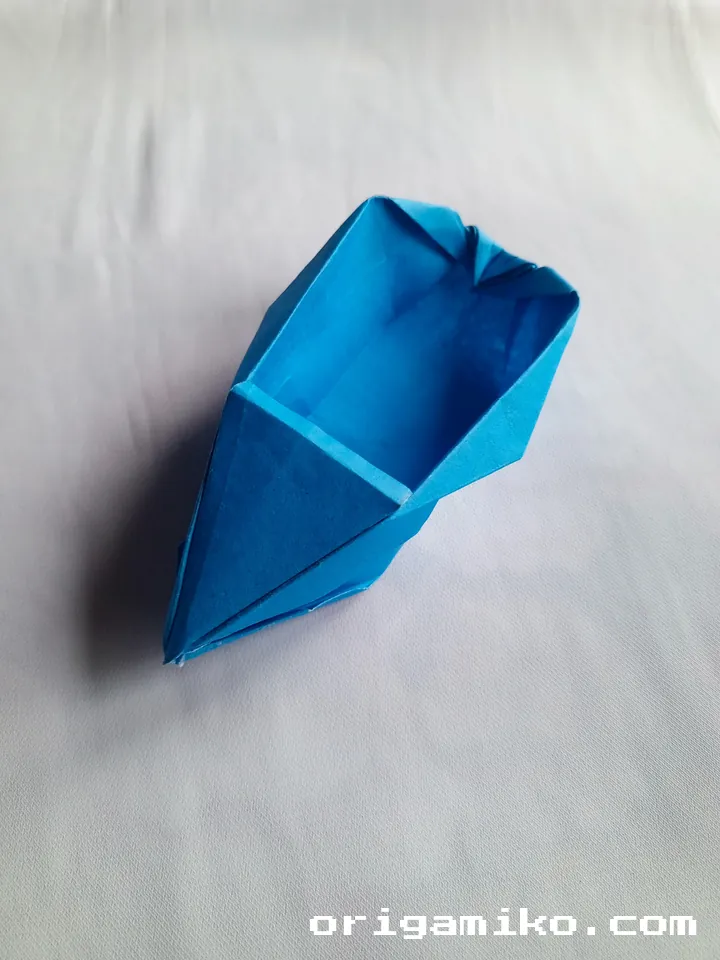
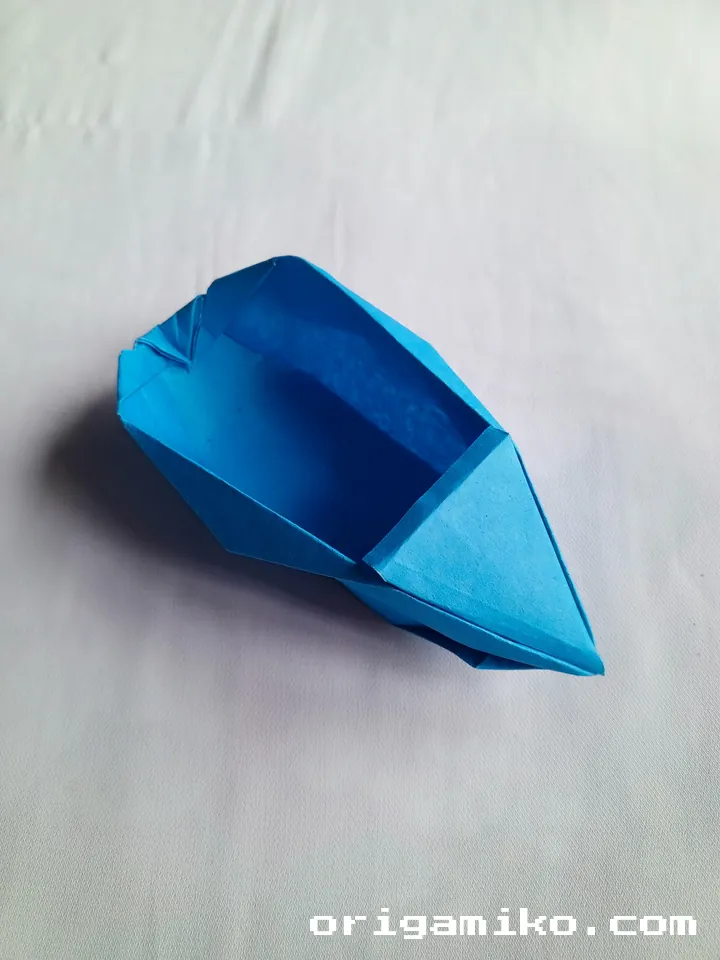
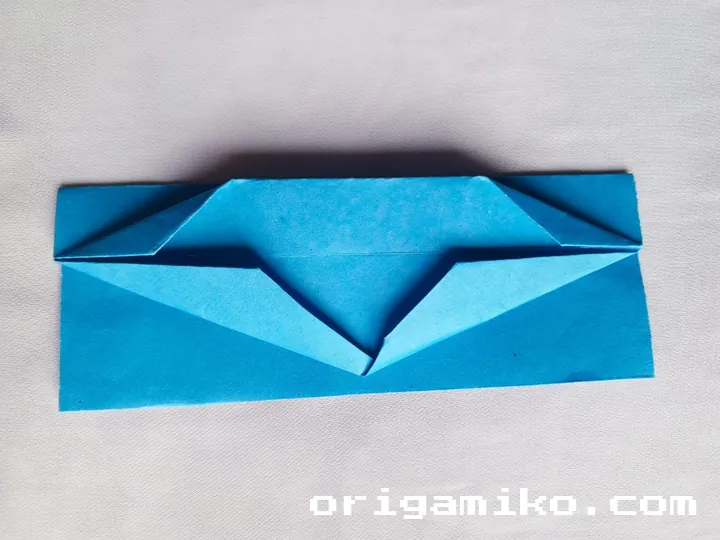
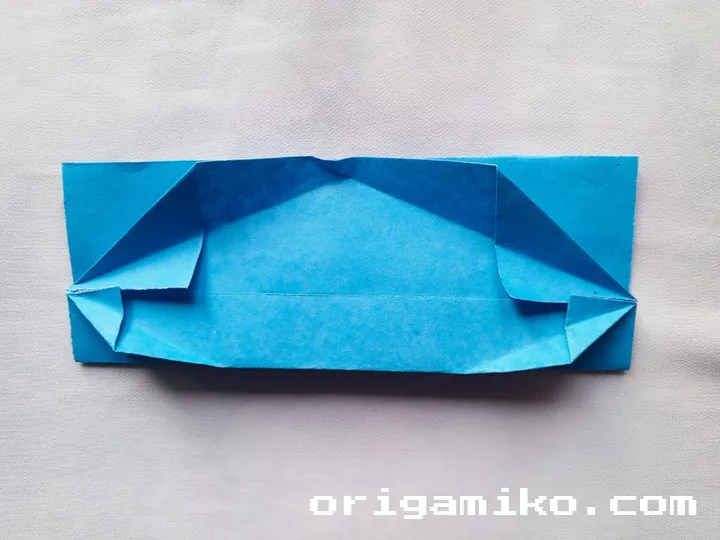
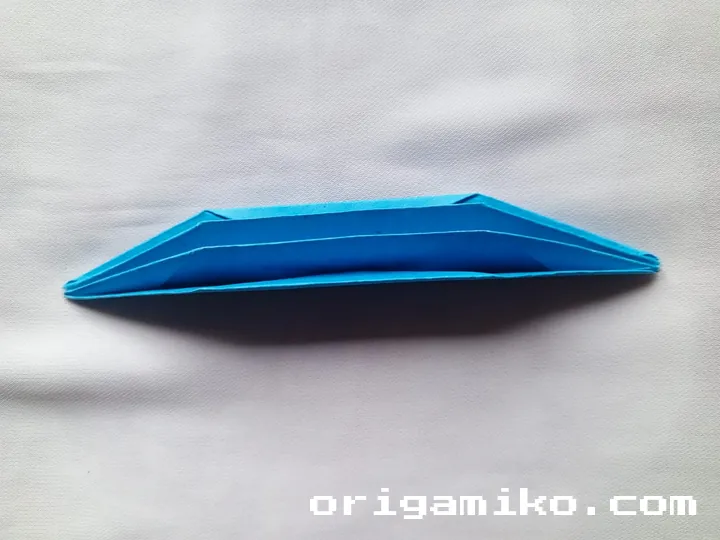
Step 5: Unfold and Cut to Size, Then Fold the Back Side to Make the Origami Speed Boat
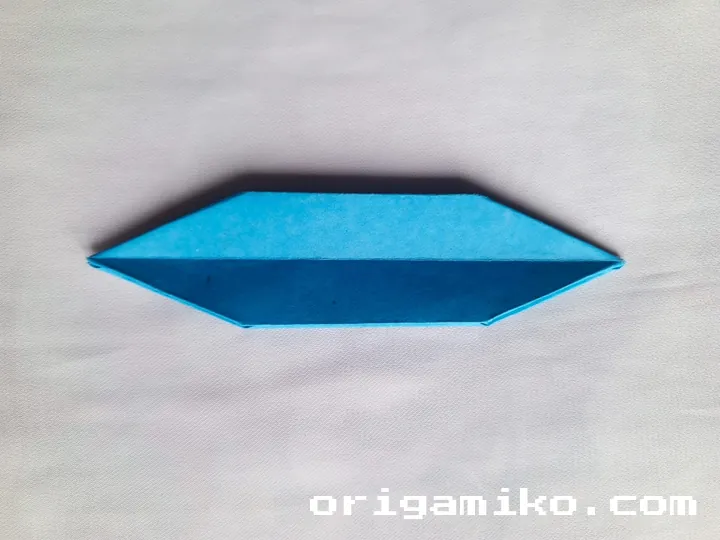

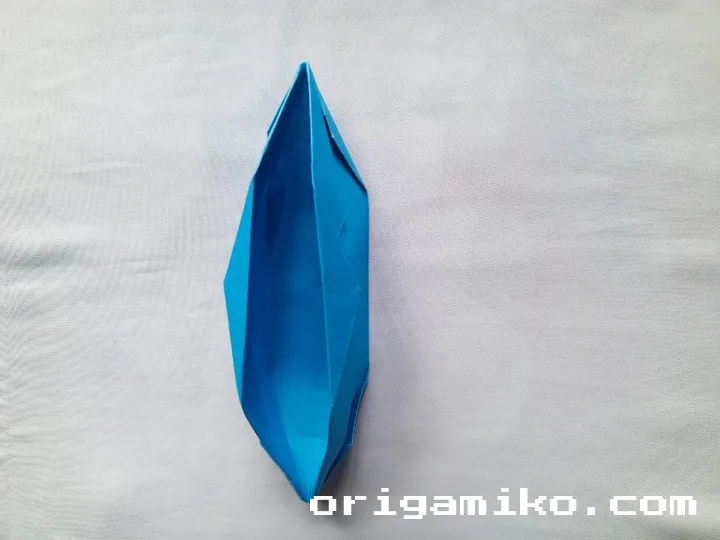

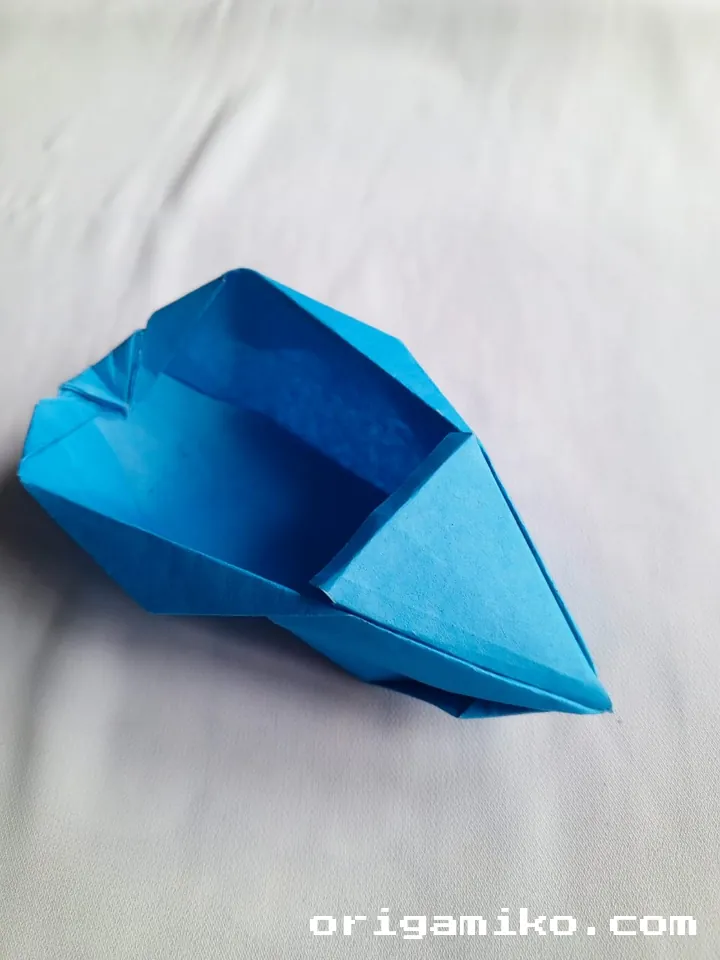
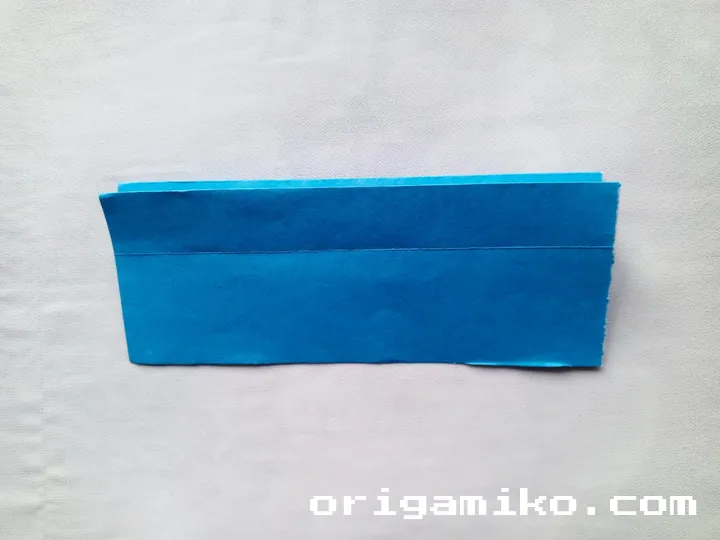
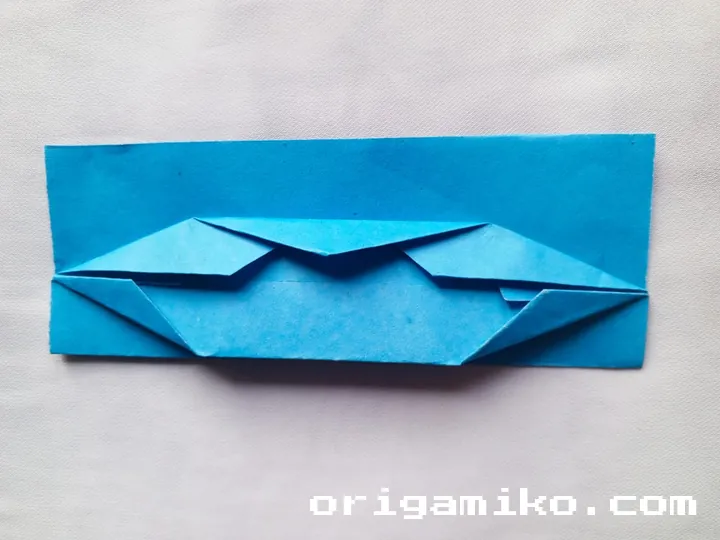
Now, unfold your paper entirely. This is where it gets exciting! You’ll need to cut a small portion at the bottom of the paper to finalize the boat shape. Cut just a little off each side to give the bottom more of a boat shape. Once you’ve done this, fold the back side of the paper upwards, and there you have it—a paper speed boat ready to sail.
Tips for Success
To make sure your origami speed boat turns out perfect, here are a few quick tips:
- Sharp Folds: Make sure to crease each fold well. This makes the whole boat sharper and more professional.
- Use Quality Paper: The sturdier the paper, the easier it will be to fold and the better your boat will look.
- Patience: Take your time with each step. Rushing through can lead to mistakes, especially with more intricate folds.
Common Mistakes and How to Avoid Them
Here are some mistakes I’ve seen before and ways to avoid them:
- Uneven Folds: This often happens when you don’t crease properly. Use a flat edge like a ruler to press your folds down tightly.
- Skipping Creases: Each fold serves a purpose. Don’t skip any steps—those creases help the boat hold its shape.
- Wrong Paper Size: While any square paper can work, the 15″ × 15″ size gives the best balance of ease and final look.
Similar Variations That Can Be Made
Once you’ve mastered the origami speed boat, why not try creating some variations? Here are a few ideas:
- Origami Sailboat: Add a triangular sail to your boat for a more classic look.
- Double Hull Speed Boat: Fold two boats and combine them for a racing duo!
Conclusion
And there you have it! Your very own origami speed boat. It’s a simple, satisfying craft that looks fantastic once completed. Whether you’re making just one or creating an entire fleet, I hope this step-by-step guide helps you craft your perfect boat. The best part? You can customize it in so many ways—try different sizes of paper, colors, or even add some markers to give your boat a unique flair.
Enjoy folding, and remember, practice makes perfect! If you have any questions or suggestions, feel free to drop them in the comments below. I’d love to hear about your origami creations!